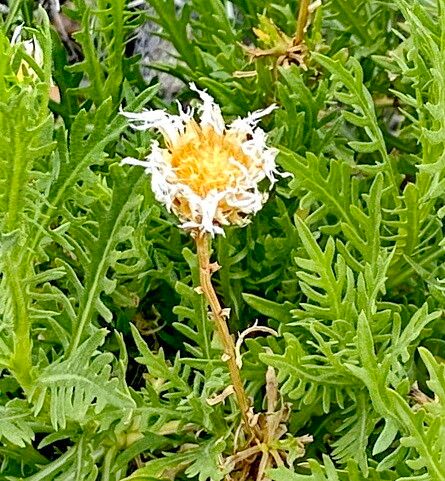
Oh, hello there! Come on in, let’s brew a fresh pot of coffee. Today, we’re diving into the wonderfully sculptural world of Plectocephalus chilensis. You know, the one with those striking, spiky, almost alien-looking flower heads? They’re just such a statement piece in the garden, adding a wonderful textural element that’s unlike anything else. Propagating these beauties is a fantastic way to fill your garden with more of their unique charm, or even share them with fellow plant enthusiasts.
Now, if you’re wondering if this is a beginner-friendly plant, I’d say it leans towards the moderately easy side. It’s not as fussy as some orchids, but it does appreciate a bit of thoughtful care. The reward, though, is immense! Watching a tiny cutting develop into a robust, flowering plant is pure gardening magic.
The Best Time to Start
For Plectocephalus chilensis, late spring to early summer is our golden window. This is when the plant is in a vigorous growth phase, meaning cuttings will have the best chance to establish roots quickly. Mornings, when the plant is fully turgid and not stressed by the midday sun, are ideal for taking cuttings.
Supplies You’ll Need
Here’s what I always have on hand when I’m ready to propagate:
- Sharp, clean pruning shears or a sharp knife: A clean cut is crucial to prevent disease.
- A rooting hormone powder or gel: This isn’t strictly mandatory for Plectocephalus chilensis, but it can give your cuttings a real boost.
- A well-draining potting mix: I like to use a blend of about 50% perlite or coarse sand and 50% standard potting soil. Some people swear by a cactus mix too, which works wonderfully.
- Small pots or seed trays: Clean, with drainage holes, of course.
- A clear plastic bag or a propagator lid: To create a humid environment.
- Watering can or spray bottle: For gentle watering.
Propagation Methods
We’ll focus on the most reliable ways to get more Plectocephalus chilensis from your established plants.
Stem Cuttings
This is my go-to method for these plants.
- Select a healthy stem: Look for a stem that’s at least 4-6 inches long and is currently growing, not woody. You want actively growing tips.
- Make a clean cut: Using your sharp shears or knife, make a clean cut just below a leaf node. A leaf node is where a leaf attaches to the stem. This is where the magic of root development happens!
- Remove lower leaves: Gently strip off the leaves from the bottom 2-3 inches of the cutting. This will prevent them from rotting when you insert them into the soil.
- Apply rooting hormone (optional but recommended): Dip the cut end of the stem into your rooting hormone powder or gel. Tap off any excess.
- Plant the cutting: Make a small hole in your prepared potting mix with your finger or a pencil. Insert the cut end of the stem into the hole, ensuring it’s firm. Gently firm the soil around the base of the cutting.
- Water gently: Water the soil thoroughly but gently, making sure not to dislodge the cutting.
Division
If your Plectocephalus chilensis is forming clumps, division is a fantastic option.
- Gently unpot the plant: Carefully remove the entire plant from its pot.
- Loosen the roots: Gently work your fingers or a trowel around the base of the plant to separate the root ball. You’re looking for distinct sections, each with its own set of roots and shoots.
- Separate the divisions: With patience, you should be able to pull or carefully cut apart the larger clumps into smaller, manageable divisions. Make sure each division has at least a few healthy roots and a shoot or two.
- Pot up the divisions: Pot each division into its own pot filled with your well-draining potting mix.
- Water lightly: Water each potted division gently.
The “Secret Sauce” (Pro Tips)
Here are a few tricks I’ve learned over the years that really make a difference:
One thing I always do after planting cuttings is create a mini-greenhouse effect by covering the pots with a clear plastic bag or placing them in a propagator. This traps humidity, which is vital for cuttings that haven’t developed roots yet. Just make sure to open it for a few minutes each day to allow for air circulation and prevent fungal issues.
When I’m propagating succulents or semi-succulents like this, I often let the cut end of the stem callus over for a day or two before planting it. This ‘scabbing’ over happens in a dry, airy spot. It helps prevent rot right from the start, giving the cutting a better chance to root.
Aftercare & Troubleshooting
Once your cuttings are planted and tucked into their humid little homes, patience is key. Keep the soil consistently moist but not waterlogged. You don’t want the little roots to dry out, but we also don’t want them to sit in soggy soil – that’s a fast track to rot.
You’ll know your cutting has rooted when you see new growth appearing, or when you give the cutting a gentle tug and feel resistance. This usually takes anywhere from 4-8 weeks. Once roots are established, you can gradually introduce your new plant to normal conditions, slightly reducing the humidity.
The main issue you might encounter is rot. If your cutting starts to look mushy, black, or wilts dramatically despite consistent moisture, it’s likely rotting. This is often due to overwatering or poor drainage. If you catch it early, you might be able to salvage an unrotted section by recutting it and dipping it in rooting hormone again before replanting in fresh, dry mix.
A Warm Closing
Propagating plants is such a rewarding journey. It teaches us even more about plant life cycles and offers a wonderful connection to nature. Don’t be discouraged if not every cutting takes – it’s all part of the learning process. Just keep trying, observe your plants, and most importantly, enjoy the magic of creation happening right in your own home. Happy propagating!
Resource: