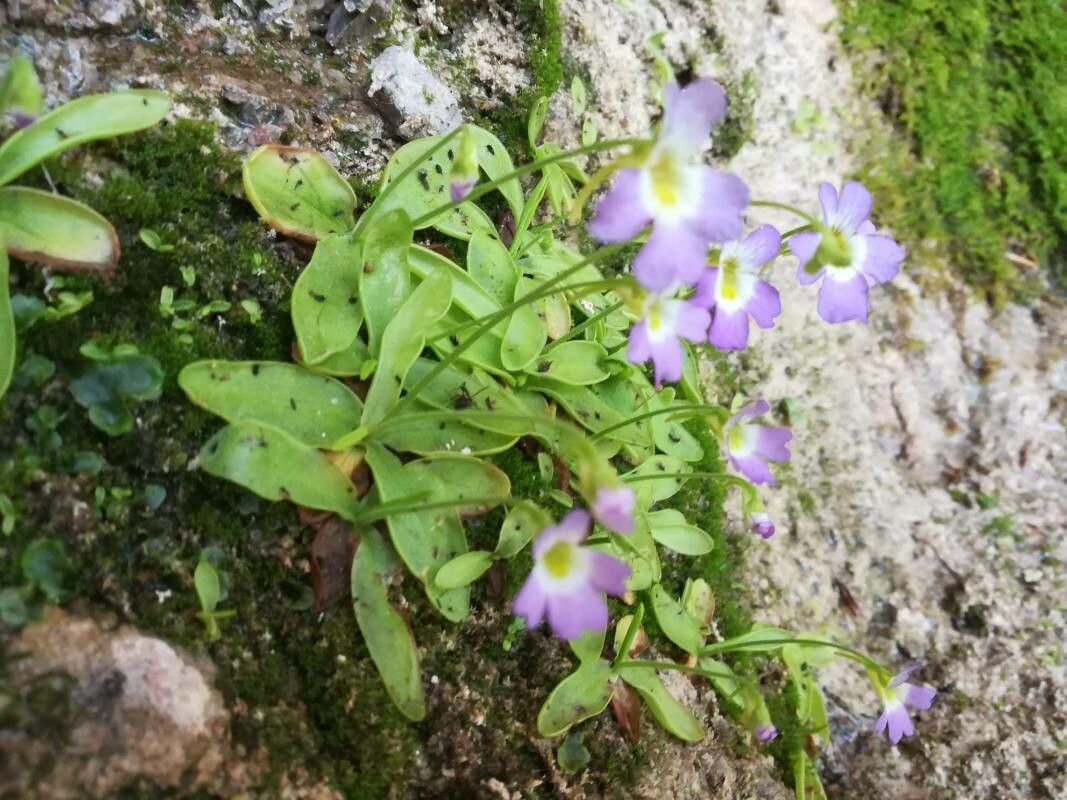
Oh, hello there! I’m so glad you’ve decided to dive into the wonderful world of propagating Pinguicula hirtiflora. If you’ve ever seen these delightful little butterworts gracing a windowsill or a terrarium, you know exactly why they’re captured your eye. Their sticky leaves, dusted with dew-like glands, are not only beautiful but also incredibly functional, catching tiny unwary insects. And the flowers! Often a soft pink or lavender, they’re like tiny works of art.
Propagating Pinguicula hirtiflora is a really rewarding experience. It’s like giving the gift of life to your plants, creating new babies from just a leaf or a division. If you’re wondering if this is a good plant for a beginner to propagate, I’d say it’s moderately easy. It’s not as straightforward as some propagation tasks, but with a little attention and the right approach, you’ll find wonderful success.
The Best Time to Start
For Pinguicula hirtiflora, the spring and early summer are your golden windows. This is when the plant is actively growing after its dormant period, signaling it has plenty of energy to dedicate to new growth. You’ll see vigorous leaves and, if you’re lucky, developing flower stalks. This growth spurt makes them much more receptive to propagation. Try to avoid propagating when the plant is stressed, like during a heatwave or a dry spell.
Supplies You’ll Need
Here’s what I always have on hand when I’m ready to get propagating:
- Well-draining potting mix: A good blend for carnivorous plants or a mix of peat moss, perlite, and a little bit of sand works wonders. Avoid standard potting soil; it’s too heavy.
- Small pots or trays: Clean plastic pots or seedling trays are perfect. They need drainage holes.
- Razor blade or very sharp knife: For clean cuts. Sterilize it with rubbing alcohol between cuts to prevent disease.
- Misting bottle: For keeping things gently moist.
- Optional: Rooting hormone: While not strictly necessary for Pinguicula, it can sometimes give young roots a little extra boost.
- Clean water: Distilled, rainwater, or reverse osmosis (RO) water is best, as these plants are sensitive to minerals.
Propagation Methods
There are a couple of ways to multiply your Pinguicula hirtiflora. I find both incredibly effective.
Leaf Cuttings
This is my favorite method for butterworts. It’s almost magical!
- Choose a healthy leaf: Look for a mature, firm leaf that’s not old or yellowing.
- Make a clean cut: Gently twist or carefully cut the leaf from the base of the plant, close to the crown. You want to ensure you get a tiny bit of the white basal tissue with the leaf if possible; this is where the magic happens.
- Prepare the cutting: You can gently dab the cut end into rooting hormone if you’re using it, but it’s often not needed.
- Plant the leaf: Lay the leaf flat on the surface of your prepared, damp potting mix. Some growers prefer to insert the cut end just slightly into the soil, but laying it flat is my go-to. Make sure the underside of the leaf is in contact with the soil.
- Positioning is key: Don’t let the leaves touch the water in the tray if you’re using the tray method for watering. They can rot if they stay soggy.
Division
This is a great method if your plant is already a bit crowded.
- Gently remove from pot: Carefully slide your Pinguicula out of its current container.
- Examine the root ball: You’ll often see that the plant has naturally formed several smaller rosettes or clumped together.
- Separate the divisions: Using your clean fingers or a sterile knife, gently tease apart the rosettes. Try to ensure each division has some roots attached. It’s okay if a few roots break; they’ll grow back.
- Pot up the divisions: Plant each division in its own small pot filled with your well-draining mix. Water gently, just enough to settle the soil.
The “Secret Sauce” (Pro Tips)
Here are a couple of things I’ve learned over the years that make a big difference:
- Humidity is your friend, but not soggy feet: Butterworts thrive in high humidity, which is why propagation under domes or in terrariums often works so well. However, the leaves themselves should not be sitting in standing water. The soil needs to be moist, not waterlogged. This is crucial to prevent rot.
- Bottom heat is a game-changer: If you can provide gentle bottom heat, perhaps with a seedling heat mat set on a low setting, it really speeds up root development. It mimics the warmth of spring and encourages those tiny roots to form with gusto. Just be sure the heat isn’t too intense; you don’t want to cook your little cuttings!
Aftercare & Troubleshooting
Once you’ve potted up your cuttings or divisions, keep them in a bright spot with indirect light. A humid environment, like a cloche or a plastic bag tented over the pot, will help tremendously. Mist gently if the soil surface begins to dry out, but again, avoid waterlogging.
You’ll start to see roots forming from the base of the leaf cuttings in a few weeks to a couple of months. Tiny plantlets will then emerge, usually from the cut edge or the base. For divisions, they’ll just start growing like normal.
The biggest issue you’ll encounter is rot. If a leaf cutting turns black and mushy, or a division starts looking limp and discolored, it’s likely due to too much moisture and poor air circulation. Remove any rotting material immediately to prevent it from spreading. If a whole leaf cutting rots, don’t despair; sometimes another one will still take!
A Encouraging Closing
Propagation takes patience, dear friends. Nature works on its own timetable, and sometimes it’s a slow dance. Don’t get discouraged if your first few attempts aren’t immediate successes. Keep observing your plants, adjust your methods, and most importantly, enjoy the process. There’s a unique joy in nurturing a new life from a simple leaf. Happy propagating!
Resource:
https://identify.plantnet.org/k-world-flora/species/Pinguicula%20hirtiflora%20Ten./data