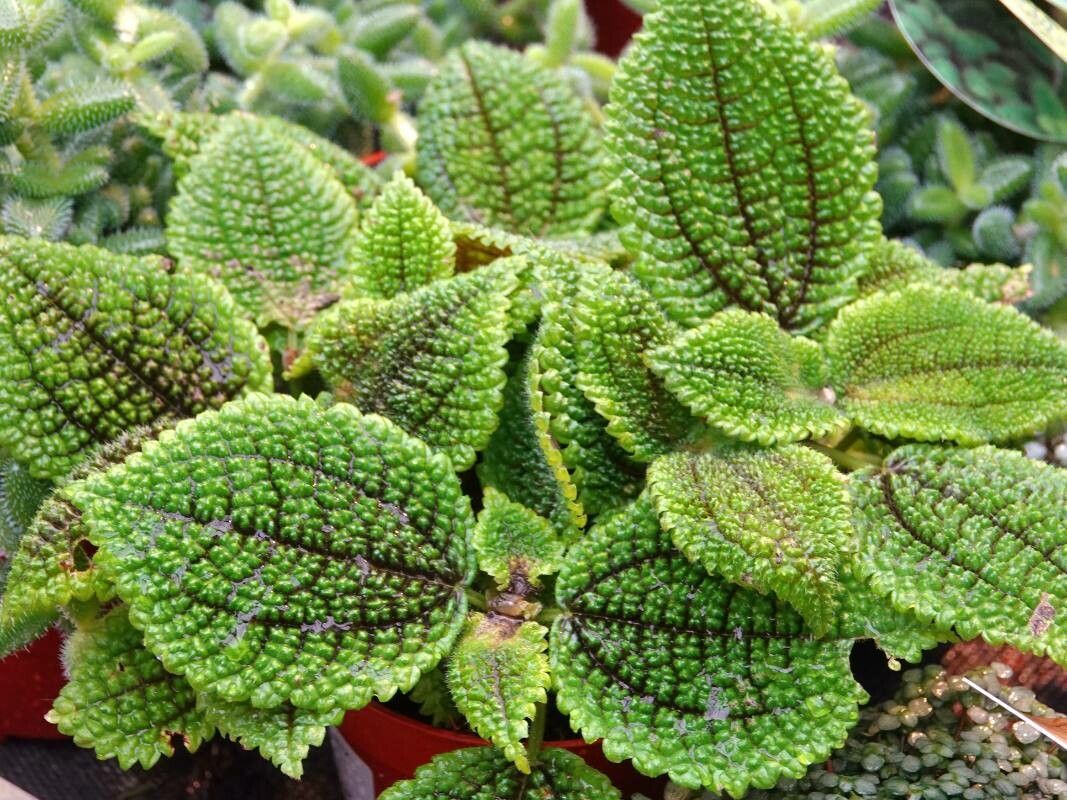
Oh, hello there, fellow plant lover! So, you’ve fallen for the Pilea involucrata, haven’t you? I don’t blame you one bit. Its quilted leaves, often with those lovely silver veins, are just so unique and charming. It’s the kind of plant that makes you stop and admire it, especially when it’s thriving.
Propagating Pilea involucrata, often called the “Friendship Plant” (talk about a sweet name!), is a truly rewarding experience. It’s like giving the gift of green to yourself or a friend. And the best part? It’s generally quite forgiving, which means even if you’re new to the plant parent game, you’ll likely have success. Let’s dive in!
The Best Time to Start
Honestly, the most opportune moment to embark on your Pilea propagation journey is during spring and summer. This is when the plant is in its active growth phase, meaning it’s full of energy and ready to send out new roots with gusto. You can certainly try at other times, but you’ll find the process moves a bit quicker and with more vigor when the days are longer and warmer. Look for healthy, vigorous stems that are actively producing new leaves.
Supplies You’ll Need
Gathering your supplies before you begin is always a good idea. It makes the whole process much smoother!
- Sharp Pruning Shears or Scissors: Cleanliness is key to preventing disease.
- Well-Draining Potting Mix: A mix of peat moss, perlite, and a bit of compost works beautifully. You can also use a cactus or succulent mix.
- Small Pots or Trays: For your new propagations.
- Rooting Hormone (Optional but Recommended): This can give your cuttings an extra boost.
- Water: For water propagation.
- Clear Plastic Bag or Dome (Optional): To create a mini-greenhouse effect.
- Perlite or Vermiculite (Optional): To help with aeration in your soil mix.
Propagation Methods
Let’s get our hands dirty! Pilea involucrata is quite amenable to a couple of popular propagation techniques.
Stem Cuttings
This is my go-to method for Pilea.
- Take Your Cuttings: Using your clean pruning shears, snip off a healthy stem that is at least 3-4 inches long. It’s best to make the cut just below a leaf node (the point where a leaf attaches to the stem).
- Prepare the Cutting: Gently remove the lower leaves from the stem, leaving at least two or three sets of leaves at the top. This prevents leaves from rotting in the soil or water.
- Rooting Hormone (Optional): If you’re using rooting hormone, dip the cut end of the stem into it. Tap off any excess.
- Planting: Fill a small pot with your well-draining potting mix. Make a small hole in the center with your finger or a pencil.
- Insert the Cutting: Place the cut end of the stem into the hole and gently firm the soil around it.
- Water Lightly: Water the soil thoroughly but don’t drench it. You want it moist, not soggy.
Water Propagation
This method lets you watch the magic of root development unfold!
- Prepare the Cutting: Follow steps 1 and 2 from the stem cutting method above – make a cut below a leaf node and remove lower leaves.
- Place in Water: Pop the stem cutting into a glass or jar of room-temperature water. Ensure the leaf nodes where you removed the leaves are submerged, but keep the remaining leaves above the water line.
- Location: Place the jar in a bright spot with indirect sunlight.
- Change Water: Change the water every few days to keep it fresh and prevent bacterial growth.
The “Secret Sauce” (Pro Tips)
After years of coaxing plants to grow, I’ve picked up a few tricks that make a real difference.
- Don’t Drench, Just Moisten: When planting cuttings in soil, aim for consistently moist but not waterlogged soil. Overwatering is the quickest way to invite rot. Think of it as a well-wrung-out sponge.
- Embrace the Humidity: Pilea involucrata loves a humid environment. Once you’ve potted your cuttings, loosely cover the pot with a clear plastic bag or place a clear dome over it. This creates a mini-greenhouse effect, keeping the humidity high and encouraging rooting. Just remember to open it for a short while each day to allow for air circulation.
- Bottom Heat is Your Friend: If you’re struggling with root development, especially in cooler months, consider using a heating mat designed for seedlings or plants. Placing your pots on a gentle heat source can significantly speed up the rooting process.
Aftercare & Troubleshooting
Once you start seeing those tiny roots emerging (hooray!), your job isn’t done yet.
- For Water Propagations: When your roots are about an inch or two long, it’s time to transplant your cutting into soil. Treat it just like a freshly potted cutting.
- For Soil Propagations: Keep the soil consistently moist and humid. You can gradually acclimate your propagation to lower humidity by removing the plastic bag or dome for longer periods each day over a week.
- Signs of Failure: The most common issue is rot. If your stem turns black and mushy, or the leaves yellow and drop off suddenly, this is usually a sign of too much moisture or a pathogen. If you catch it early, you might be able to salvage a healthy section by taking another cutting. Another sign is if the cutting browns and wilts, which could mean it’s too dry or not getting enough light.
A Little Patience Goes a Long Way
Propagating plants is a journey, and like any good journey, it requires a bit of patience. Don’t get discouraged if your first attempt isn’t a runaway success. Keep observing your plant, adjust your care, and enjoy the process of nurturing new life. Soon, you’ll have a whole troop of Pilea involucrata to liven up your space or share with friends. Happy propagating!
Resource: