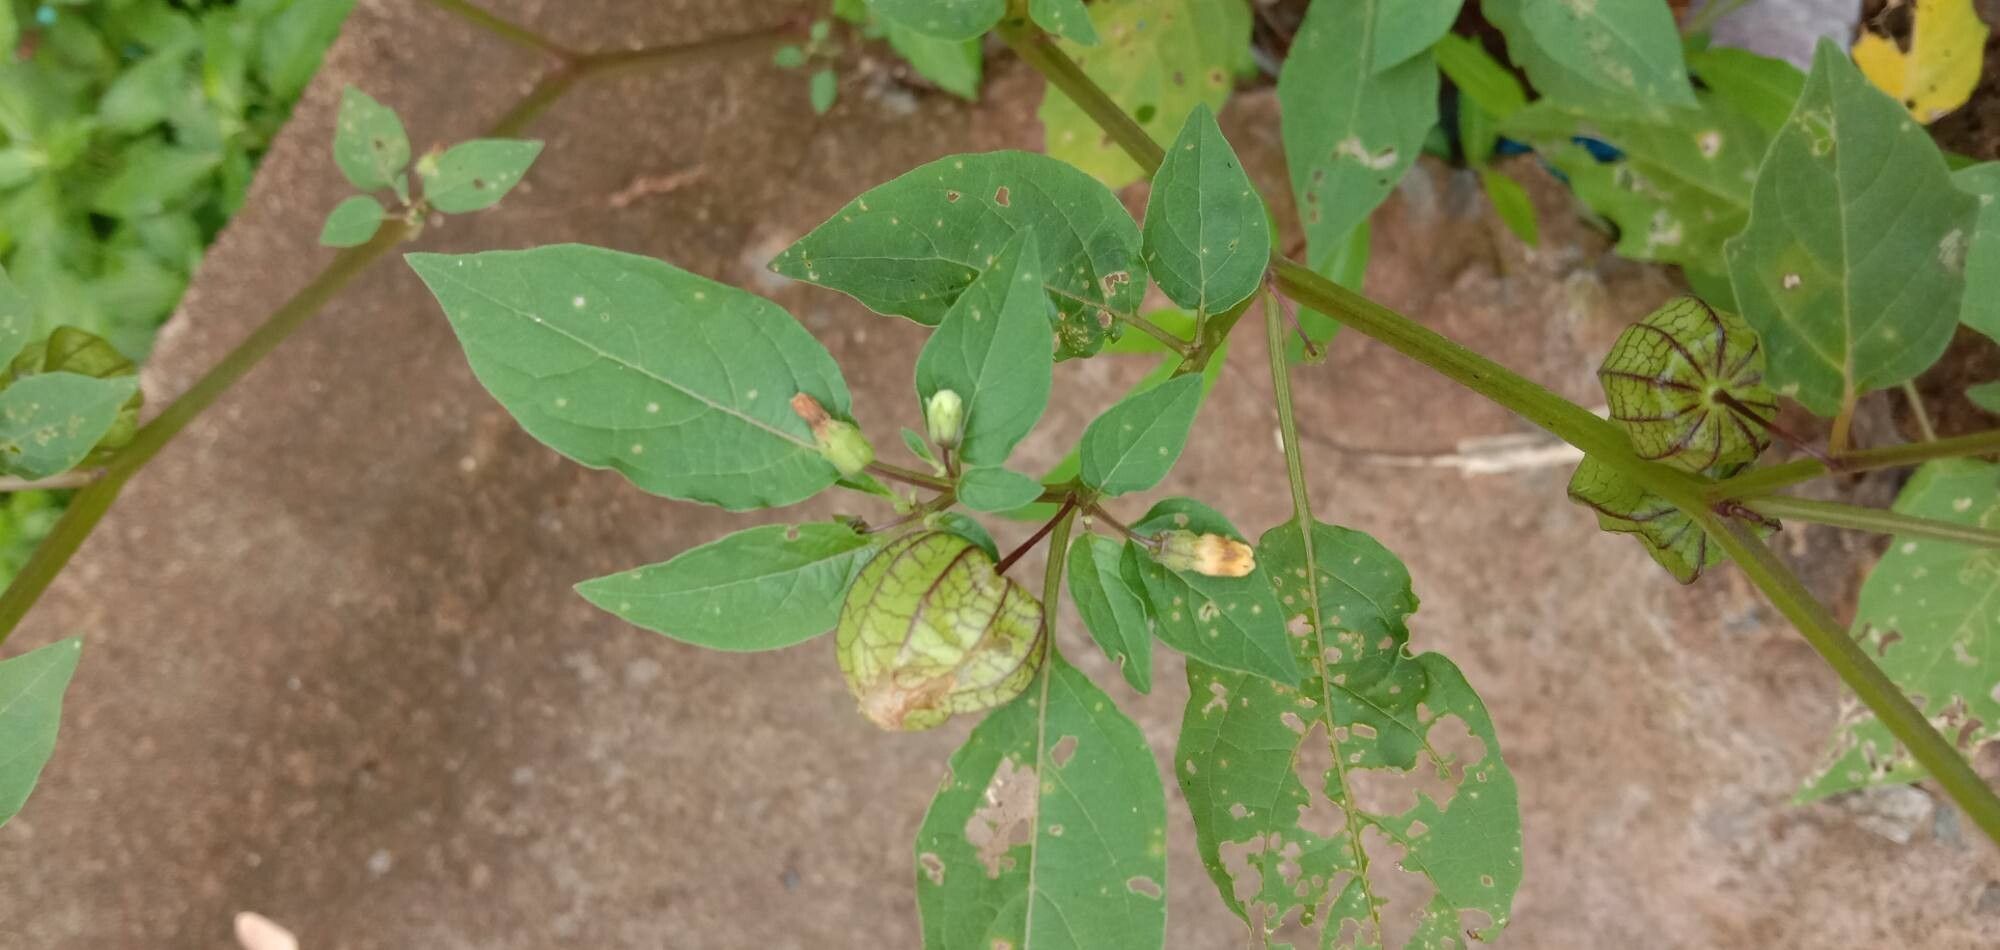
Oh, Physalis angulata! Isn’t that just a delightful plant? You know, the ones with those charming papery lanterns that hold the fruit? They bring such a touch of whimsical beauty to the garden, not to mention a delicious, tart treat for the adventurous eater. The good news is, they’re a joy to propagate, and I find it incredibly rewarding to share these little green gems with friends. If you’re new to the gardening world, consider Physalis angulata a wonderfully forgiving plant to start with. You’re in for a treat!
When to Get Started
For the highest success rate with Physalis angulata, you’ll want to take cuttings when the plant is in its most vigorous growth phase. This usually means late spring or early summer. You’re looking for actively growing stems, not old, woody ones. If you’ve got a plant that’s already established and putting out new shoots, that’s your prime time.
Gathering Your Tools
You don’t need a fancy greenhouse for this; just a few tried-and-true essentials:
- Sharp pruning shears or a clean craft knife: For making neat, precise cuts.
- A good quality potting mix: I like a blend that’s well-draining. A mix of peat moss, perlite, and a bit of compost works wonders.
- Small pots or seed trays: Clean ones are essential to prevent disease.
- Rooting hormone (optional but helpful): A powder or gel can give your cuttings a boost.
- A clear plastic bag or propagation dome: To create a humid environment.
- Watering can with a fine rose: For gentle watering.
Sharing the Green Goodness: Propagation Methods
Physalis angulata is delightfully amenable to a few different propagation techniques. I find stem cuttings to be the most reliable method.
Stem Cuttings
- Select your source: Find a healthy, actively growing stem on your mature Physalis angulata plant. Look for stems that are firm but not yet woody.
- Make the cut: Using your sharp shears or knife, make a clean cut just below a leaf node. A leaf node is where a leaf attaches to the stem. Aim for a cutting that’s about 4-6 inches long.
- Prepare the cutting: Remove the lower leaves, leaving just a couple of leaves at the very top. This prevents them from rotting in the soil and helps the plant focus its energy on root development.
- Apply rooting hormone (optional): If you’re using rooting hormone, dip the cut end into the powder or gel. Tap off any excess.
- Plant your cutting: Make a small hole in your prepared potting mix. Gently insert the cut end of the stem into the hole and firm the soil gently around it.
- Water gently: Water the potting mix until it’s evenly moist but not waterlogged.
- Create humidity: Place the pot inside a clear plastic bag or under a propagation dome. This traps moisture and helps prevent the cutting from drying out. You can prop the bag up with a few sticks so it doesn’t touch the leaves.
- Find a warm spot: Place the pot in a bright location that receives indirect sunlight. Avoid direct sun, which can scorch the delicate cuttings.
Water Propagation (for the impatient!)
This is a quicker way to see progress, though I find stem cuttings in soil are often more robust long-term.
- Take your cutting: Follow steps 1-3 from the stem cutting method.
- Place in water: Put the cutting in a jar or glass of clean water. Make sure the leaf nodes where you removed the leaves are submerged.
- Change water regularly: Change the water every few days to keep it fresh and prevent bacterial growth.
- Watch for roots: You should start to see tiny white roots emerging from the submerged nodes within a couple of weeks.
- Plant when ready: Once the roots are about an inch long, carefully transplant the cutting into a pot with your well-draining potting mix. Water gently and proceed with aftercare.
The “Secret Sauce” (My Insider Tips!)
- Bottom Heat is Your Friend: If you have a seedling heat mat, using it under your pots of cuttings is a game-changer. That gentle warmth really encourages root formation. It’s like a cozy hug for your little cuttings!
- Don’t Let Those Leaves Drip: When you water your cuttings, especially if they’re covered with a plastic bag, make sure the leaves aren’t constantly touching moist soil or water. This is a surefire way to invite rot. A little airflow is good.
- Patience with the Potting Mix: When planting cuttings that have rooted in water, be extra gentle. The roots are quite fragile at this stage. I like to lightly moisten the soil before planting, making it easier to tuck those delicate roots in without damage.
Welcoming Your New Babies: Aftercare & Troubleshooting
Once you see evidence of new growth – tiny leaves emerging from the top or even a slight tug resisting when you gently pull on the stem – your cutting has likely rooted!
- Gradually Acclimate: Once roots are established, slowly begin to acclimate your new plant to normal conditions. This means gradually opening the plastic bag a little more each day over a week, or lifting the propagation dome for longer periods.
- Watering: Water when the top inch of soil feels dry to the touch. Avoid letting the pot sit in a saucer of water.
- Light: Continue to provide bright, indirect light. As it grows stronger, you can introduce it to a bit more direct sun, but watch for signs of stress.
Uh oh, what if things go wrong? The most common issue is rot. If your cutting turns black and mushy, it’s likely rotted. This is often due to too much moisture, poor drainage, or lack of airflow. Don’t get discouraged! It happens to all of us gardeners sometimes. Simply discard the failed cutting, clean your pot, and try again with fresh soil and perhaps adjust your watering schedule.
Well, there you have it! Propagating Physalis angulata is a wonderfully rewarding journey. It’s a chance to connect with nature, create more of those delightful plants, and share them with others. Be patient with yourself and your cuttings, and don’t be afraid to experiment. Happy propagating!
Resource:
https://identify.plantnet.org/k-world-flora/species/Physalis%20angulata%20L./data