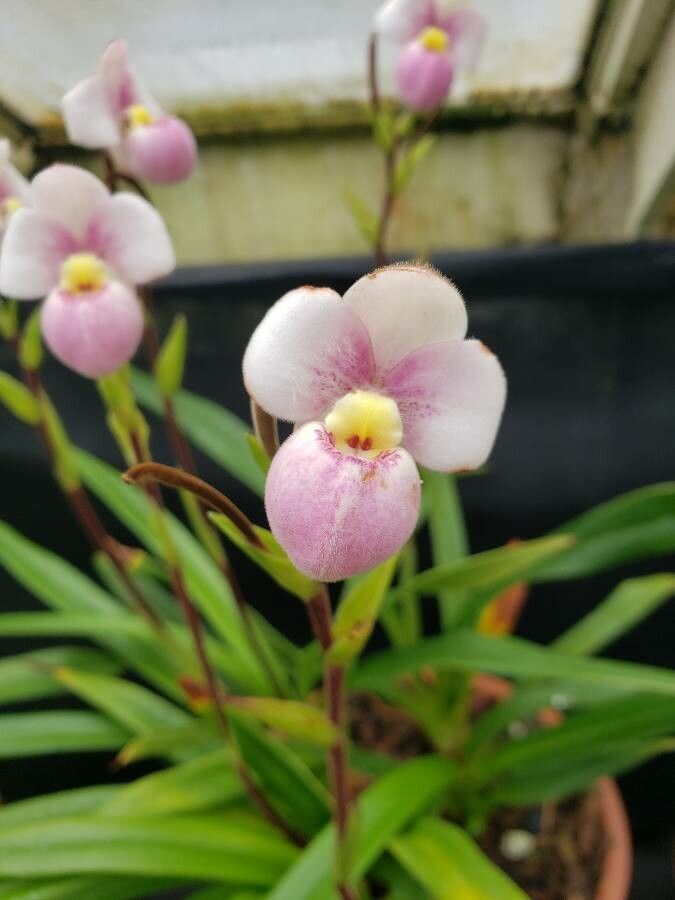
Oh, hello there, fellow plant enthusiast! Today, we’re diving into the wonderful world of Phragmipedium schlimii. If you’ve ever had the pleasure of seeing this orchid bloom, you know why it’s so special. Those charming, slipper-shaped flowers, with their delicate colors and graceful presentation, are truly a sight to behold. And the best part? You can bring more of that beauty into your life by propagating them! Now, I won’t sugarcoat it – Phragmipedium schlimii can be a bit of a diva when it comes to propagation. It’s not quite a beginner-friendly task, but with a little know-how and a lot of patience, it’s absolutely achievable, and incredibly rewarding.
The Best Time to Start
For Phragmipedium schlimii, the sweet spot for propagation is typically during its active growth phase. This usually means late spring or early summer, after the orchid has finished its major blooming cycle. You’ll see new leaves emerging and the plant really gearing up for growth. Trying to propagate when the plant is dormant or stressed is like asking someone to run a marathon without any training – it’s just not going to go well.
Supplies You’ll Need
Before we get our hands dirty, let’s make sure you have everything ready. A little preparation goes a long way:
- Sharp, sterile pruning shears or a clean knife: For making clean cuts. Sterilize with rubbing alcohol between cuts to prevent disease.
- Potting medium: A well-draining orchid mix is crucial. I like a blend of good quality orchid bark, a bit of perlite for aeration, and some sphagnum moss to retain a touch of moisture. You want it airy, not soggy.
- Small pots or divisions trays: Clean, with good drainage holes.
- Rooting hormone (optional but recommended): A powder or gel rooting hormone can give your cuttings a helpful boost.
- Spray bottle: For misting.
- Clear plastic bags or a propagator: To create a humid environment.
- Patience: The most important tool of all!
Propagation Methods
Phragmipedium schlimii is best propagated through division. These orchids don’t typically produce easily separable stem cuttings in the same way some other houseplants do. Instead, we’ll be working with the natural growth habit of the plant.
Division: Dividing Your Orchid Matriarch
This is the most reliable method for Phragmipedium schlimii. Over time, the plant will produce new growths, or “leads,” around its base. When these leads have started to develop their own roots, they can often be separated.
- Gently remove the orchid from its pot. Try to disturb the roots as little as possible.
- Inspect the root system. Look for natural breaks where a new lead is clearly attached to the mother plant, and ideally, has its own aerial roots.
- Using your sterile shears or knife, carefully cut through the rhizome (the horizontal stem connecting the growths) to separate the new lead from the parent plant. Ensure each division has at least two or three healthy leaves and a good root system. If the roots are very intertwined, you might need to gently tease them apart with your fingers or a blunt tool.
- Trim any damaged or dead roots from both the parent plant and the division.
- If the division looks a bit stressed or has very few roots, you can dip the cut end into a rooting hormone powder.
- Pot each division in its own small pot with your prepared orchid mix. Plant them so the base of the new leaves is just at the surface of the medium, with the roots covered.
- Water lightly. You don’t want to saturate the potting medium at this stage.
- Place the potted divisions in an area with bright, indirect light and high humidity. Covering them with a clear plastic bag or placing them in a propagator will help maintain this.
The “Secret Sauce” (Pro Tips)
Here are a few little tricks I’ve picked up over the years that can really help your Phragmipedium schlimii divisions thrive:
- Don’t over-pot. When dividing, it’s tempting to put a small division into a large pot, but this can lead to poor air circulation and an increased risk of rot. Smaller, snugger pots are better for new divisions.
- The right humidity is key. Phrags love humidity. I find that placing the new divisions on a tray filled with pebbles and water (making sure the pot doesn’t sit in the water) helps keep the air around them consistently moist.
- Watch the light, but avoid direct sun. Too much direct sunlight on a stressed division can scorch its leaves and set it back. Bright, dappled light is perfect.
Aftercare & Troubleshooting
Once your divisions are potted, the real nurturing begins!
- Watering: Water when the potting medium is almost dry to the touch. Don’t let them sit in soggy conditions. Misting the leaves occasionally can help maintain humidity, but try to direct water towards the roots to avoid issues.
- Light: As mentioned, bright, indirect light is ideal.
- Patience is paramount. It can take several weeks, even months, for new roots to establish and for you to see significant new leaf growth. Don’t despair if there isn’t immediate action.
Now, what about when things don’t go as planned? The most common issue you’ll encounter is rot. Signs of rot include mushy, blackening leaves or pseudobulbs. This is almost always a sign of overwatering or poor air circulation. If you spot rot, act quickly. You may need to remove the affected parts with your sterile tool and repot the division into fresh, drier medium. Sometimes, unfortunately, a severely rotted division can’t be saved, but that’s just part of the learning process.
A Encouraging Closing
Propagating Phragmipedium schlimii is a journey, not a race. There will be moments of doubt, but there will also be immense satisfaction when you see those first tiny roots emerging or a new shoot pushing upwards. Treat your divisions with care, keep them in the right environment, and trust in your growth. Soon enough, you’ll have another beautiful blooming orchid to brighten your home. Happy growing!
Resource: