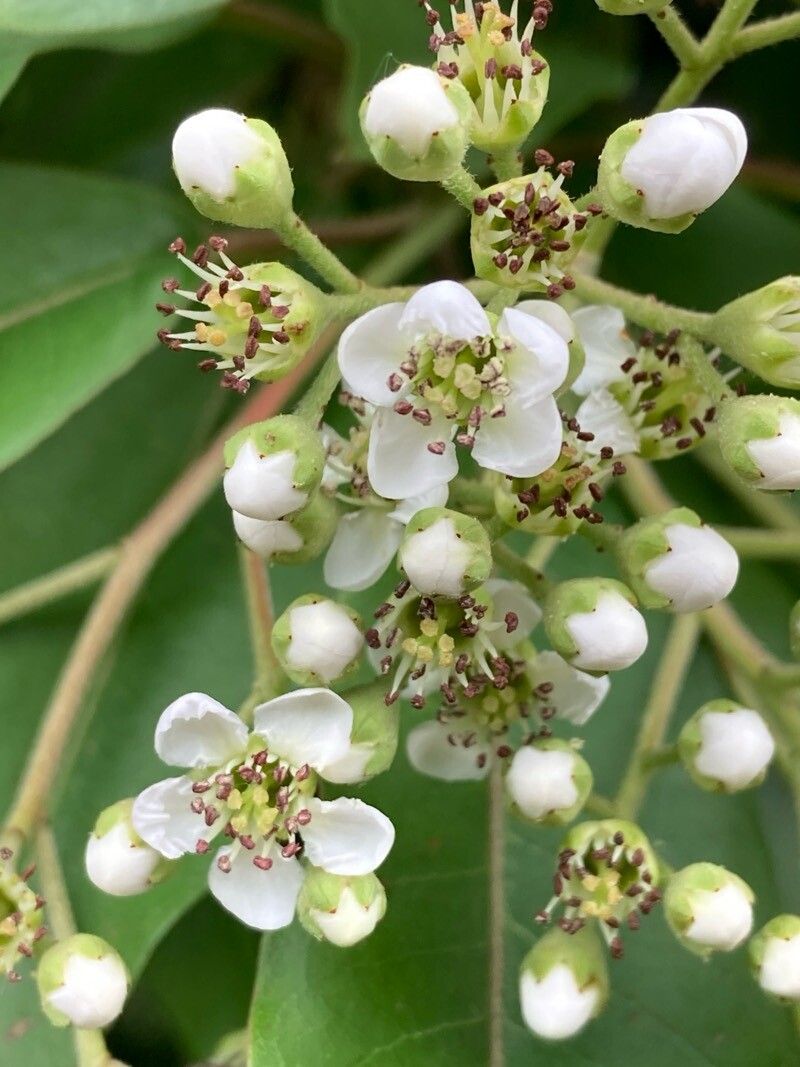
Oh, Photinia davidiana! What a gem for the garden. I still remember planting my first one, a small twig with such promise. Its glossy, dark green leaves, tinged with red in the cooler months, provide year-round interest. And those clusters of white flowers in spring? Simply delightful. The best part? You can create more of this beauty yourself! Propagating Photinia davidiana is a wonderfully rewarding way to fill your garden or share with friends. For beginners, I’d say it’s moderately easy – with a little patience and the right approach, you’ll be successful.
The Best Time to Start
For Photinia davidiana, your best bet is to take cuttings in late spring or early summer. This is when the plant is actively growing and has plenty of healthy, semi-hardwood to offer. You’re looking for stems that are flexible but not brand new and soft. Think of it as being past the floppy stage but not yet woody and tough.
Supplies You’ll Need
Here’s what you’ll want to have on hand before you get started:
- Sharp pruning shears or a clean knife: For making precise cuts.
- Rooting hormone: A powdered or liquid form will do wonders to encourage root development.
- A well-draining seed-starting mix or a blend of equal parts peat moss and perlite: This is crucial! Soggy soil is the enemy of cuttings.
- Small pots or trays: Clean ones, please!
- Plastic bags or propagation domes: To create a humid environment.
- A spray bottle: For misting.
- Labels or markers: To keep track of what you’ve planted.
Propagation Methods
Let’s get our hands dirty! For Photinia davidiana, stem cuttings are the most common and effective method.
Stem Cuttings:
- Select your stems: Look for healthy, non-flowering shoots that are about 4-6 inches long.
- Make the cut: Just below a leaf node (where a leaf attaches to the stem), make a clean cut. This is where roots are most likely to form.
- Prepare the cutting: Gently remove the lower leaves, leaving just a couple at the top. If your cuttings are very long and have many leaves, you can pinch off the top few leaves or even gently trim larger leaves in half to reduce water loss through transpiration.
- Apply rooting hormone: Dip the cut end of each stem into your rooting hormone, tapping off any excess.
- Insert into soil: Make a small hole in your prepared pot of soil with a pencil or your finger, and carefully insert the cutting. Gently firm the soil around the base of the stem to ensure good contact.
- Water gently: Water the soil thoroughly but do it gently to avoid dislodging the cuttings.
- Create humidity: Cover the pot with a clear plastic bag or a propagation dome. If using a bag, you can use stakes to keep it from touching the leaves. This creates a mini-greenhouse that keeps the humidity high, which is essential for root formation.
- Place in a bright spot: Position your pots in a location that receives bright, indirect light. Avoid direct sun, as it can scorch the delicate cuttings.
The “Secret Sauce” (Pro Tips)
Here are a few things I’ve learned over the years that can really boost your success:
- Bottom Heat is Your Friend: If possible, placing your pots on a heat mat designed for seedlings can significantly speed up root development. Warmth encourages roots to form faster.
- Don’t Let Leaves Touch Water: If you opt for water propagation for a few cuttings (which is less reliable but can be fun to watch!), make absolutely sure that no leaves are submerged. Only the stem should be in the water. Leaves in the water will rot and can take your cutting down with them.
- Sterilize, Sterilize, Sterilize! Before you start, give your pots, shears, and any tools a good wash or even a quick bleach solution rinse. This helps prevent fungal diseases from attacking your cuttings.
Aftercare & Troubleshooting
Once your cuttings have started rooting (you can gently tug on a stem to see if there’s resistance – this is your sign!), it’s time to adjust their care.
- Gradually reduce humidity: For the first week or so after you see roots, start by opening the plastic bag or dome for a few hours each day. This helps the new plant acclimate to normal conditions without shock.
- Watering: Keep the soil consistently moist but not waterlogged. Water when the top inch of soil feels dry to the touch.
- Light: Continue to provide bright, indirect light. As the plant gets stronger, you can gradually introduce it to more direct sunlight.
- Repotting: Once you have a well-established plant with new growth, you can carefully transplant it into its own pot with regular potting soil.
Troubleshooting: What if things go wrong? The most common culprit is rot. If your cuttings turn black and mushy, it’s usually a sign of too much moisture and not enough airflow. If you see this, pull out the affected cuttings, discard them, and ensure the remaining ones have better drainage and ventilation. Fungal spots on leaves can also be a sign of poor airflow.
So there you have it! Propagating Photinia davidiana is a tangible way to connect with your garden. Don’t be discouraged if your first attempt isn’t perfect. Gardening is a journey, and every bit of learning is valuable. Be patient, enjoy the process of watching those tiny roots develop, and soon you’ll have a whole new generation of these lovely shrubs. Happy growing!
Resource:
https://identify.plantnet.org/k-world-flora/species/Photinia%20davidiana%20(Decne.)%20Cardot/data