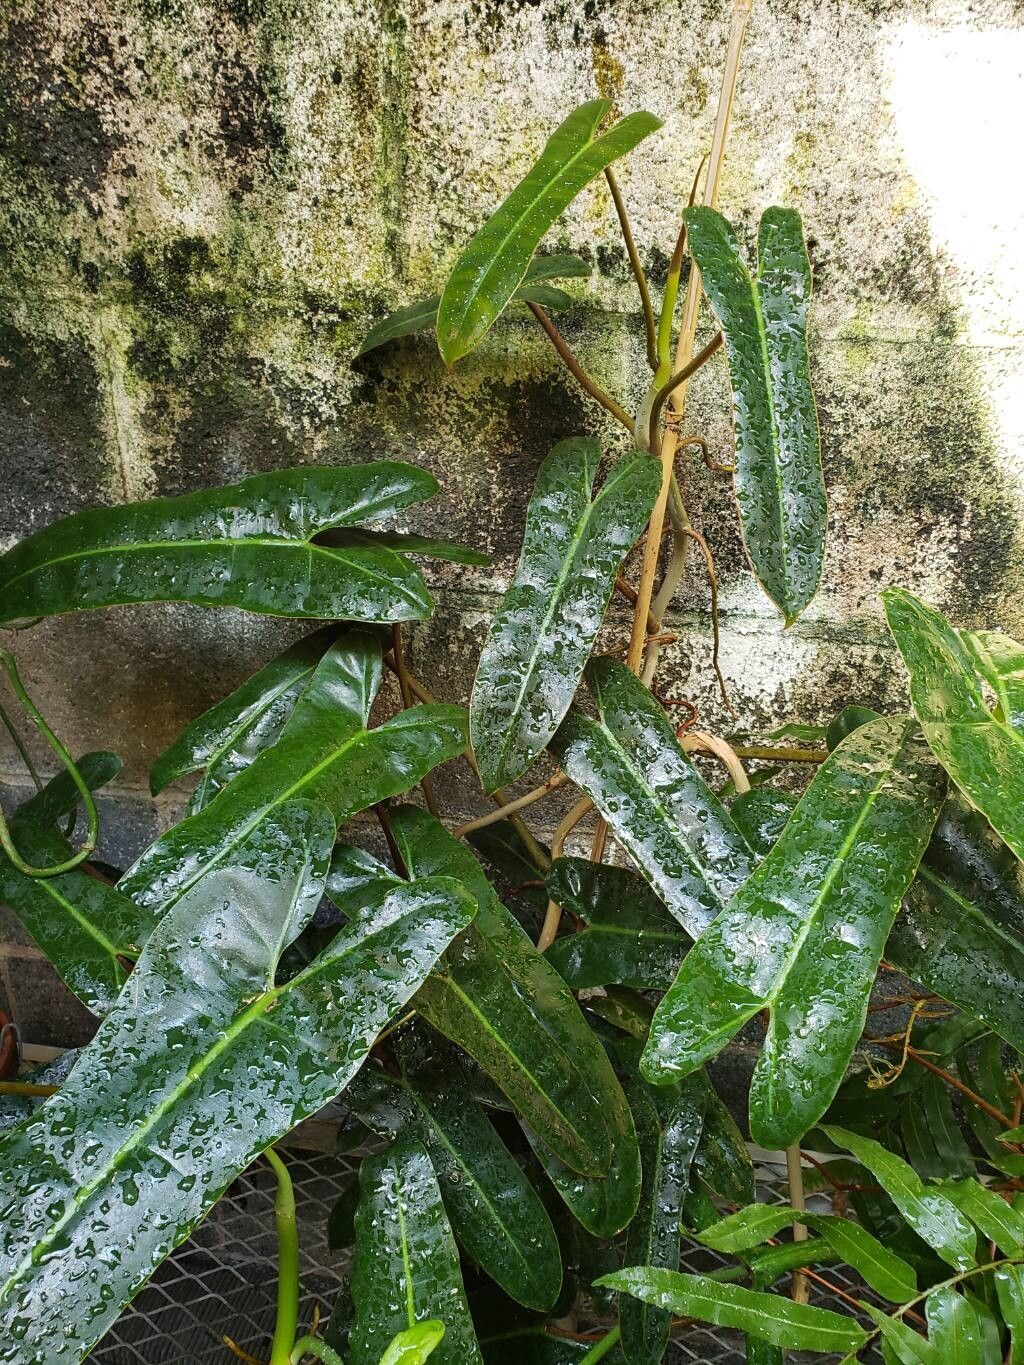
Hey there, fellow plant lovers! I’m so excited to chat with you today about one of my absolute favorites: the magnificent Philodendron atabapoense. If you’ve ever seen this beauty with its deeply lobed, almost prehistoric-looking leaves, you know exactly why it’s earned a spot in so many of our homes. The way those elegant, pointed leaves unfurl is just pure magic.
Now, if you’re thinking about adding more of these stunners to your collection – and trust me, you will be! – propagating your own is incredibly rewarding. It’s like unlocking a secret superpower in your own living room. And the good news? Philodendron atabapoense is a pretty forgiving plant to propagate, making it a fantastic project for beginners and seasoned plant parents alike.
The Best Time to Start
When it comes to making new plants, timing is everything. For Philodendron atabapoense, I find the late spring through early summer is usually prime time. This is when the plant is in its most vigorous growth phase, meaning it’s got the energy and resources to push out new roots and leaves more readily. You can absolutely propagate at other times, but you might find things move a little slower outside of this peak window. Look for actively growing stems – you’ll see fresh, green leaves and not yellowing or tired old ones.
Supplies You’ll Need
Gathering your tools beforehand makes the whole process so much smoother. Here’s what I always have on hand:
- Clean, sharp pruning shears or a sharp knife: You want a clean cut to minimize damage and prevent disease.
- Small pots or containers: For starting your new cuttings.
- A well-draining potting mix: I love a blend of coco coir, perlite, and a bit of orchid bark. This aerates the soil wonderfully.
- Rooting hormone (optional but recommended): This little bit of magic can really speed things up.
- Clear plastic bags or a humidity dome (optional): To create a mini greenhouse effect.
- Water: For water propagation or just to keep things moist.
Propagation Methods
There are a couple of super effective ways to get new atabapoense plants going.
Stem Cuttings: My Go-To Method
This is my favorite way to propagate Philodendron atabapoense. It’s straightforward and yields great results.
- Find a healthy stem: Look for a stem that has at least one node. A node is the little bump on the stem where a leaf grows from. This is crucial because that’s where the new roots will emerge. Ideally, choose a stem with a healthy leaf or two still attached.
- Make the cut: Using your sharp pruning shears or knife, make a clean cut just below a node. You can take cuttings with multiple nodes, but one or two is plenty to start.
- Prepare the cutting: If your cutting has large leaves, you might want to gently trim them in half. This reduces water loss. You can also remove any lower leaves if they are close to the cut end.
- Apply rooting hormone (optional): Dip the cut end of the stem into your rooting hormone powder or gel. Tap off any excess.
- Plant it up: Fill your small pot with your well-draining potting mix. Make a small hole with your finger and gently insert the cutting, ensuring the node is buried in the soil.
- Water gently: Water the soil thoroughly until you see it drain from the bottom.
- Create humidity: Pop a clear plastic bag over the pot (making sure the leaves don’t touch the plastic if possible) or place it under a humidity dome. You can also just mist it daily.
- Place in bright, indirect light: No direct sun for these little ones!
Water Propagation: The See-It-Grow Approach
This method is so satisfying because you can literally watch your roots develop.
- Take your cutting: Follow steps 1-3 from the stem cutting method, but instead of potting, we’re going for a splash.
- Place in water: Put your cutting into a clean jar or glass filled with fresh water. Make sure the node is submerged, but keep the leaves and stem above the water line.
- Find a spot: Place the jar in bright, indirect light.
- Change the water: Change the water every few days to keep it fresh and prevent bacterial growth. You’ll start to see little nubs appearing at the node within a couple of weeks, which will then grow into roots.
The “Secret Sauce” (Pro Tips)
Here are a few things I’ve learned over the years that can really give your propagation a boost:
- Don’t let those leaves touch the water in water propagation. Seriously, this is huge. Leaves sitting in water tend to rot, and we don’t want our precious cuttings to go that way before they even get a chance to root.
- Bottom heat is your friend. If you’re using the potting method and struggling with slow rooting, consider placing your pot on a seedling heat mat. A consistent, gentle warmth from below really encourages root development. It’s like a little spa treatment for your cuttings!
- Be patient with roots. Sometimes it takes longer than you expect for roots to form. For stem cuttings in soil, gently tugging on the cutting after a few weeks is a good way to check for resistance. If you feel it hold firm, you’ve got roots! For water propagation, just keep an eye on that node for those tiny white root nubs.
Aftercare & Troubleshooting
Once you see those roots developing – hooray! If you propagated in water, it’s time to pot your cutting into soil when the roots are at least an inch or two long. Acclimate it slowly to the soil environment. Keep the soil consistently moist for the first week or two while it settles in.
Watch out for common issues. Rot is the biggest enemy. Mushy, black stems are a sure sign of rot. This usually happens from too much moisture and poor air circulation. If you see this, it’s sadly often too late. Prevention is key: ensure excellent drainage, don’t overwater, and provide good light. Yellowing leaves can sometimes mean it’s thirsty, or it’s adjusting to its new environment, but if it persists, check your watering routine.
A Encouraging Closing
Propagating plants is such a joyful, rewarding journey. It teaches you patience and gives you a deeper connection to your leafy companions. Don’t be discouraged if a cutting doesn’t make it – every gardener has had those moments! Just adjust your approach, try again, and celebrate the successes. Enjoy watching your new Philodendron atabapoense babies grow and thrive! Happy propagating!
Resource:
https://identify.plantnet.org/k-world-flora/species/Philodendron%20atabapoense%20G.S.Bunting/data