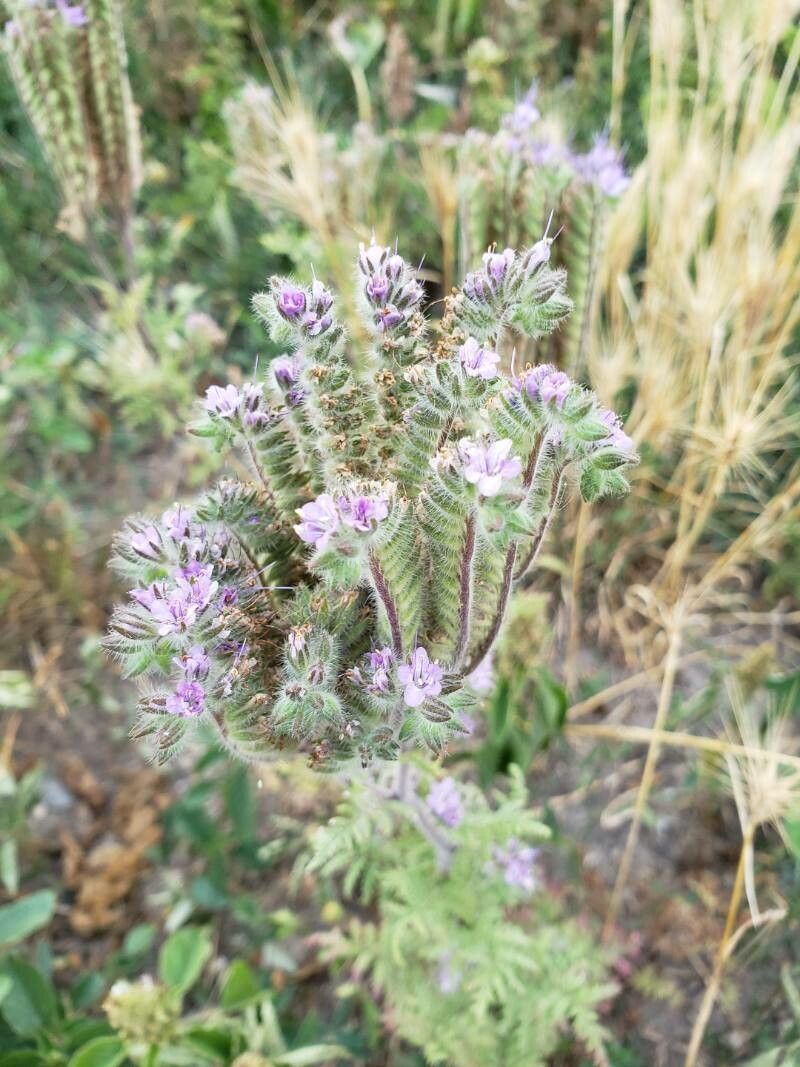
Oh, Phacelia floribunda! If you’ve ever seen this beauty gracing a garden, you know what a showstopper it is. Those clusters of cheerful, lavender-blue bells just sing with life, attracting all sorts of beneficial pollinators. It’s the kind of plant that makes you stop and stare, and honestly, once you’ve fallen in love, you’ll want more of it. The good news? Propagating Phacelia floribunda is quite satisfying, and I’d say it’s moderately easy, even for those of you just starting to get your hands dirty in the world of plant propagation.
The Best Time to Start
For the highest chances of success, I always recommend propagating Phacelia floribunda from seeds in early spring. You can also take cuttings in late spring to early summer, once the plant has got a good start on its growing season. Starting with seeds in spring gives you lovely new plants ready to bloom that same year, which is always a bonus!
Supplies You’ll Need
Here’s what I typically gather when I’m getting ready to propagate:
- Seed Starting Mix: A light, well-draining mix is crucial. I like to use a blend of peat moss, perlite, and vermiculite.
- Small Pots or Seedling Trays: About 3-4 inches in diameter is perfect. Make sure they have drainage holes!
- Labels and Marker: You’ll want to remember what you planted, trust me.
- Watering Can with a Fine Rose: Gentle watering is key, especially for tiny seedlings.
- Pruning Shears or a Sharp Knife: For taking cuttings.
- Rooting Hormone (Optional but helpful for cuttings): A powdered or liquid form can give cuttings a boost.
- Perlite or Coarse Sand: For improving drainage if you’re using cuttings.
Propagation Methods
Let’s get our hands dirty! Here are my go-to methods for multiplying your Phacelia floribunda.
From Seed: A Gardener’s Best Friend
This is my favorite way to start Phacelia floribunda. It’s straightforward and yields so many new plants.
- Prepare Your Pots: Fill your pots or trays with the seed starting mix. Gently firm it down, but don’t compact it too much.
- Sow the Seeds: Phacelia seeds are small, so I usually scatter them evenly over the surface of the soil. You don’t need to bury them deeply – just a light dusting of soil or vermiculite is enough. Think of it as giving them a cozy blanket.
- Water Gently: Use your watering can with the fine rose to moisten the soil thoroughly. You want it damp, not waterlogged. A misting bottle can also work wonders here.
- Provide Warmth: Place your pots in a warm spot. A sunny windowsill is ideal, or you can use a heat mat if you have one.
- Be Patient and Keep Moist: Germination usually takes about 10-20 days. Keep the soil consistently moist but not soggy. Covering the pots with a clear plastic lid or plastic wrap can help maintain humidity, but remember to lift it for a bit of air circulation each day.
- Transplant When Ready: Once your seedlings have a few sets of true leaves and are large enough to handle, you can carefully transplant them into larger individual pots.
From Cuttings: Building Your Collection
If you have a mature plant you love, taking cuttings is a great way to create an identical twin!
- Select Healthy Stems: Look for healthy, non-flowering stems that are about 4-6 inches long. Pinch off any leaves from the bottom half of the stem.
- Make the Cut: Using your sharp pruning shears or knife, make a clean cut just below a leaf node (that little bump where a leaf grows from the stem).
- Apply Rooting Hormone (Optional): If you’re using rooting hormone, dip the cut end of the stem into the powder or liquid. Tap off any excess.
- Plant the Cuttings: Fill small pots with a mix of seed starting mix and perlite or coarse sand (about a 50/50 blend). This helps with drainage. Stick the cut end of the stem about an inch deep into the mix.
- Water and Cover: Water gently to settle the soil around the cuttings. You can then cover the pot with a clear plastic bag or lid to create a mini-greenhouse effect.
- Provide Indirect Light: Place the pots in a location that receives bright, indirect light. Avoid direct sun, as it can scorch the cuttings.
- Check for Roots: This can take several weeks. You’ll know roots have formed when you feel a gentle resistance if you tug lightly on the cutting or see new growth.
The “Secret Sauce” (Pro Tips)
Over the years, I’ve picked up a few little tricks that can really make a difference:
- For Cuttings: Don’t Let the Leaves Touch the Water! If you’re attempting water propagation (which I find Phacelia can be a bit fussy with, hence the soil mix recommendation above), make sure absolutely no leaves are submerged. Rot happens fast in water if leaves are constantly wet, and it’s a sure way to lose your cutting.
- Bottom Heat is Your Friend for Cuttings: Providing gentle bottom heat from a propagation mat can significantly speed up root development for cuttings. It mimics the warmth from the soil on a sunny day and gives those roots a real kickstart.
- Air Circulation is Key for Seedlings: While you want to maintain humidity for germinating seeds, don’t suffocate them. Open the lid or plastic covering daily for at least 15-30 minutes to allow for air exchange. This helps prevent fungal issues like “damping off.”
Aftercare & Troubleshooting
Once your seedlings are a decent size or your cuttings have rooted, it’s time for a bit more attentive care.
- Acclimatize Gradually: If your new plants have been under cover, gradually introduce them to normal room humidity over a week or so. Open the covers for longer periods each day before removing them completely.
- Watering is Still Important: Water your young plants when the top inch of soil feels dry. Avoid overwatering. Soggy soil is the enemy and can lead to root rot, which is a common sign of failure.
- Watch for Rot: If you see stems wilting or turning mushy at the base, it’s often a sign of overwatering and root rot. Unfortunately, this is hard to come back from, so prevention is key. Make sure your pots have good drainage!
- Potting Up: As your plants grow, you’ll need to pot them up into larger containers so their roots have room to spread.
A Little Patience Goes a Long Way
Propagating plants is a journey, and there will be moments of triumph and maybe a few small setbacks. Don’t get discouraged if not every seed germinates or every cutting roots. Gardening is all about learning and experimenting. Enjoy the process, celebrate your successes, and before you know it, you’ll have a whole garden bursting with your lovely Phacelia floribunda! Happy growing!
Resource:
https://identify.plantnet.org/k-world-flora/species/Phacelia%20floribunda%20Greene/data