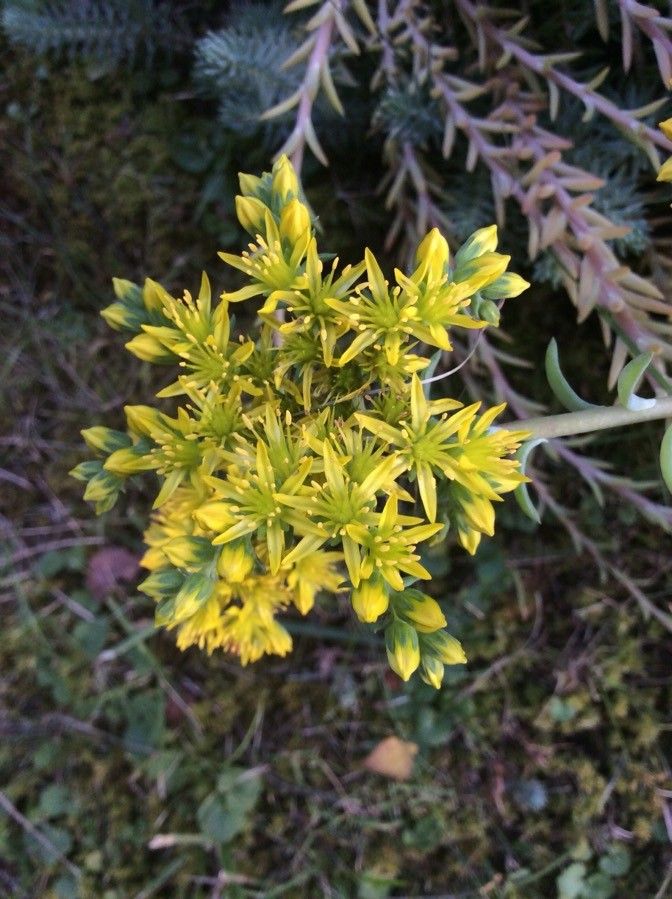
Oh, Petrosedum rupestre! I’m so glad you asked about this one. If you’re looking for a succulent that’s as rewarding to grow as it is beautiful, you’ve found it. Its trailing stems, often adorned with lovely blue-green foliage, are just a joy to have spilling over pots or weaving through rock gardens. And the best part? Propagating it is delightfully easy, making it a perfect project for beginners and seasoned gardeners alike. There’s something truly special about nurturing a tiny cutting into a full, thriving plant, and with Petrosedum rupestre, you’ll be multiplying your greenery in no time!
The Best Time to Start
For Petrosedum rupestre, spring or early summer is your sweet spot. This is when the plant is in its active growth phase, meaning it’s full of energy and ready to put out roots. Starting outside of this window isn’t impossible, but you’ll likely see quicker, more robust results if you wait for these warmer months. Think of it like giving your new plant babies the best possible chance to thrive from day one.
Supplies You’ll Need
Here’s what you’ll want to have on hand before you dive in:
- Sharp, clean pruning shears or a sharp knife: For making clean cuts.
- Well-draining potting mix: A cactus or succulent mix is ideal. You can also make your own by mixing potting soil with perlite or pumice.
- Small pots or trays: With drainage holes, of course!
- Optional: Rooting hormone: While not strictly necessary for this plant, it can speed things up.
- Optional: Small spray bottle: For gentle misting.
Propagation Methods
Let’s get our hands dirty! There are a couple of fantastic ways to multiply your Petrosedum rupestre.
Stem Cuttings: My Go-To Method
This is undoubtedly the easiest and most common way to propagate this succulent.
- Take your cuttings: Using your clean shears, snip off healthy stems that are about 3 to 5 inches long. Try to take them from the tips of the branches.
- Let them callous: This is a crucial step for succulents! Lay your cuttings out on a dry surface, away from direct sunlight, for 2 to 3 days. You’ll notice the cut end will dry and form a protective scab. This prevents rot when you plant them.
- Pot them up: Fill your small pots with your well-draining mix. You can gently dip the calloused end of each cutting into rooting hormone if you’re using it.
- Plant the cuttings: Make a small hole in the soil with your finger or a pencil and insert the calloused end of the cutting about an inch deep. If you have multiple cuttings, space them a couple of inches apart.
- Water lightly: Wait a day or two after planting before giving them their first light watering. You don’t want to soak them immediately.
Division: A Quick Win
If your Petrosedum rupestre has become a bit of a clump, dividing is a fantastic way to get instant results.
- Gently remove the plant from its pot.
- Loosen the soil around the base of the plant. You can use your fingers or a small trowel.
- Carefully tease apart the root ball to separate the plant into smaller sections. Each section should have roots and some stems.
- Allow any cut roots to callous for a day or two.
- Pot up the divisions in well-draining soil, just as you would with cuttings. Water lightly after a day or two.
The “Secret Sauce” (Pro Tips)
Here are a few things I’ve learned over the years that make a difference:
- Don’t overcrowd your pots! Give those new cuttings a little breathing room. Stems touching each other can encourage rot, especially if they remain damp.
- Bottom heat can be your friend. While not essential, placing your pots on a seedling heat mat can really speed up root development. It mimics the warmth of spring soil and encourages those roots to get going.
- Less is more with watering initially. I know it’s tempting to water as soon as you plant, but patience here pays off. Letting the soil dry out slightly between waterings encourages the plant to reach for moisture, thus developing stronger roots.
Aftercare & Troubleshooting
Once your cuttings or divisions have been in their pots for a few weeks, you’ll start to see signs of new growth. That’s your cue that roots have formed!
- Continue to water sparingly. Allow the soil to dry out significantly between waterings. You’ll be able to tell by lifting the pot – a dried-out pot is much lighter.
- Gradually introduce more light. Once you see established growth, you can slowly move them into brighter conditions, but avoid direct, scorching sun until they are stronger.
The biggest challenge you might face is rot. This usually happens if the cuttings are planted into overly wet soil, or if they are kept too moist during the callousing period. If you notice a stem turning mushy and black, unfortunately, it’s best to discard it and try again.
A Little Patience Goes a Long Way
Propagating Petrosedum rupestre is a truly joyful experience. Remember to be patient; those roots take time to develop. Enjoy the process of nurturing your new plants, and soon you’ll have plenty to share with friends or to fill every corner of your garden with that signature cascading charm. Happy growing!
Resource:
https://identify.plantnet.org/k-world-flora/species/Petrosedum%20rupestre%20(L.)%20P.V.Heath/data