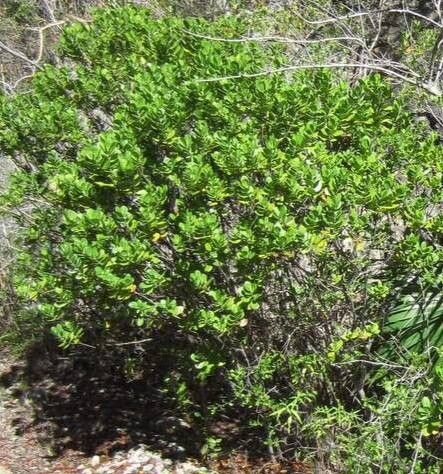
Oh, hello there! I’m so glad you’ve stopped by. Today, we’re diving into the wonderful world of propagating Peripterygia marginata. If you haven’t met this beauty yet, imagine lush, architectural leaves with a striking, often ruffled margin. They add such a sophisticated touch to any indoor jungle. And the best part? Doubling your collection is totally doable and incredibly satisfying.
For beginners, Peripterygia marginata is a really quite beginner-friendly plant to propagate. You’ll get a lovely sense of accomplishment watching your new babies thrive.
The Best Time to Start
Honestly, the most successful time to take cuttings from your Peripterygia marginata is during its active growing season. Think spring through early to mid-summer. The plant is brimming with energy then, meaning your cuttings have the best chance to root quickly and vigor. Trying to propagate when the plant is a bit sleepy in the winter can work, but you might find it takes much longer.
Supplies You’ll Need
Here’s what I usually grab before I get started:
- Sharp Pruning Shears or a Clean Knife: We want clean cuts to prevent disease. Sterilize them with rubbing alcohol!
- Rooting Hormone (Optional but Recommended): A little boost can really help. Look for one for soft or semi-hardwood cuttings.
- Well-Draining Potting Mix: A mix of perlite, peat moss, and some coir works beautifully. You can also use a commercially produced seedling or succulent mix.
- Small Pots or Propagation Trays: Clean, with drainage holes, of course.
- Water: For hydrating cuttings and for water propagation.
- A Spray Bottle: For misting.
- Optional: Heat Mat: This is a nice-to-have, especially in cooler environments.
Propagation Methods
The most reliable way to propagate Peripterygia marginata is through stem cuttings. Here’s how I do it:
- Select a Healthy Parent Plant: Choose a vigorous, disease-free plant. You want to see strong, upright growth.
- Take Your Cuttings: Look for healthy stems that are at least 4-6 inches long. Using your clean shears, make a clean cut just below a leaf node. A leaf node is where a leaf emerges from the stem, and it’s where those magical roots will eventually form. I like to take several cuttings at once, just in case!
- Prepare the Cuttings: Gently remove the lower leaves from the stem, leaving just a couple of leaves at the top. This reduces water loss and prevents leaves from rotting in the soil or water.
- Apply Rooting Hormone (Optional): If you’re using it, dip the cut end of the stem into the rooting hormone powder, tapping off any excess.
- Plant Your Cuttings:
- In Soil: Make a small hole in your prepared potting mix with a pencil or your finger. Gently insert the cut end of the stem into the hole, making sure it’s snug. Firm the soil around it.
- In Water: Place the prepared cuttings in a clean jar or vase filled with water. Make sure the leaf nodes are submerged, but crucially, ensure that no leaves are submerged in the water.
- Provide Light and Humidity: Place your pots or jars in a bright location, but out of direct sunlight. This is important to prevent scorching. If you’re using soil, give the cuttings a gentle watering. You can cover the pots loosely with a clear plastic bag or a propagation dome to create a humid environment.
The “Secret Sauce” (Pro Tips)
Want to give your cuttings an even better chance? Here are a couple of tricks I swear by:
- Bottom Heat is Your Friend: If you’re using soil propagation, placing your pots on a gentle heat mat can significantly speed up rooting. It mimics the warmth of spring soil and really encourages those root cells to get going.
- Don’t Overcrowd: In water propagation, give your cuttings a bit of space. If they’re all crammed together, it invites fungal issues and competition. Also, change the water every few days to keep it fresh and oxygenated. For soil cuttings, avoid overwatering – damp is good, soggy is bad!
Aftercare & Troubleshooting
Once you start seeing new roots emerging – and this can take anywhere from a few weeks to a couple of months – it’s time for a little more TLC.
- For Soil Cuttings: When the roots are a good inch or two long, you can gradually acclimate them to normal room humidity if you used a plastic cover. Water them when the top inch of soil feels dry.
- For Water Cuttings: Once the roots are a few inches long, you can carefully plant them into well-draining potting mix. Treat them gently as their roots are delicate.
- Troubleshooting: The most common issue is rot. This usually happens from overwatering or waterlogged soil, or from leaves sitting in water. If you see black, mushy stems, sadly, that cutting has likely succumbed. Don’t be discouraged; just try again with a fresh cutting and slightly adjusted watering habits. Brown or crispy leaves on a cutting can indicate it’s too dry or getting too much direct light.
Wrapping Up
Propagating Peripterygia marginata is such a rewarding journey. It’s a wonderful way to learn more about your plants and to share them with friends. Be patient, observe your cuttings, and most importantly, enjoy the process! Happy propagating!
Resource:
https://identify.plantnet.org/k-world-flora/species/Peripterygia%20marginata%20(Baill.)%20Loes./data