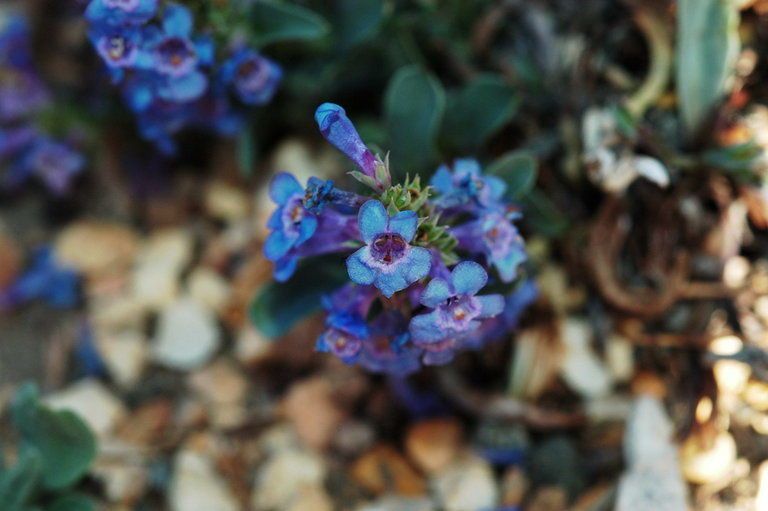
Oh, hello there! I’m so glad you’re interested in propagating Penstemon arenicola. It’s such a charming little plant, isn’t it? With its delicate, often purplish-blue flowers nodding in the breeze, it really adds a touch of wildflower magic to any garden. And the best part? Getting more of these beauties yourself is incredibly rewarding. For those of you just starting out, I’d say Penstemon arenicola is generally moderately easy to propagate. It might take a little patience, but you absolutely can do it!
The Best Time to Start
My favorite time to get propagating is definitely late spring to early summer. This is when the plant is actively growing, and you’ll find plenty of nice, semi-hardwood stems that are perfect for taking cuttings. You want stems that have started to firm up a bit, but aren’t yet woody and old. Think of it as a spring-to-summer growth spurt – that’s prime propagation time!
Supplies You’ll Need
Let’s gather our supplies. Having everything ready makes the process so much smoother:
- Pruning shears or sharp scissors: Clean and sharp is the name of the game.
- Rooting hormone: Powder or gel works well. This is a big help for encouraging strong root development.
- Small pots or seed trays: With drainage holes, of course!
- Propagation mix: I like to use a well-draining blend. A good starting point is equal parts perlite and peat moss or coco coir. Adding a bit of coarse sand can also be beneficial.
- Plastic bags or a propagation dome: To create a humid environment.
- Labels and a permanent marker: To keep track of what you’ve planted, where, and when.
- Watering can with a fine rose: For gentle watering.
Propagation Methods
While you might find other methods work, I’ve had the most success with stem cuttings for our Penstemon arenicola. It’s reliable and gives you plenty of new plants.
Here’s how we do it:
- Take the Cuttings: On a bright morning, select healthy, non-flowering stems. Using your clean pruning shears, make a clean cut just below a leaf node (where a leaf joins the stem). You want cuttings that are about 4-6 inches long. Remove the lower leaves, leaving just a few at the top. This reduces water loss.
- Prepare the Cuttings: Dip the cut end of each stem into your rooting hormone, tapping off any excess.
- Plant the Cuttings: Fill your pots with the propagation mix. Make a small hole in the center of the mix with your finger or a pencil. Gently insert the prepared cutting into the hole, ensuring the leaf nodes are below the soil surface. The rooting hormone will help here. Firm the soil gently around the base of the cutting.
- Create Humidity: Water the potting mix gently. Then, cover the pots with a clear plastic bag, spreading it out so it doesn’t touch the leaves, or place them under a propagation dome. This creates a mini-greenhouse to keep the cuttings from drying out while they develop roots.
- Provide Light and Warmth: Place the pots in a spot with bright, indirect light. Avoid direct, scorching sun, which can quickly dehydrate your cuttings. A bit of bottom heat (like a heating mat) can speed things up, but it’s not strictly necessary at this stage.
The “Secret Sauce”
Now for a couple of tricks I’ve learned over the years:
- Don’t let the leaves touch the water. If you’re using a propagation dome or bag, make sure the foliage isn’t pressed against the plastic. Any condensation that collects on the leaves can lead to fungal issues and rot. A little twig or a strategically placed leaf can prop the cover up.
- Take tip cuttings, but also consider removing some of the lower leaves and burying a node. This gives the stem more surface area for root initiation. It’s like giving it extra “places” to sprout new roots from.
Aftercare & Troubleshooting
Once your cuttings are planted, keep the soil consistently moist but not waterlogged. You’ll want to peek under the plastic bag daily to check for condensation and ensure things are looking healthy.
After a few weeks, you can gently tug on a cutting. If you feel resistance, congratulations! You’ve got roots! At this point, you can gradually introduce them to more light and air by opening the bag a little more each day over a week or so. Once they seem sturdy and are showing new growth, they’re ready to be transplanted into individual pots with a good all-purpose potting mix.
Troubleshooting? The most common issue is rot. If your cuttings turn black and mushy, it’s usually a sign of too much moisture and not enough air circulation. Don’t be discouraged! Sometimes, it’s trial and error. If you see mold on the soil surface, try to gently remove it and ensure better airflow.
A Encouraging Closing
Propagating plants is a journey, and it’s one filled with so much satisfaction. Watching a tiny cutting transform into a thriving new plant is truly magical. Be patient with your Penstemon arenicola, enjoy the process, and before you know it, you’ll have a whole garden full of these lovely blooms! Happy propagating!
Resource:
https://identify.plantnet.org/k-world-flora/species/Penstemon%20arenicola%20A.Nelson/data