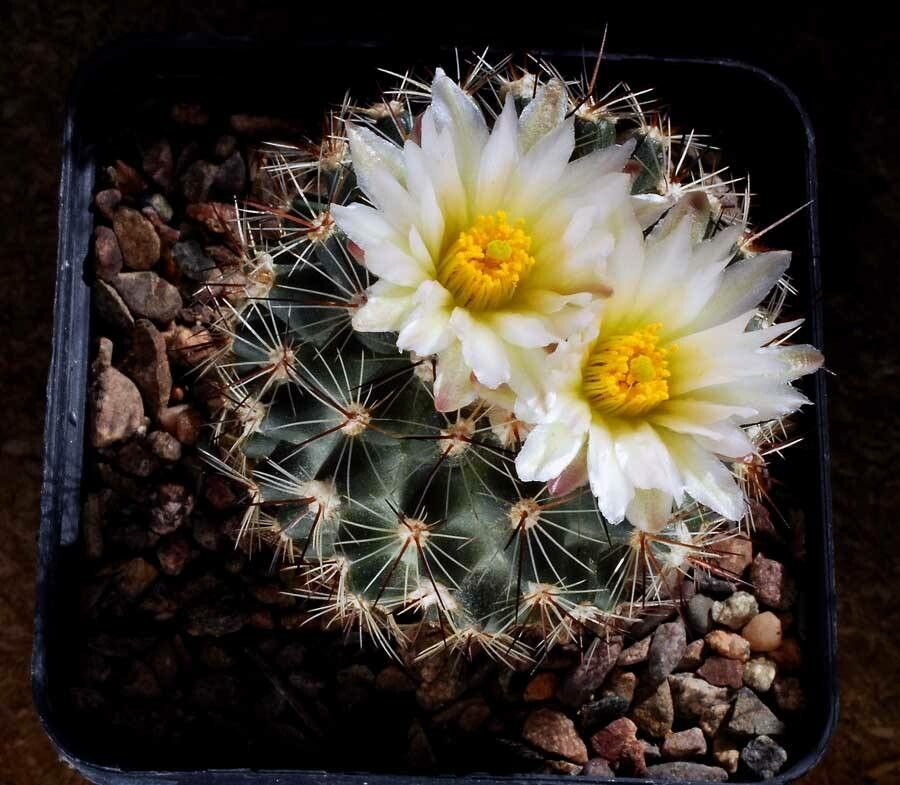
Oh, Pediocactus simpsonii! If you’ve ever seen this beautiful little cactus, you know why it captures our hearts. That spherical body, often covered in a charming mesh of spines, just begs to be admired. And the flowers! When they do bloom, they’re an absolute jewel tone. Propagating them is a fantastic way to share this joy, or simply to grow your own little cactus collection without breaking the bank. Now, I’ll be honest, Pediocactus can be a tad more particular than your average Opuntia. It’s not a beginner’s walk in the park, but with a little focus and patience, you absolutely can succeed. Think of it as a rewarding challenge!
The Best Time to Start
The most opportune time to propagate Pediocactus simpsonii is during its active growing season. For most of us, this means spring and early summer. You’ll know it’s the right time because the plant will look plump and healthy, perhaps even showing signs of new growth. Trying to propagate when the plant is dormant or stressed is a recipe for disappointment.
Supplies You’ll Need
Gathering your supplies beforehand makes the whole process much smoother. Here’s what I always have on hand:
- Sterile Cactus Mix: A very gritty, well-draining mix is paramount. I usually combine equal parts perlite, coarse sand, and a small amount of compost or coco coir.
- Sharp, Sterile Pruning Shears or Knife: Cleanliness is crucial to prevent disease.
- Rooting Hormone (Optional but Recommended): A powder or gel can give your cuttings a helpful boost.
- Small Pots or Seed Trays: Choose something with drainage holes!
- Gravel or Small Pebbles: For top dressing to help keep the base of the cutting dry.
- Watering Can with a Fine Rose: To gently water without disturbing new roots.
- Labels: To keep track of what you’ve propagated and when.
Propagation Methods
For Pediocactus, the most straightforward and effective method is propagating from Offsets (Pups). This cactus is known for producing little baby plants around its base.
Propagating from Offsets:
- Identify an Offset: Look for a small, independent plantlet growing from the side or base of the mother plant. It should have its own distinct root system, even if it’s just starting to form.
- Carefully Detach: Using your sterile knife or shears, gently cut the offset away from the parent plant. Try to get as much of its nascent root as possible. If it’s very small, you might just be separating a stem segment that will need to root from scratch.
- Let it “Callus”: This is a super important step! Place the detached offset in a clean, dry, well-ventilated spot. Do not plant it immediately. Allow the cut surface to dry and form a protective callous over for at least a week, or even two. This prevents rot when you eventually plant it.
- Prepare the Pot: Fill your small pot with your prepared, dry cactus mix.
- Plant the Offset: Gently insert the callused end of the offset into the soil, just deep enough to make it stand upright. You can lightly press the soil around it for stability.
- Top Dress (Optional but Recommended): Add a thin layer of gravel or small pebbles around the base of the offset. This helps to wick away moisture from the stem and prevent rot.
- Wait to Water: Resist the urge to water right away! Wait for at least another week or two after planting.
The “Secret Sauce” (Pro Tips)
- Temperature is Key: While you can start offsets in spring, if you want to encourage faster root development, a little gentle bottom heat can work wonders. Placing your pots on a seedling heat mat set to a low temperature (around 70-75°F or 21-24°C) can really speed things along, especially if your home is a bit cooler.
- Less is More with Water: After you do start watering, be extremely judicious. I only give my new propagations a very light watering when the soil is completely dry. Overwatering is the quickest way to lose a Pediocactus cutting. Think subtle sips, not drowning!
- Don’t Rush the “Callus”: I know it’s tempting to get your new babies into soil quickly, but that callous is your best friend against rot. Be patient! A proper dry period is critical.
Aftercare & Troubleshooting
Once your Pediocactus offset is planted and you’ve started watering tentatively, keep it in a bright spot, but avoid direct, intense sun initially. Too much heat and sun on a young, unrooted plant can stress it out. You’ll know it’s rooting when you see signs of new growth, like a slightly plumper appearance or the start of a new spine cluster.
The most common sign of failure is rot. If your cutting looks mushy, discolors (often turning brown or black and then very soft), or collapses, it’s likely rotted. This is usually due to insufficient callusing or overwatering. If you catch it early, you might be able to salvage a healthy section to re-callus and try again, but often, it’s time to start fresh.
A Encouraging Closing
Propagating Pediocactus simpsonii is a journey. There might be a few setbacks along the way, and that’s perfectly normal! The key is to learn from each attempt. Be patient, observe your little plants closely, and celebrate every tiny success. Before you know it, you’ll have a thriving little clan of these charming desert gems to enjoy. Happy propagating!
Resource: