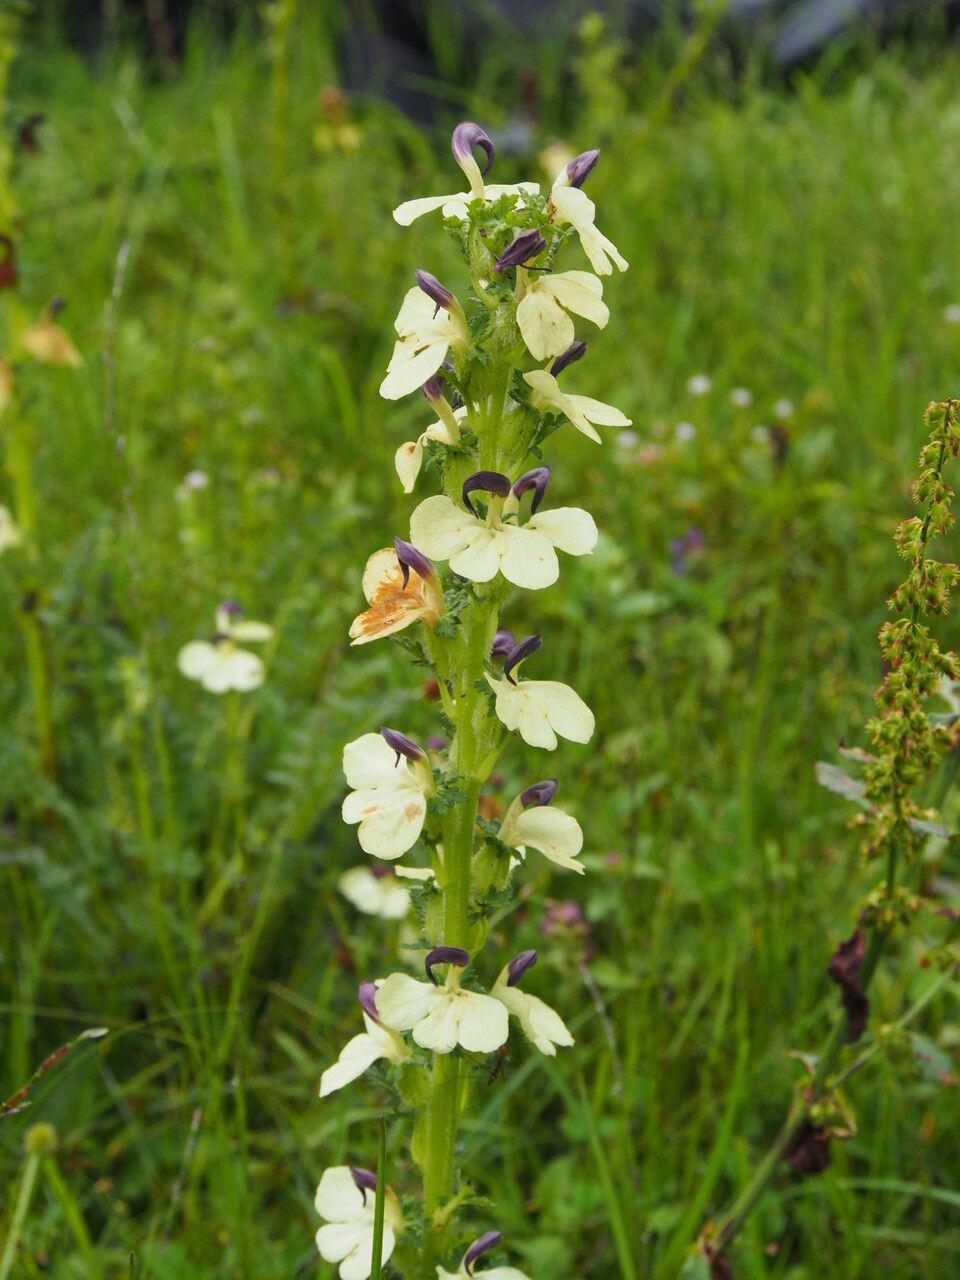
Hello there, fellow plant enthusiasts! I’m so thrilled you’ve landed on my little corner of the internet today. We’re diving into the delightful world of Pedicularis lutescens, often called the Yellow Betony. Now, if you’re looking for a plant that brings a sunny disposition to your garden with its cheerful yellow blooms and charming, somewhat fern-like foliage, you’re in for a treat. Propagating Pedicularis lutescens yourself is incredibly rewarding. You get to watch life emerge from a tiny piece of your beloved parent plant, and it’s a fantastic way to share this beauty with friends. Is it a beginner-friendly plant to propagate? Honestly, it can be a little finicky, but with a bit of care and these tips, you’ll be well on your way. Don’t let that deter you!
The Best Time to Start
For Pedicularis lutescens, I’ve found the absolute best time to begin propagation is in the late spring or early summer. This is when the plant is actively growing and has plenty of energy to put into developing new roots. You’re looking for stems that are still somewhat pliable but have started to firm up – not the brand new, bright green, floppy tips, but not the old, woody growth either. Think of it as a happy medium.
Supplies You’ll Need
Gathering your supplies beforehand makes the whole process so much smoother. Here’s what I always have on hand:
- Sharp, clean pruning shears or a sharp knife: Essential for making clean cuts, which helps prevent disease.
- Rooting hormone (powder or gel): While not strictly mandatory for all plants, it significantly boosts your success rate, especially with slightly more challenging ones like this.
- Well-draining potting mix: A good blend is key. I often use a mix of perlite, sterile potting soil, and a touch of coarse sand. This ensures good aeration and prevents waterlogging. You can also find specialized succulent or cactus mixes that work well.
- Small pots or seed trays: Clean ones, of course! Make sure they have drainage holes.
- Water: For misting.
- Plastic bags or a humidity dome: To create a mini-greenhouse effect.
- Labels: To keep track of what you’ve propagated!
Propagation Methods
While Pedicularis lutescens can be a bit particular, the most reliable method I’ve found is through stem cuttings. Let’s walk through it:
- Take Your Cuttings: Using your clean shears or knife, select a healthy stem from your mature plant. Aim for a section about 4-6 inches long. Make your cut just below a leaf node (the point where leaves emerge from the stem). This is where the magic happens for root development.
- Prepare the Cuttings: Gently remove the lower leaves, leaving just a couple of leaves at the very top. This reduces water loss from the cutting. If the remaining leaves are quite large, I’ll even snip them in half to further minimize stress on the cutting.
- Apply Rooting Hormone: Dip the cut end of the stem into your rooting hormone, tapping off any excess. This gives the cutting a little boost to start forming roots.
- Plant Your Cuttings: Make a small hole in your prepared potting mix with a pencil or your finger. Gently insert the cut end of the stem cutting into the hole. Firm the soil gently around it.
- Create a Humid Environment: Water the soil lightly and then cover the pot or tray with a clear plastic bag or a humidity dome. This traps moisture, which is crucial for the cuttings to survive before they develop roots. Pop the pots into a spot with bright, indirect light – no direct sun, as it will cook them!
The “Secret Sauce” (Pro Tips)
Over the years, I’ve learned a few tricks that can really make a difference.
- Bottom Heat is Your Friend: If you have it available, placing your pots on a gentle seedling heat mat can significantly speed up root formation. It mimics the warmth of spring soil and encourages those roots to get a move on.
- Don’t Drown Your Dreams: After the initial watering, be very careful not to overwater. The soil should be consistently moist, but never soggy. Soggy soil is the express lane to rot, and we do not want that! A good test is to poke your finger about an inch into the soil; if it feels dry, it’s time for a light watering or a misting.
- Patience, Young Grasshopper: Pedicularis lutescens can take its sweet time. Don’t be discouraged if you don’t see new growth immediately. It can take anywhere from 4 to 8 weeks, sometimes even longer, for roots to establish. Resist the urge to tug on the cuttings to “check” for roots – you’ll likely just damage them!
Aftercare & Troubleshooting
Once you start seeing new leaf growth emerging from your cuttings, that’s a fantastic sign! It means roots have likely formed and the plant is settling in. At this point, you can gradually increase the light intensity and slowly acclimatize them to normal room humidity by opening the plastic bag a little more each day. Continue to water when the top inch of soil feels dry.
The most common problem you might encounter is rot. This usually happens due to overwatering and poor air circulation. You’ll notice the stem becoming mushy and discolored, often dark brown or black. If you see this, unfortunately, that cutting is likely lost. The best prevention is to ensure good drainage and avoid overwatering.
A Encouraging Closing
Propagating Pedicularis lutescens might require a little more patience and attention than some other plants, but the thrill of success is so worth it. Enjoy the process of nurturing these new little lives. Be observant, be patient, and most importantly, have fun watching your garden – and your confidence – grow! Happy propagating!
Resource:
https://identify.plantnet.org/k-world-flora/species/Pedicularis%20lutescens%20Franch./data