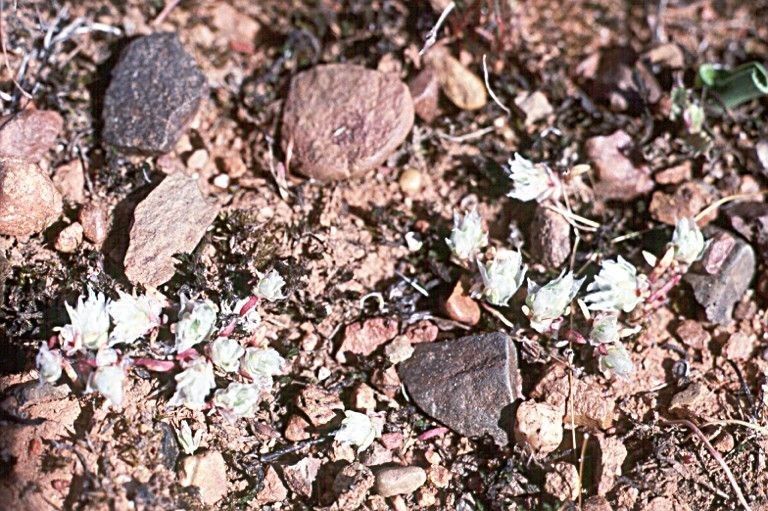
Oh, hello there! Come on in, grab a mug. We’re going to chat about a truly delightful little plant today: Paronychia ahartii. If you haven’t met this beauty, imagine tiny, silvery-white, papery bracts that look like a perpetual snow flurry clinging to low-growing, grey-green foliage. It’s absolutely charming, especially spilling over a rock garden edge or peeking out from a container. Propagating it yourself? It’s incredibly satisfying, and honestly, not as daunting as you might think. It’s a fantastic project for dipping your toes into propagation, even if you’re just starting out.
The Best Time to Start
For Paronychia ahartii, the sweet spot for propagation is definitely late spring to early summer. This is when the plant is actively growing and has plenty of energy to put into developing new roots. You want to look for new, non-flowering growth. Stems that are just starting to lengthen and are still a bit flexible are perfect. Avoid trying to propagate when the plant is stressed, perhaps from extreme heat or drought, or when it’s actively blooming.
Supplies You’ll Need
Here’s a quick rundown of what you’ll want to have on hand:
- Sharp, clean pruning shears or a sharp knife: For making those clean cuts. We don’t want to bruise our little cuttings.
- Rooting hormone (optional, but recommended): A little powder or gel can give your cuttings a real boost.
- Well-draining potting mix: I like a blend of coarse sand, perlite, and a good quality peat-free compost. Aim for something that won’t hold too much moisture. A good general-purpose succulent or cacti mix often works well too.
- Small pots or trays: Clean ones, of course! Terracotta pots are great because they breathe.
- A watering can with a fine rose attachment: For gentle watering.
- A clear plastic bag or a propagator lid: To create a humid environment.
Propagation Methods
I find the most reliable way to multiply Paronychia ahartii is through stem cuttings. It’s straightforward and generally gives excellent results.
- Take Your Cuttings: Using your clean shears or knife, take cuttings that are 3-4 inches long. Make sure to get them from healthy, vigorous stems. It’s best to take several cuttings; not all of them will necessarily take, but it increases your odds.
- Prepare the Cuttings: Gently remove the lower leaves from the cutting. You want a clean stem to insert into your potting mix. If the cutting is particularly long, you can pinch off a few more leaves from the bottom half.
- Apply Rooting Hormone (Optional): Dip the cut end of the stem into rooting hormone, tapping off any excess. Don’t be shy about using it; it really helps encourage root formation.
- Plant Your Cuttings: Fill your small pots or trays with your prepared, well-draining mix. Make a small hole in the center of the mix with a pencil or your finger. Gently insert the cut end of the stem into the hole, ensuring the bare stem is covered by the mix, but try not to disturb the rooting hormone too much. Firm the mix gently around the cutting.
- Water Gently: Water the cuttings lightly to settle the soil around them.
- Create a Humid Environment: Place the pots into a clear plastic bag, sealing it loosely, or cover them with a propagator lid. This creates a mini-greenhouse effect, keeping the humidity high, which is crucial for cuttings to root before they dry out.
The “Secret Sauce” (Pro Tips)
Now, let me share a couple of things I’ve learned over the years that make a real difference:
- Bottom Heat is Your Friend: If you can, pop your pots onto a slightly warm surface. A heat mat designed for seedlings is perfect. This gentle warmth encourages root development from below, giving your cuttings that extra push they need.
- Don’t Drench Them: While humidity is key, overwatering is the quickest way to lose cuttings to rot. The soil should be consistently moist but never soggy. I like to check the moisture level by gently pressing the soil. If it springs back, it’s probably okay.
- Air Circulation Matters: Even though we’re creating a humid environment, it’s important to ventilate occasionally. After about a week, I’ll open the bag or lid for an hour or so each day to allow for some fresh air exchange. This helps prevent fungal issues.
Aftercare & Troubleshooting
Once you see signs of new growth – tiny leaves or even just a bit of upward movement – it’s a good indicator that roots are forming! You can carefully try to tug gently on a cutting; if there’s resistance, you’ve got roots.
- Gradual Acclimation: Once roots have formed, start to gradually acclimate your new plants to lower humidity. Gradually open the bags or vents over a week or so.
- Repotting: Once your cuttings are robust enough to handle, you can carefully transplant them into their own small pots. Continue to use your well-draining mix.
- Common Signs of Failure: The most common problem you’ll encounter is rot. If your cuttings turn mushy and brown, especially at the base, it’s likely they’ve received too much moisture and not enough air. Discard any affected cuttings promptly. Another sign of trouble is wilting without recovery, which often points to lack of moisture or inadequate rooting.
A Little Patience Goes a Long Way
Propagating plants is a journey, and Paronychia ahartii is no exception. Be patient with your new little starters. It might take several weeks to see significant root development. Don’t be discouraged if not every cutting takes. Celebrate the successes, learn from any setbacks, and most importantly, enjoy the wonderfully rewarding process of bringing new life into your garden. Happy growing!
Resource:
https://identify.plantnet.org/k-world-flora/species/Paronychia%20ahartii%20Ertter/data