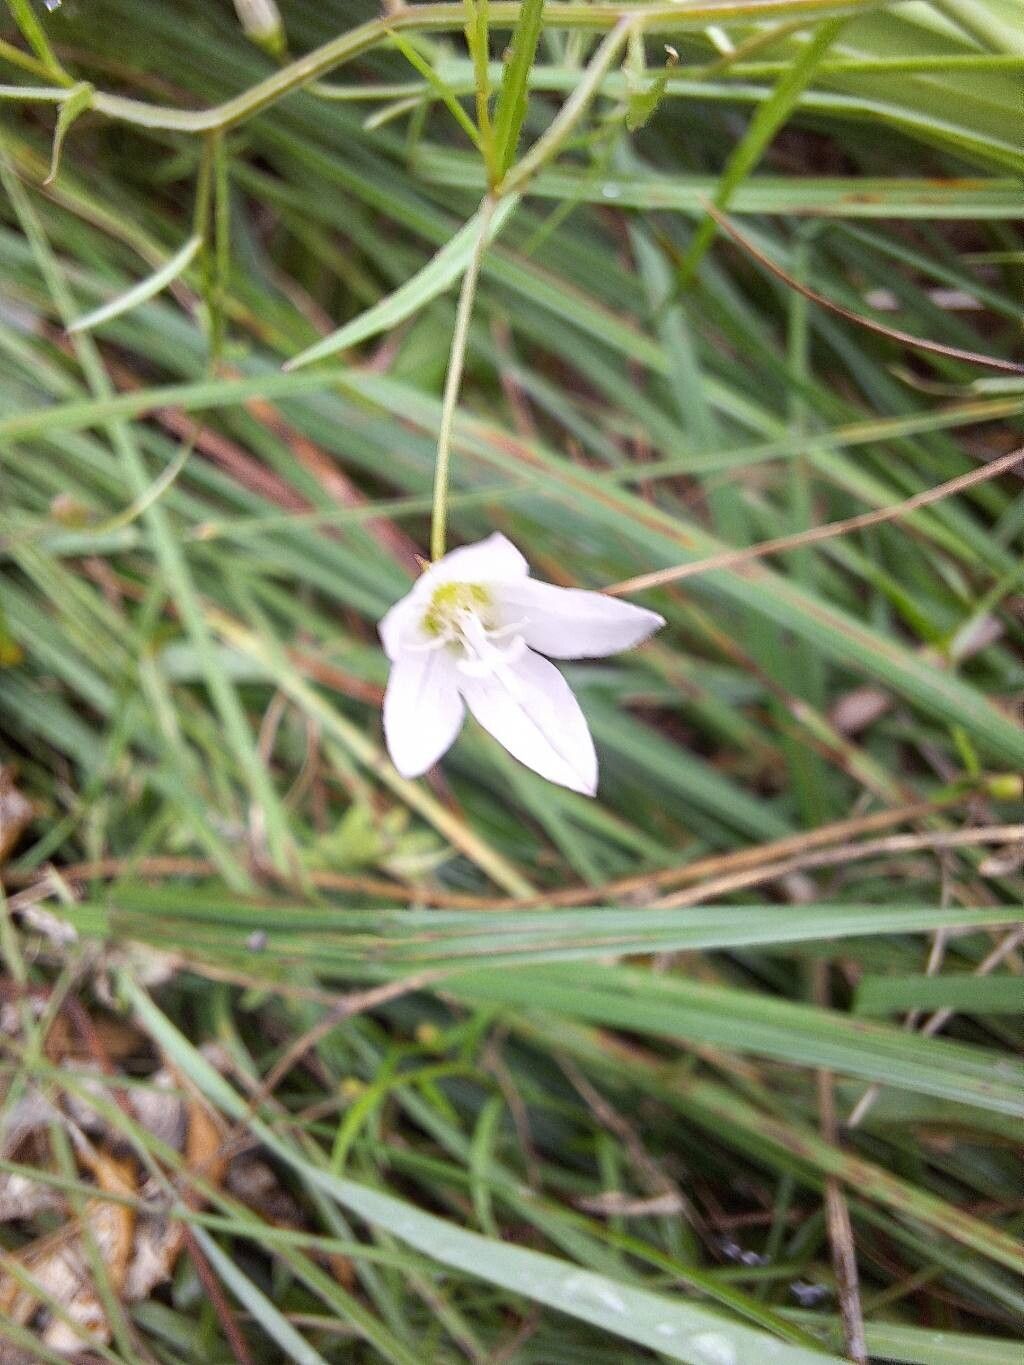
Hello, fellow plant lovers! Pull up a chair, let’s chat about one of my particular favorites: Palustricodon aparinoides. You might know it by its common name, the “Bog Hairs” – a rather whimsical moniker for such a delightful plant. Its delicate, feathery foliage and surprising resilience in damp conditions make it a real showstopper in shady, moist garden corners or as a unique indoor specimen.
Now, the rewarding part. There’s a special kind of joy in coaxing life from a tiny cutting or a division. It’s a tangible connection to the plant world, and with Palustricodon aparinoides, it’s a surprisingly accessible endeavor. While I wouldn’t call it a first-timer’s walk in the park, it’s definitely a project that a patient beginner can absolutely master.
The Best Time to Start
My personal sweet spot for propagating Palustricodon aparinoides is late spring to early summer. This is when the plant is actively growing, pushing out fresh, vibrant new shoots. These young stems have a lot of stored energy, making them more receptive to rooting. You can also have a good deal of success with softwood cuttings taken right after the main flush of spring growth has softened a bit.
Supplies You’ll Need
Gathering your tools before you begin makes everything so much smoother. Here’s what I always have on hand:
- Sharp Pruning Shears or a Clean Knife: For making clean cuts.
- Rooting Hormone: Gel or powder works well. It’s not strictly essential for this plant, but it can give an extra boost.
- Seed Starting Mix or a Well-Draining Potting Mix: I often use a blend of peat moss, perlite, and a little compost. For Palustricodon aparinoides, adding a bit more perlite or coarse sand is beneficial for drainage.
- Small Pots or Propagation Trays: Whatever you have that provides good drainage.
- Clear Plastic Bags or Domes: To create a humid microclimate.
- Watering Can with a Fine Rose: For gentle watering.
- Optional: Heat Mat: This can speed up root development, especially if your home is on the cooler side.
Propagation Methods
Let’s get our hands dirty! Propagating Palustricodon aparinoides is quite straightforward using a couple of my favorite techniques.
Stem Cuttings
This is my go-to method. It’s efficient and you can get several new plants from a single parent.
- Take Your Cuttings: Using your sharp shears, snip off healthy, non-flowering stems that are about 4-6 inches long. Look for stems that are flexible but not floppy. Make your cut just below a leaf node (where a leaf attaches to the stem).
- Prepare the Cuttings: Gently remove the lower leaves from the cutting, leaving just a few at the top. This prevents them from rotting in the soil. If the leaves at the top are very large, you can even cut them in half horizontally to reduce water loss.
- Apply Rooting Hormone: Dip the cut end of each stem into your rooting hormone, tapping off any excess.
- Plant the Cuttings: Fill your pots or trays with your moistened potting mix. Make a small hole with a pencil or your finger and gently insert the cutting. Firm the soil around it.
- Create Humidity: Water gently. Then, cover the pot or tray with a clear plastic bag or dome. This traps in moisture, which is crucial for callusing and root formation.
Division
If you have a mature clump of Palustricodon aparinoides, division is a fantastic way to increase your plant collection and revitalize the parent plant.
- Prepare the Parent Plant: Water the plant thoroughly a day or two before you plan to divide it. This helps to reduce transplant shock.
- Gently Excavate: Carefully dig around the base of the plant and lift the clump from its pot or the ground.
- Separate the Divisions: Gently tease apart the roots and offsets. You can use your fingers or a clean trowel for this. Aim for divisions that have at least a few healthy roots and a couple of shoots. If the roots are very dense and tangled, you can use a clean, sharp knife to cut through them.
- Replant Immediately: Pot up your divisions into fresh, moist potting mix. Water them in well.
The “Secret Sauce” (Pro Tips)
Here are a few things I’ve learned over the years that really make a difference:
- Don’t Let the Leaves Touch the Water (When Water Propagating): If you choose to try water propagation for Palustricodon aparinoides (which can be done, but I find stem cuttings in soil more reliable), ensure that no leaves are submerged. Submerged leaves quickly rot, hindering root development and potentially sickening the whole cutting.
- Bottom Heat is Your Friend: While not absolutely essential when propagating in spring or summer, placing your pots on a gentle heat mat can significantly speed up root formation. It mimics the warmth of the soil at the root zone, encouraging quicker growth. I usually set mine to around 70-75°F (21-24°C).
- A Gentle Breeze is Beneficial: Once your cuttings have rooted and you’re ready to acclimate them, gradually introduce them to air movement. Leaving the plastic bag on for too long can promote fungal issues. Open the bag for increasing amounts of time each day for a week or so before removing it entirely. This helps toughen up your new plants.
Aftercare & Troubleshooting
Once you see new growth appearing, it’s a sign that roots are forming!
- Watering: Keep the soil consistently moist but not waterlogged. As the plant matures, you can reduce watering slightly, allowing the top inch of soil to dry out between waterings.
- Light: New cuttings and divisions prefer bright, indirect light. Too much direct sun can scorch their delicate leaves.
- Fertilizing: Hold off on fertilizing for the first few weeks. Once your new plants are established and showing consistent growth, you can start with a diluted, balanced liquid fertilizer every 4-6 weeks during the growing season.
Now, for the inevitable bumps in the road. The most common sign of trouble is wilting. This can be due to:
- Not Enough Water: If the soil feels dry, give it a good watering.
- Too Much Water: This is more serious and can lead to root rot. The leaves might turn yellow and mushy, and the stem could become soft and black at the soil line. If you suspect rot, it’s best to unpot the cutting, trim away any brown or slimy roots, and repot in fresh, dry mix. You might also need to take a new cutting.
- Lack of Humidity: If your cuttings look crispy and dry, they might need more humidity. Ensure your cover is sealing well, or mist them lightly.
A Little Patience Goes a Long Way
Propagating plants is a beautiful dance between nature and nurture. Don’t be discouraged if not every attempt is a runaway success. With Palustricodon aparinoides, a bit of patience, the right environment, and these tips, you’ll be rewarded with a house full of these charming plants. Enjoy the process, and celebrate every tiny new leaf!
Resource: