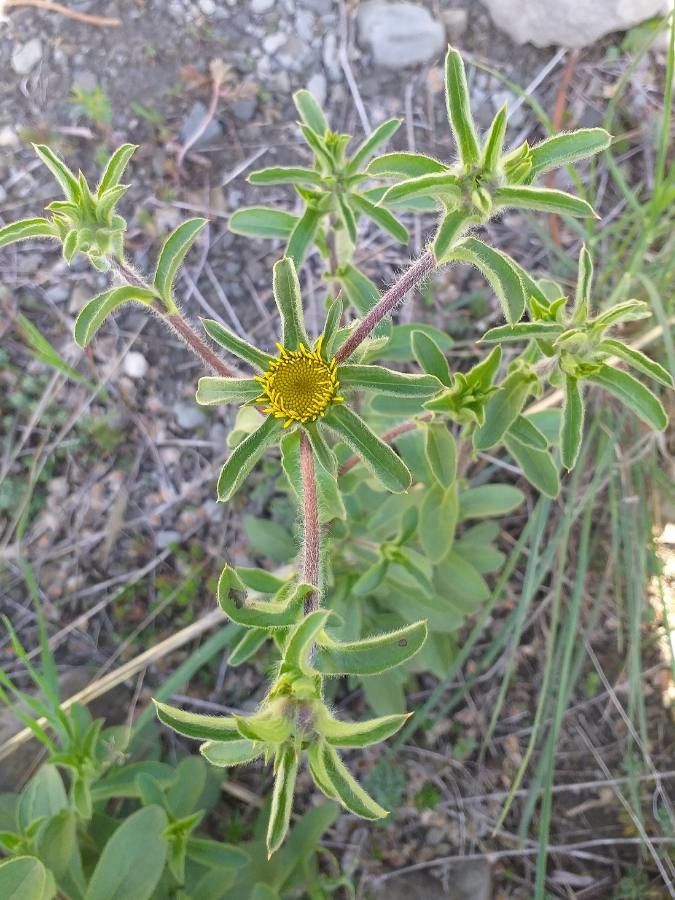
Oh, hello there, fellow garden enthusiasts! It’s so lovely to have you join me. Today, we’re diving into a plant that’s a real joy to have around and even more exciting to multiply: Pallenis spinosa. You might know it by its common name, Spiny Yellow Daisy, or perhaps as a cheerful splash of sunshine in your garden beds. I just adore its bright, happy yellow flowers and those intriguing, spiny bracts. But the real magic, for me, is the satisfaction of creating new life from an existing one. And the good news? If you’re new to propagating, Pallenis spinosa is a forgiving friend, making it a wonderful plant to try your hand at!
The Best Time to Start
My experience tells me the sweet spot for propagating Pallenis spinosa is in late spring to early summer. This is when the plant is in its active growth phase, brimming with vitality. You’re looking for stems that are firm and developing, but not yet flowering. Think of it as capturing that youthful energy. Waiting until after the first flush of bloom might also work, but I find starting with those younger, non-flowering shoots gives them the best head start.
Supplies You’ll Need
Here’s what I always grab before I start snipping and potting:
- Sharp Pruning Shears or a Clean Knife: You want to make a clean cut to avoid crushing the stem, which can hinder rooting.
- Potting Mix: A well-draining mix is crucial. I like to use a blend of regular potting soil with perlite or coarse sand. Some people opt for a seedling starter mix, which is also a good choice.
- Small Pots or Seedling Trays: Clean pots are a must to avoid introducing diseases.
- Rooting Hormone (Optional but Recommended): This isn’t strictly necessary for Pallenis spinosa, as it’s quite eager to root, but it can definitely give your cuttings an extra boost. I usually go for a powder form.
- Watering Can or Spray Bottle: Gentle watering is key.
- Plastic Bag or propagator: To create a humid environment for your cuttings.
Propagation Methods
For Pallenis spinosa, the most straightforward way to propagate is through stem cuttings. It’s wonderfully effective!
- Taking the Cuttings: First, choose a healthy-looking Pallenis spinosa plant. Look for stems that are about 4-6 inches long. Using your clean shears or knife, make a clean cut just below a leaf node. A leaf node is a point on the stem where leaves emerge – this is where the magic happens for rooting.
- Preparing the Cuttings: Gently remove the lower leaves from the cutting, leaving just two or three pairs of leaves at the top. This prevents the submerged leaves from rotting in the soil. If the remaining leaves are quite large, I sometimes snip them in half horizontally to reduce water loss through transpiration.
- Applying Rooting Hormone (If Using): Dip the cut end of the stem into the rooting hormone powder, tapping off any excess.
- Planting the Cuttings: Fill your small pots or trays with your prepared, well-draining potting mix. Moisten the mix thoroughly. Make a small hole in the center of the pot with your finger or a pencil. Insert the prepared cutting into the hole, pushing it down about an inch or so. Gently firm the soil around the base of the cutting.
- Creating Humidity: Water gently, ensuring the soil is moist but not waterlogged. Then, cover the pots with a clear plastic bag or place them inside a propagator. This creates a mini-greenhouse effect, keeping the humidity high, which is vital for cuttings to root.
The “Secret Sauce” (Pro Tips)
Here are a couple of things I’ve learned over the years that really make a difference:
- Avoid Submerged Leaves Like the Plague: Seriously, this is a biggie. Any leaves that are below the soil line will rot, and that rot can travel up the stem, dooming your cutting before it even has a chance to start rooting. Keep them out of the soil, or out of the water if you opt for water propagation.
- The Magic of Bottom Heat: While Pallenis spinosa isn’t incredibly fussy, giving your cuttings a little warmth from below can encourage roots to develop much faster. A good old heat mat designed for seedlings works wonders. I usually place my trays on one, especially if the ambient temperature in my greenhouse or on my windowsill isn’t consistently warm.
Aftercare & Troubleshooting
Once your cuttings are planted and covered, find them a bright spot, but avoid direct, harsh sunlight, which can scorch the tender new shoots. Keep the soil consistently moist – check it every day or two, and mist if necessary, especially if you don’t have a lid on your propagator.
You’ll know your cuttings are rooting when you see new leaf growth appearing from the top. This usually takes a few weeks, but don’t panic if it takes a little longer! You can also gently tug on a cutting – if there’s resistance, it means roots have formed.
The most common issue you might encounter is rot. If you see your cutting turning mushy or blackening, it’s usually a sign of too much moisture and not enough air circulation, or potentially a fungal issue. In this case, it’s probably best to discard it and start again, and perhaps re-evaluate your watering habits or soil mix.
A Encouraging Closing
Propagating plants is a journey of patience and observation, and with Pallenis spinosa, it’s a wonderfully rewarding one. Don’t be discouraged if your first few attempts aren’t perfect – gardening is all about learning! Just enjoy the process of nurturing these little green wonders, and soon you’ll have a whole colony of these sunny blooms to share with friends, or just keep all to yourself. Happy planting!
Resource:
https://identify.plantnet.org/k-world-flora/species/Pallenis%20spinosa%20(L.)%20Cass./data