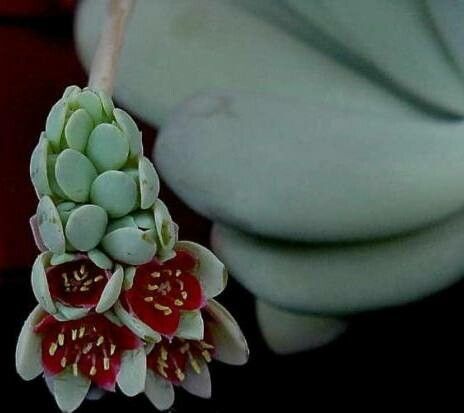
Well hello there, fellow plant lover! It’s so lovely you’ve stopped by. Today, we’re going to dive into the wonderful world of Pachyphytum bracteosum, those utterly charming, plump-leaved succulents that look like little stone roses. Their dusty, silvery leaves have such a unique appeal, don’t they? And the best part? They’re incredibly rewarding to propagate. If you’re new to the succulent scene, you’ll be happy to know that Pachyphytum generally plays nicely with beginners when it comes to making more of them. It’s a journey I’ve taken many times, and I’m always thrilled with the results.
The Best Time to Start
For the highest success rate with your Pachyphytum, I always recommend waiting until spring or early summer. This is when the plant is actively growing. You’ll have more energy to draw from, whether you’re taking cuttings or gently separating offsets. Trying to propagate when the plant is dormant, typically in the cooler, darker months, just doesn’t give them the boost they need. Think of it like giving them the best possible start when the sunshine is abundant.
Supplies You’ll Need
Gathering your tools before you begin is half the battle! Here’s what I keep handy:
- Sharp, clean pruning shears or a sharp knife: For making clean cuts.
- Rooting hormone (optional but recommended): Especially for stem cuttings. It really gives them a leg up.
- Well-draining potting mix: A cactus or succulent mix is perfect. I often mix in extra perlite or pumice to ensure it drains super fast.
- Small pots or seed trays: Something appropriately sized for your cuttings or offsets.
- Gloves (optional): Some people find handling succulents a bit sticky.
- Watering can or spray bottle: For gentle watering.
Propagation Methods
Pachyphytum bracteosum is a trooper and can be coaxed into new life through a couple of simple methods. My personal favorites are stem cuttings and leaf propagation.
Stem Cuttings
This is my go-to!
- Take the Cutting: Find a healthy stem with at least a few leaves. Using your clean shears or knife, cut the stem just above a leaf node. Aim for a cutting that’s about 2-4 inches long.
- Let it Callous: This step is crucial. Place your cutting on a dry surface in a bright, indirect light spot for 2-7 days. You want the cut end to dry out and form a protective scab, or callous. This prevents rot when you plant it.
- Planting: Once calloused, you can optionally dip the cut end in rooting hormone. Then, gently insert the calloused end into your well-draining potting mix. Don’t bury it too deep, just enough so it stands upright.
- Watering (Sparingly!): Wait for about a week before watering for the first time. You want the soil to be barely moist. I usually give mine a light misting.
Leaf Propagation
This method is wonderfully simple, though it can take a bit longer.
- Select Healthy Leaves: Choose plump, firm leaves from the mother plant.
- Remove the Leaf: Gently twist or wiggle the leaf from the stem. You want to get as much of the leaf base attached as possible. If it tears or is ragged, it might not be as successful.
- Callous (Again!): Just like with stem cuttings, let the leaf sit in a bright, indirect light spot for 1-3 days until the leaf base has calloused over.
- Place on Soil: Lay the calloused leaves on top of your well-draining potting mix. You can lay them flat or gently press the calloused end into the soil. Don’t bury them.
- Mist Gently: Lightly mist the soil every few days, just enough to keep it from drying out completely. You’re encouraging the roots to seek moisture.
The “Secret Sauce” (Pro Tips)
Here are a few little tricks I’ve picked up over the years that make all the difference:
- Don’t Let Leaves Touch Water (During Leaf Propagation): When you’re misting for leaf propagation, try your best to avoid getting the leaves themselves soaked, especially from water sitting in the tray. This is a surefire way to encourage rot. You want the energy and moisture to come from the calloused end seeking the soil.
- Bottom Heat is Your Friend (For Stem Cuttings): If you can, place your pots of stem cuttings on a gentle heating mat. This warm environment encourages root development much faster than ambient room temperature. It’s like giving them a little warm hug from below, speeding up the rooting process considerably.
- Patience is Truly a Virtue (Especially with Leaves): Leaf propagation can feel like an eternity sometimes. Don’t get discouraged if you don’t see tiny plantlets forming immediately. Some leaves take weeks, even months, to show signs of life. Just keep them in good conditions, and they’ll surprise you.
Aftercare & Troubleshooting
Once you spot little roots or tiny baby plants emerging, you’re well on your way!
- Watering: Continue to water sparingly once you see roots. Allow the soil to dry out between waterings. As the new plant grows larger, you can gradually increase watering frequency, but always err on the side of underwatering rather than overwatering for succulents.
- Light: Keep your new propagations in bright, indirect light. Direct sun can be too harsh for these vulnerable little ones. Once they’re more established, you can slowly acclimate them to more direct sunlight.
Now, what if things go wrong? The most common issue is rot. If you see a leaf turning mushy and translucent, or a stem cutting becoming soft and black at the cut end, it’s a sign of too much moisture. If you catch it early, you might be able to save it by cutting away the rotted parts and letting the healthy section callous again, but often it’s best to start fresh. Yellowing, shriveling leaves on a cutting that hasn’t calloused properly can also indicate it’s not going to root.
A Encouraging Closing
Seeing a new plant emerge from a single leaf or a small cutting is one of the most satisfying experiences in gardening. It’s a testament to nature’s resilience and your own growing skills. Don’t be afraid to experiment, and remember to be patient. The process itself is as beautiful as the outcome. Happy propagating, and enjoy watching your Pachyphytum family grow!
Resource: