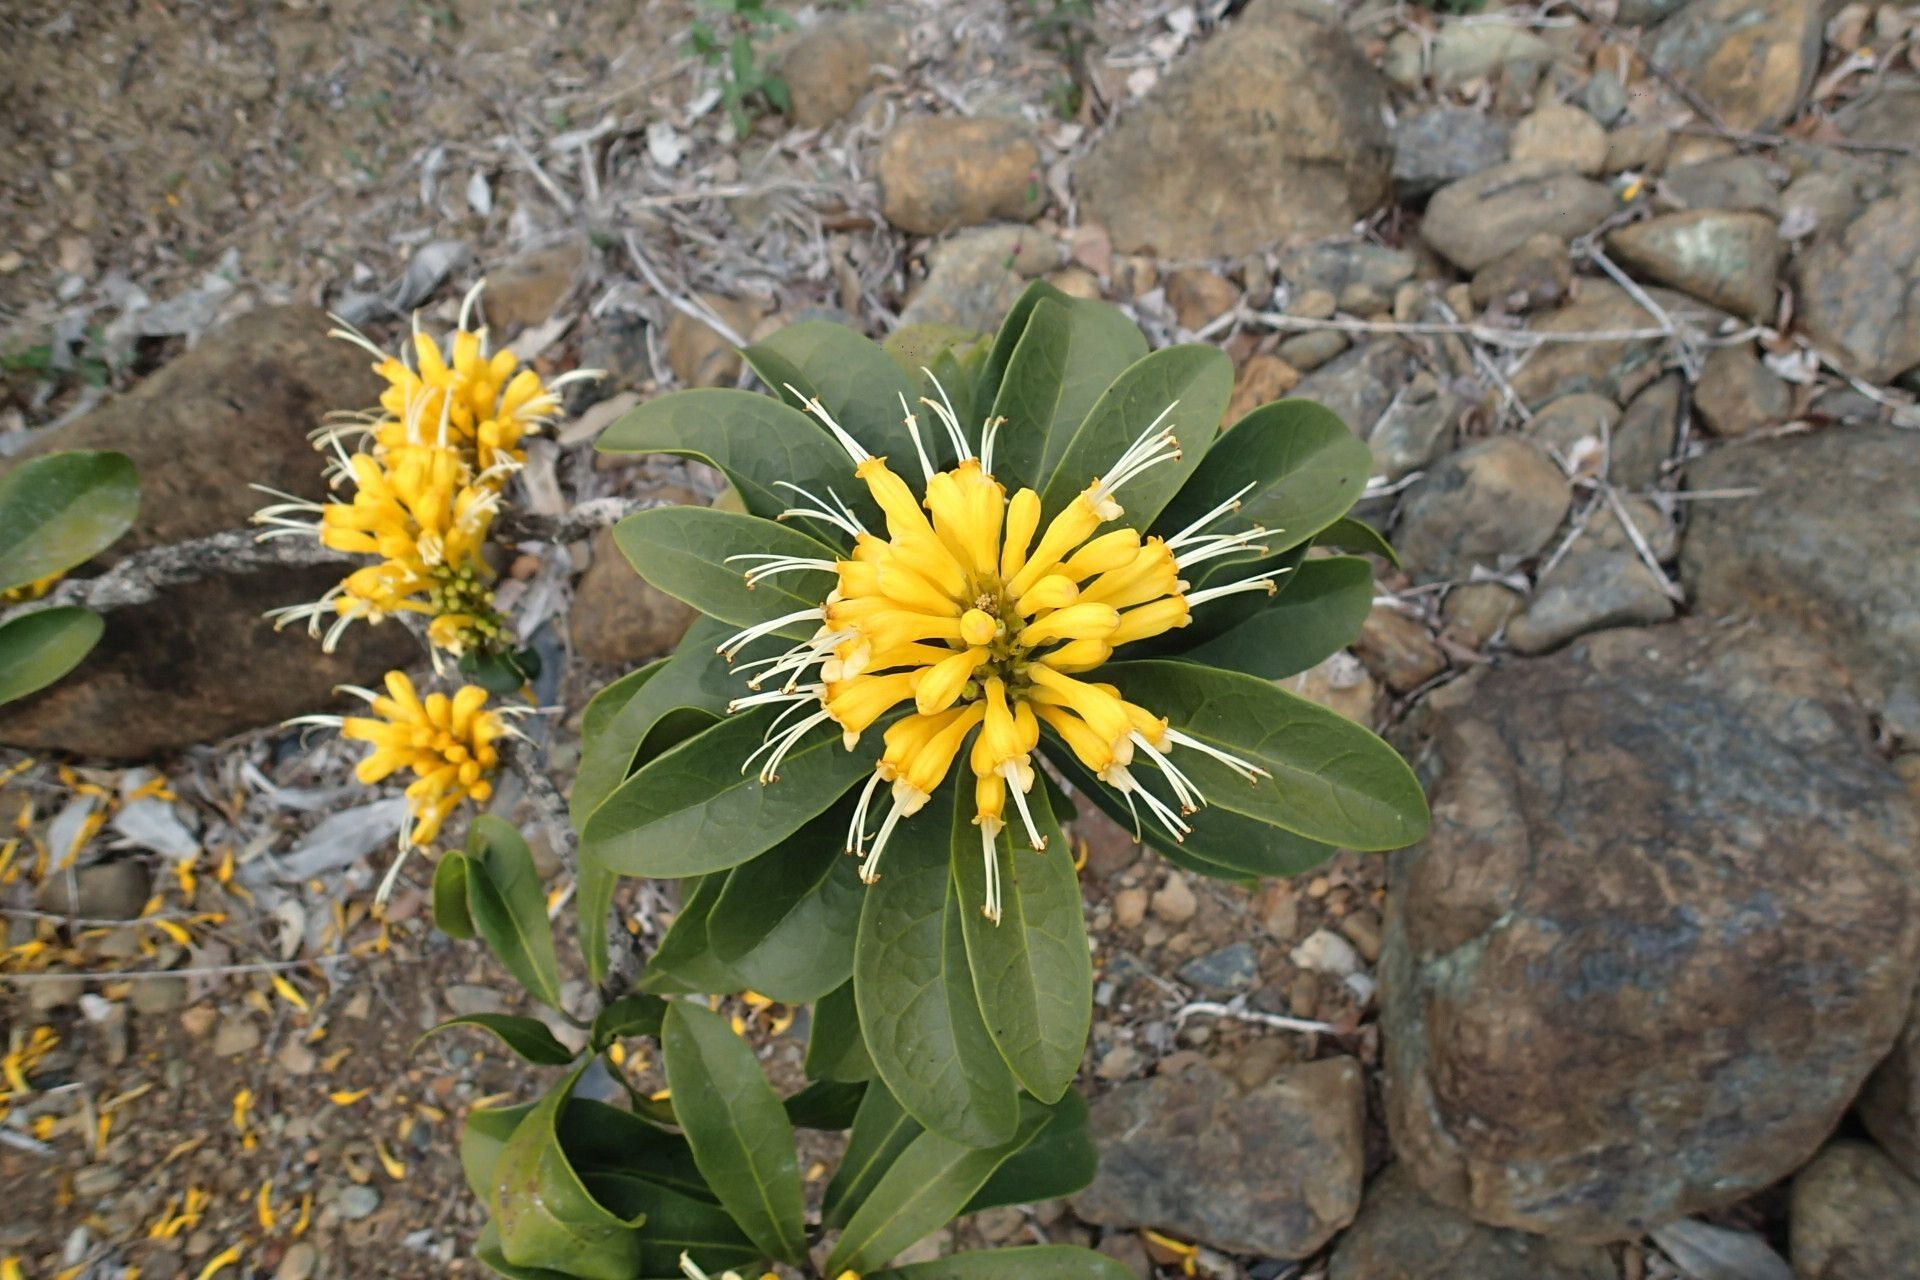
Oh, hello there, fellow plant enthusiast! Pull up a chair, I’ve got a lovely cup of something warm brewing, and I’m so excited to chat with you today about a truly delightful plant: Oxera gmelinoides. You know, the one with those stunning, often vibrant, bell-shaped flowers that seem to just sing in the garden? It’s such a joy to see them bloom, isn’t it? And the best part? You can easily bring that joy into your own home or garden by propagating your own. The satisfaction of watching a tiny cutting transform into a thriving new plant is just chef’s kiss. Now, for beginners, I’d say Oxera gmelinoides is a moderately easy plant to propagate. A little bit of patience and the right approach will get you lovely results.
The Best Time to Start
When it comes to getting the best bang for your buck with propagation, timing is everything. For Oxera gmelinoides, I find that late spring or early summer, right after the plant has finished its main flush of flowering, is absolutely ideal. This is when the plant is in active growth, and the new stems have that perfect bit of pliability and energy needed to root. Waiting until after flowering also means you’re not sacrificing any precious blooms!
Supplies You’ll Need
Before we get our hands dirty, let’s gather our trusty tools. Having everything ready makes the whole process so much smoother.
- Sharp Pruning Shears or a Clean Knife: Essential for making clean cuts.
- Rooting Hormone (Optional, but Recommended): A good quality rooting hormone can significantly speed up the process.
- Small Pots or Seed Trays: Clean ones are a must to prevent disease.
- Well-Draining Potting Mix: I usually mix equal parts peat moss or coco coir with perlite or coarse sand. This ensures good aeration and prevents that dreaded waterlogging.
- Plastic Bags or a Propagation Dome/Cover: To create that humid environment young cuttings crave.
- Watering Can or Spray Bottle: For gentle watering.
- Labels and a Marker: So you remember what you planted where!
Propagation Methods
Let’s dive into the fun part! Here are the most reliable ways I’ve found to multiply my Oxera gmelinoides.
Stem Cuttings: My Go-To Method
This is usually my preferred method for Oxera gmelinoides. It’s straightforward and yields great results.
- Select Your Source Material: Look for healthy, mature stems that are not flowering. You want stems that are somewhat woody but still flexible – not brand-new, floppy growth.
- Take the Cuttings: Using your clean shears or knife, take cuttings about 4-6 inches long. Make a cut just below a leaf node (where a leaf attaches to the stem).
- Prepare the Cuttings: Gently remove the lower leaves, leaving just a few at the top. If the leaves are quite large, I sometimes cut them in half horizontally to reduce water loss through transpiration.
- Apply Rooting Hormone (Optional): Dip the cut end of each stem into your rooting hormone. Tap off any excess.
- Plant the Cuttings: Fill your clean pots with your prepared potting mix. Make a small hole with a pencil or your finger, and insert the cut end of the stem, ensuring the lower leaf nodes are buried. Firm the soil gently around it.
- Water Gently: Water just enough to moisten the soil. You don’t want it soggy.
- Create a Humid Environment: Place the pot inside a clear plastic bag, or cover it with a propagation dome. Make sure the leaves aren’t touching the plastic. You can secure the bag around the pot with a rubber band.
Water Propagation: A Visual Delight
This method is wonderful for watching the roots develop, although I find stem cuttings in soil can sometimes produce stronger, more resilient plants initially.
- Take and Prepare Cuttings: Follow steps 1 and 2 from the stem cutting method.
- Place in Water: Fill a clean jar or glass with room-temperature water. Place the prepared stem cuttings in the water, ensuring that the leaf nodes you removed are submerged but the remaining leaves are above the water line.
- Find a Bright Spot: Place the jar in a bright location, but out of direct, harsh sunlight.
- Change Water Regularly: This is crucial! Change the water every 2-3 days to keep it fresh and prevent bacterial growth.
- Wait for Roots: You should start to see tiny white roots appear in a few weeks. Once the roots are about an inch long, it’s time to transplant them into soil.
The “Secret Sauce” (Pro Tips)
Here are a couple of things I’ve learned over the years that really seem to make a difference for Oxera cuttings:
- Keep Those Leaves Dry! In water propagation, and even with cuttings in pots covered by plastic, preventing the leaves from touching the water or condensation build-up is key. This dramatically reduces the risk of rot and fungal diseases. If you see condensation pooling heavily on the leaves, gently dab it off with a paper towel or slightly vent the plastic bag for a while.
- The Magic of Bottom Heat (If You Have It!): If you happen to have a seedling heat mat, it’s a game-changer! Placing your pots of cuttings on a gentle heat mat provides warmth to the base of the stems. This warmth encourages the development of new roots much faster, giving your cuttings that extra boost they need.
Aftercare & Troubleshooting
Once you see those glorious roots poking out of the bottom of the pot (or a good inch long in water), congratulations! It’s time to nurture your new little Oxera.
- Gradual Acclimation: If you’ve been using a plastic bag or dome, gradually acclimate your new plant to normal humidity. Start by removing the cover for a few hours each day, extending the time over a week or so.
- Light and Water: Once potted, place your new plant in bright, indirect light. Water when the top inch of soil feels dry to the touch.
- Common Issues: The most common sign of trouble is wilting and eventual blackening of the stem, often from too much moisture and poor air circulation. This is root rot, and unfortunately, it’s usually fatal for that particular cutting. On the flip side, if your cuttings look healthy but just aren’t rooting after a good long while (several weeks), they might just need more time, or perhaps the conditions weren’t quite right. Don’t be discouraged if some don’t make it – that’s part of the learning process!
A Warm Farewell
Propagating Oxera gmelinoides can be incredibly rewarding. Remember to be patient with your little cuttings. Nature takes its course, and sometimes things just need a little extra time. Enjoy the journey of watching them grow, and soon you’ll have a whole collection of these beautiful blooming beauties to share or enjoy yourself. Happy growing!
Resource:
https://identify.plantnet.org/k-world-flora/species/Oxera%20gmelinoides%20S.Moore/data