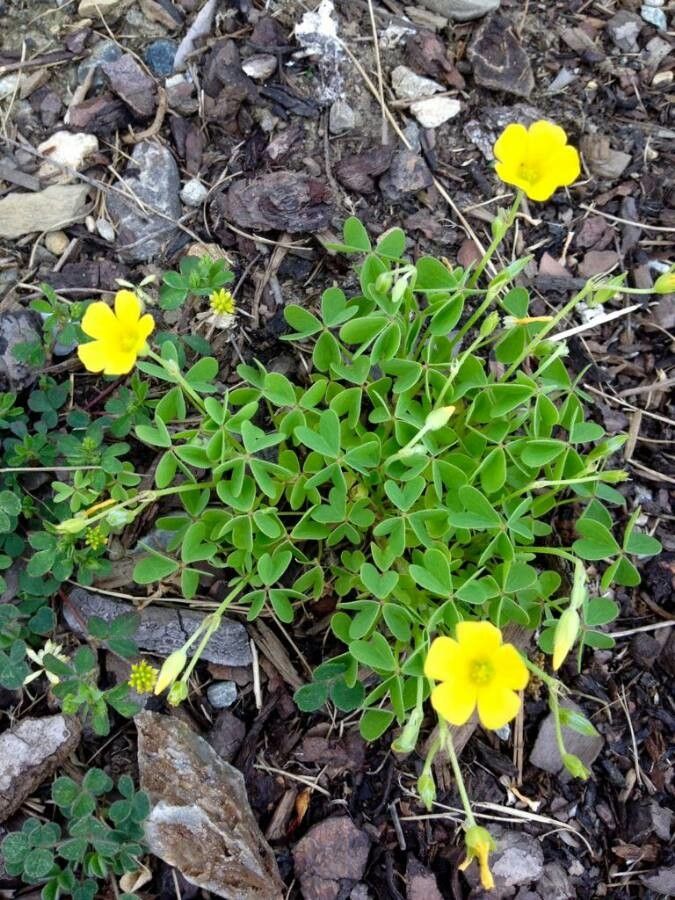
Hello there, fellow plant lovers! It’s so good to have you join me today. We’re going to chat about something I absolutely adore: propagating Oxalis dillenii. You know, those charming little trifoliate leaves that unfurl so beautifully, often with that delightful clover-like charm? They bring such a cheerful vibe to any space, and the thought of creating more of them from a single plant is just pure gardening magic.
And the best part? If you’re new to this whole propagating adventure, Oxalis dillenii is a wonderfully forgiving plant to start with. It’s a real joy to see those tiny roots begin to form, and before you know it, you’ll have a whole new collection of these beauties.
When’s the Perfect Moment to Get Started?
For Oxalis dillenii, I’ve found spring to be the absolute best time to begin. This is when the plant is usually coming out of its resting period and gearing up for active growth. You’ll see lots of new shoots and lush foliage, which means it has plenty of energy to spare for making new plants. Aim for a time when your existing plant is looking healthy and vigorous.
Gather Your Gardening Arsenal
Before we dive in, let’s make sure you have everything you need. Think of it as packing for a successful plant-making expedition!
- A well-draining potting mix: I like to use a blend of peat moss and perlite or a commercially available propagator mix. Drainage is key!
- Sharp pruning shears or scissors: Clean tools are essential to prevent the spread of any potential diseases.
- Small pots or seed trays: Anything that can hold your new babies and allow for good air circulation.
- Watering can or spray bottle: For gentle watering.
- Optional: Rooting hormone: While not strictly necessary for Oxalis dillenii, it can give your cuttings an extra boost.
- Optional: A clear plastic bag or dome: To create a humid environment for cuttings.
Let’s Get Planting: Propagation Methods
Oxalis dillenii is quite flexible, but I find two methods work exceptionally well for me.
1. Stem Cuttings: The Classic Approach
This is my go-to method, and it’s super effective.
- First, select a healthy stem from your mature Oxalis dillenii. Look for one that’s got a bit of length and a few sets of leaves.
- Using your sharp pruning shears,carefully cut the stem just below a leaf node. A leaf node is where a leaf attaches to the stem; this is where roots will likely emerge. Aim for cuttings that are about 3-4 inches long.
- Gently remove the lower leaves from the cutting, leaving just a few at the top. This prevents them from rotting once you’ve planted.
- If you’re using it, dip the cut end into rooting hormone. Tap off any excess.
- Now, plant the cutting into your prepared, well-draining potting mix. Make sure the leaf nodes you exposed are pushed gently into the soil.
- Water lightly to settle the soil around the cutting.
- To keep humidity levels high, I like to cover the pot with a clear plastic bag or a small propagator dome. Make sure the leaves aren’t touching the plastic. It’s like giving them their own mini greenhouse!
2. Division: Spreading the Love
This method is fantastic if your Oxalis dillenii plant is looking a bit crowded in its pot.
- Gently remove the entire plant from its pot. Be as gentle as you can with the roots.
- Carefully shake off any excess soil so you can clearly see the root structure.
- You’ll often see that the plant has formed little clumps or multiple crowns. Gently pull these clumps apart with your hands. If they’re stubborn, you can use a clean knife to slice through any matted roots, but always try to keep as much of the root system intact as possible.
- Replant each divided section into its own pot filled with fresh, well-draining potting mix.
- Water gently and place them in a bright spot out of direct sun.
My Little “Secret Sauce” Tips
After years of playing with plants, I’ve picked up a few tricks that seem to make all the difference.
- When doing water propagation (which I sometimes do with Oxalis cuttings before planting), make sure no leaves are submerged in the water. Any foliage touching the water will inevitably turn mushy and rot, which is the last thing we want to encourage! Just the stem should be in the water.
- For stem cuttings, don’t underestimate the power of warmth. Placing your pots on a heat mat specifically designed for seedlings can dramatically speed up root development. It’s like giving them a cozy spa day!
Love and Patience: Aftercare and What to Watch For
Once your cuttings or divisions are in their new homes, it’s time for a bit of tender loving care.
Keep the soil consistently moist but not waterlogged. A good rule of thumb is to water when the top inch of soil feels dry to the touch. As I mentioned, maintaining some humidity is beneficial, so keep that plastic bag on or mist the foliage occasionally, especially if your home tends to be dry.
You’ll know your cuttings are taking root when you see new growth appearing. Don’t be discouraged if it takes a few weeks; patience is a gardener’s best friend! For divisions, they should show signs of revitalization within a week or two.
If you notice yellowing leaves or soft, mushy stems, it’s a sign of overwatering or rot. Don’t panic! You might need to trim away any affected parts and allow the soil to dry out a bit more. Sometimes, a cutting just doesn’t make it, and that’s okay. It’s part of the learning process.
Happy Propagating!
See? It’s really quite straightforward. Propagating Oxalis dillenii is a wonderfully rewarding way to expand your plant collection and share these delightful plants with friends. Be patient with yourself and the process, and most importantly, enjoy every step of watching new life emerge. Happy gardening!
Resource:
https://identify.plantnet.org/k-world-flora/species/Oxalis%20dillenii%20Jacq./data