Oh, hello there! Come on in and pull up a chair. I’ve got the kettle on, and today, we’re going to talk about a truly special plant: Ourisia coccinea.
A Touch of Scarlet Magic: Why You’ll Love Propagating Ourisia Coccinea
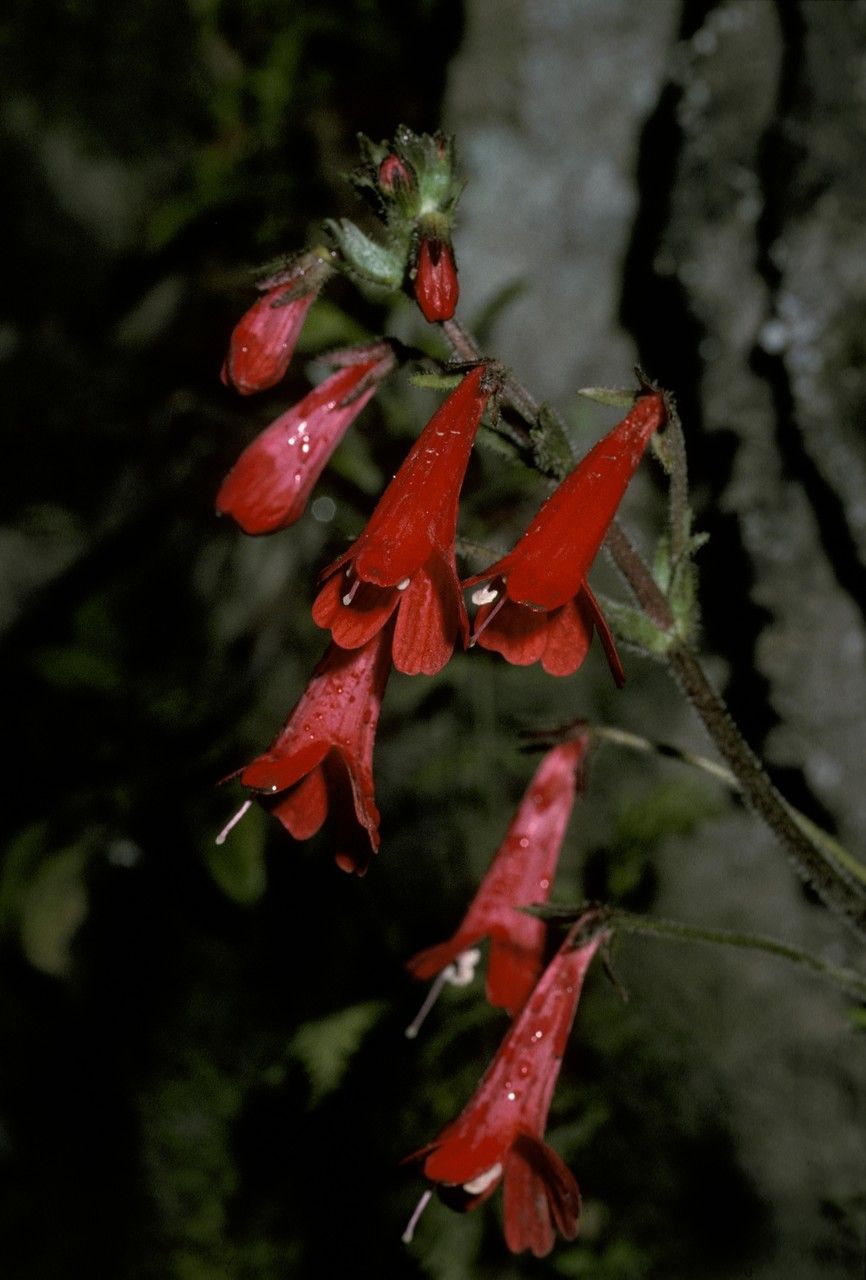
If you adore a splash of vibrant color in your shady corners, then Ourisia coccinea, also known as the Chilean Firecracker plant, is probably already on your radar. Its bright red, tubular flowers are like little sparks of joy, especially when they appear in late spring and summer. And the best part? Propagating it is a wonderfully rewarding experience. It’s not the absolute easiest plant for a complete beginner, but with a little care and attention, you can be well on your way to a whole collection of these beauties.
The Perfect Moment: When to Get Started
The sweet spot for propagating Ourisia coccinea is typically late spring or early summer, just as the plant is actively growing and before the heat of high summer really kicks in. You want to work with healthy, vigorous stems. If you can catch it right after it’s finished its main flush of flowering, that’s often ideal as well.
Gathering Your Gear: What You’ll Need
Before we dive in, let’s make sure you have everything at hand. It’s always better to be prepared!
- Sharp Pruning Shears or a Craft Knife: Clean, sharp tools are essential for making neat cuts that heal well.
- Rooting Hormone (Optional but Recommended): This can really give your cuttings a boost. Look for a powder or gel specifically for stem cuttings.
- Potting Soil Mix: A well-draining mix is crucial. I like to use a blend of peat moss, perlite, and a bit of compost. Or, you can buy a good quality seed-starting mix.
- Small Pots or Trays: Clean pots are a must to prevent disease. Small ones are perfect for cuttings.
- Watering Can or Spray Bottle: Gentle watering is key.
- Plastic Bags or a Propagator Lid: To create a humid environment.
- Gravel or Small Stones (for water propagation): To help keep cuttings upright.
Branching Out: Propagation Techniques
Ourisia coccinea is quite obliging when it comes to making more of itself. Here are a couple of my favorite methods:
Stem Cuttings: The Most Reliable Way
This is my go-to method. It’s straightforward and usually yields the best results.
- Select Your Stems: Look for healthy, non-flowering stems that are about 4-6 inches long. You want them to be somewhat firm, not floppy, but not old and woody either.
- Make the Cut: Using your sharp shears or knife, take cuttings just below a leaf node. A leaf node is a point on the stem where leaves emerge. This is where the magic happens, as it’s rich in growth hormones.
- Prepare the Cutting: Remove the lower leaves, leaving just a couple of leaves at the tip. This prevents leaves from rotting in the soil. If the leaves are very large, you can even cut them in half horizontally.
- Apply Rooting Hormone (Optional): Dip the cut end into your rooting hormone, tapping off any excess.
- Plant Your Cuttings: Fill your clean pots with your well-draining soil mix. Make a small hole with your finger or a pencil and insert the cutting, firming the soil gently around it. You can plant several cuttings in one pot, spaced a couple of inches apart.
- Water Gently: Water thoroughly, but avoid waterlogging.
- Create Humidity: Cover the pot with a plastic bag or place it in a propagator with a lid. Make sure the leaves don’t touch the plastic.
Water Propagation: A Visual Treat (with a Caveat)
While you can propagate Ourisia in water, I find it a bit trickier for this particular plant. If you want to give it a go, here’s how:
- Take Cuttings: Prepare cuttings just as you would for stem cuttings, removing all but the top leaves.
- Place in Water: Put the cuttings in a clean jar or glass filled with water. You can add a few small pebbles or gravel to the bottom to help support the cuttings more upright, ensuring the leaf nodes are submerged but the leaves stay out of the water.
- Change Water Regularly: Change the water every other day to keep it fresh and prevent any bacterial growth.
- Wait for Roots: You should see tiny white roots forming from the leaf nodes. Once the roots are about an inch long, you can carefully transplant them into your potting mix.
The “Secret Sauce”: My Insider Tips
After years of playing with plants, a few little tricks always seem to make a difference.
- Bottom Heat is Your Friend: While not strictly necessary, placing your pots on a heated propagator mat can significantly speed up root development, especially if your home is on the cooler side. The gentle warmth encourages root growth.
- Don’t Let Them Dry Out (But Don’t Drown Them!): This is a delicate balance. Keep the soil consistently moist but never soggy. I like to check the moisture by feeling the weight of the pot or by gently poking the soil. If it feels dry an inch down, it’s time for a drink.
- Patience is a Virtue: Seriously. Some cuttings root in a few weeks, others can take months. Don’t give up too soon! Regular checks are good, but don’t be constantly poking and prodding.
Aftercare and What to Watch For
Once you see new growth appearing, or if you gently tug on a cutting and feel resistance, it’s a good sign that roots have formed!
- Acclimatize: Gradually introduce your new cuttings to less humid conditions. If they were in a propagator, remove the lid for a few hours each day for a week before removing it entirely.
- Potting Up: Once they have a good root system and are showing healthy new growth, you can carefully transplant them into their own small pots.
- Troubleshooting Rot: The most common problem is rot. This usually happens when the soil is too wet and there’s not enough air circulation, or if you used dirty tools or pots. If you see a cutting go black and mushy, unfortunately, it’s likely too late for that one. Remove it immediately to prevent it from affecting others. In water propagation, cloudy or smelly water is a sure sign of bacteria.
Happy Planting!
There you have it – a little journey into the world of propagating Ourisia coccinea. It’s a process that connects you more deeply with your plants, and there’s nothing quite like the satisfaction of nurturing a new life from just a cutting. Be patient with yourself and your little green charges. Enjoy the magic of watching them grow – and soon, you’ll have scarlet fireworks dancing in your garden!
Resource:
https://identify.plantnet.org/k-world-flora/species/Ourisia%20coccinea%20(Cav.)%20Pers./data