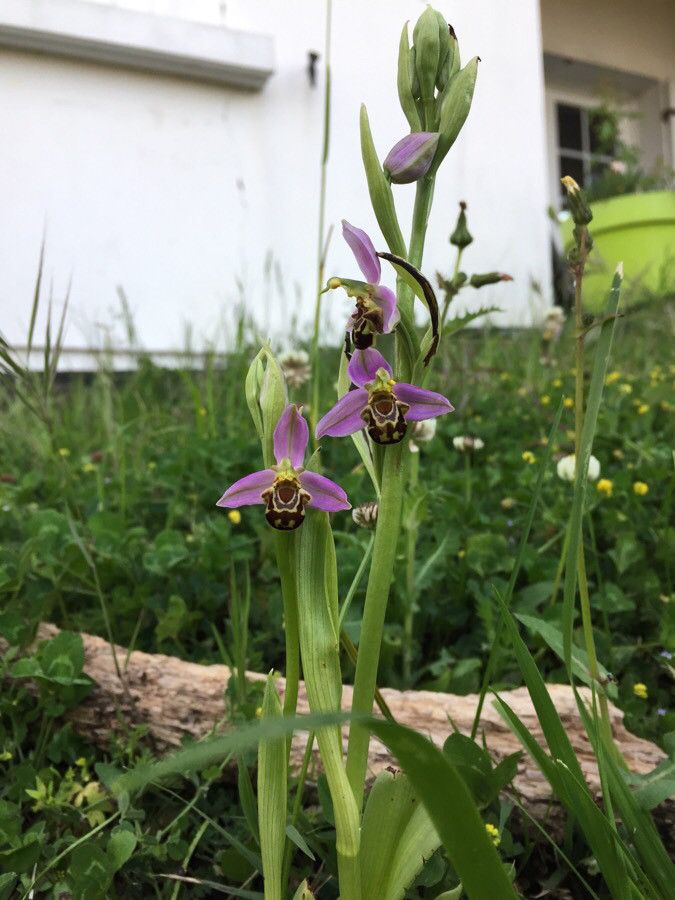
Oh, the Bee Orchid! Ophrys apifera. Just saying the name conjures up images of these delicate, almost whimsical blooms that so expertly mimic a female bee. They’re a wonder to behold in the wild, and honestly, bringing one to life in your own garden is a truly special feeling. You’ve likely seen them and thought, “Wow, I wish I could have that!” Well, I’m here to tell you, you absolutely can. Propagating Ophrys apifera isn’t a walk in the park, mind you, but with a little patience and the right approach, it’s a journey I’m excited to share with you. While it’s not the easiest plant for a complete beginner, those with some experience in coaxing life from cuttings or divisions will find it a rewarding challenge.
The Best Time to Start
For Ophrys apifera, timing is everything. We’re looking at late summer to early autumn, after the plant has finished flowering and its energy is redirecting towards its underground tuber. This is when you’ll find the dormant tubers ready for a little gentle coaxing. Wait until the foliage has mostly withered and yellowed – that’s your signal that the plant is settling down for its rest period.
Supplies You’ll Need
Gathering your tools beforehand makes the whole process smoother. Here’s what I recommend having on hand:
- A clean, sharp knife or small trowel: For separating tubers. Sterilize it with rubbing alcohol before and after use.
- Well-draining potting mix: This is crucial! A mix designed for succulents or a blend of equal parts perlite, coarse sand, and peat moss works wonders. We want excellent drainage to prevent rot.
- Small pots or trays: With drainage holes, of course.
- Watering can with a fine rose or a spray bottle: For gentle watering.
- Rooting hormone (optional, but recommended): A powder or gel can give your cuttings a little boost.
- A sheltered spot: Out of direct sun and harsh weather, especially in the early stages.
Propagation Methods
While Ophrys apifera is primarily propagated by division of its tubers, which is our focus here, a word about seed – it’s incredibly tricky due to complex mycorrhizal relationships and not something I’d advise for home growers aiming for quick results. So, we’ll concentrate on the tubers.
Divisions: Our Best Bet
- Locate the Tubers: Gently excavate around the base of your Ophrys apifera plant in late summer or early autumn, as mentioned. You’ll likely find one or more fleshy tubers. Don’t disturb them more than necessary.
- Careful Separation: Using your sterilized knife or trowel, carefully separate the tubers. If a larger tuber has smaller offsets attached, you can gently twist or cut them free. Aim for tubers that are about the size of a small marble or larger.
- Treat (Optional but Good Practice): If you’re using a rooting hormone, lightly dip the cut end of each tuber into the powder or gel. Tap off any excess. This helps to seal the wound and encourage root development.
- Potting Up: Fill your small pots with your chosen well-draining mix. Make a small indentation in the center of the soil.
- Planting the Tuber: Place the tuber in the indentation, ensuring the growing point (where the shoots emerged) is facing upwards. Bury it just beneath the surface of the soil, about half an inch deep.
- Initial Watering: Water very gently. You want the soil to be moist but not waterlogged. A light misting from a spray bottle is often best initially.
The “Secret Sauce” (Pro Tips)
Here are a couple of little tricks I’ve learned over the years that can make a big difference:
- Don’t Overwater! This cannot be stressed enough with orchids, and Ophrys apifera is no exception. They thrive on being on the drier side between waterings. Soggy soil is the fastest way to invite rot and lose your precious divisions. Let the top inch of soil dry out before watering again.
- Embrace the Dormancy: Remember, these are orchids with a natural dormancy period. Be patient. You might not see much activity for weeks, or even a couple of months. This is normal! They are working underground to establish themselves.
Aftercare & Troubleshooting
Once your divisions are potted, find them a cool, bright spot with no direct sunlight. They prefer a bit of fresh air, so good ventilation is important. Water sparingly, only when the soil feels dry to the touch.
The most common issue you might encounter is rot. If you see your tuber turning mushy, black, or developing mold, it’s likely due to excessive moisture. Sadly, once rot sets in, it’s very difficult to save the division. Your best defense is prevention: excellent drainage and a light hand with the watering can. If a tuber doesn’t sprout after a few months, don’t despair too quickly; sometimes they just need a little extra time to wake up.
A Little Patience Goes a Long Way
Propagating Ophrys apifera is a journey of observation and patience. It might take a season for your divisions to truly establish and show their full glory, but the reward of seeing these fascinating little bee mimics bloom, knowing you helped them come to life, is absolutely worth it. So, get your hands dirty, trust your instincts, and enjoy the magic of growing something truly unique. Happy gardening!
Resource:
https://identify.plantnet.org/k-world-flora/species/Ophrys%20apifera%20Huds./data