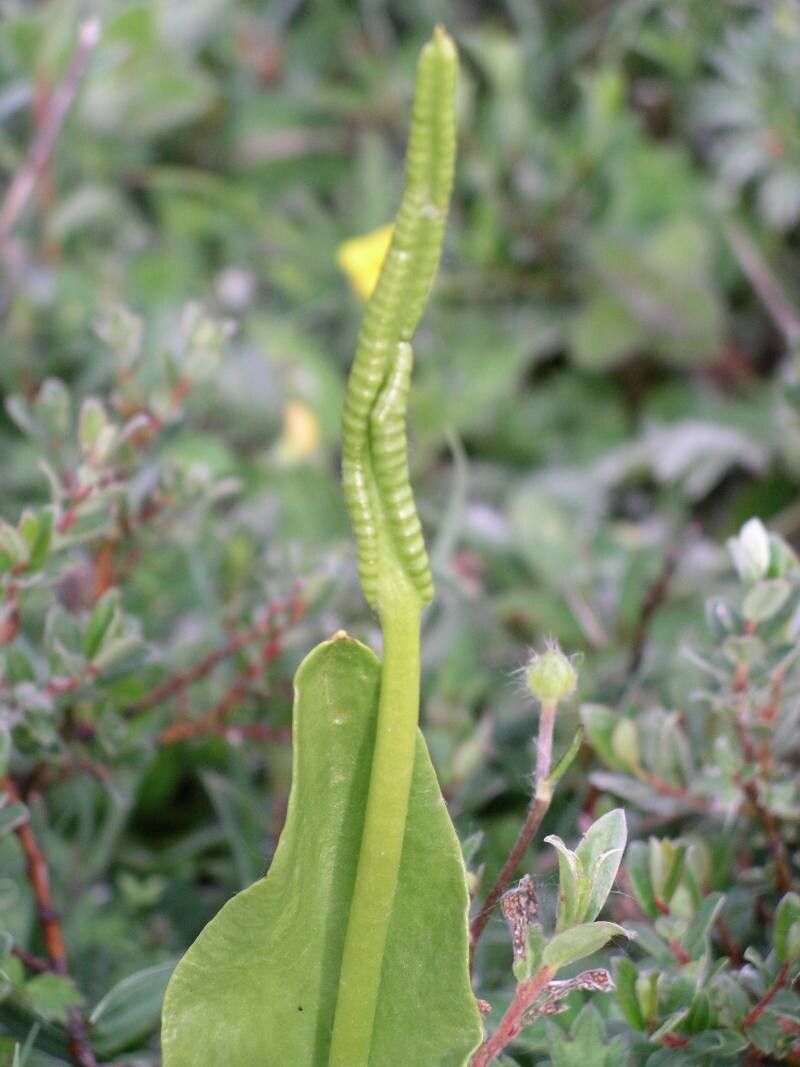
Hey there, fellow plant lovers! If you’re anything like me, you’ve probably fallen a little bit in love with the unique charm of Ophioglossum vulgatum, also known as the common adder’s-tongue fern. Its one-of-a-kind fertile frond, looking like a tiny snake’s tongue emerging from a single basal leaf, is just so fascinating. Propagating this beauty isn’t perhaps the most straightforward of tasks, but the reward of seeing new life sprout from your efforts is truly special. For beginners, I’d say it leans a bit towards the challenging side, but with a little patience and care, it’s absolutely achievable!
The Best Time to Start
When it comes to Ophioglossum vulgatum, spring is your best bet. This is when the plant is waking up from its dormancy and has the most energy for growth. You’re looking to propagate from actively growing, healthy specimens. Avoid trying to propagate from plants that are looking stressed or are in their resting phase.
Supplies You’ll Need
Here’s what I usually have on hand when I’m working with my ferns:
- Sharp, clean pruning shears or a sterile knife: We want clean cuts to prevent disease.
- A good-quality, well-draining potting mix: I often use a mix of peat moss, perlite, and a bit of orchid bark. You want something that holds some moisture but doesn’t become waterlogged.
- Small pots or propagation trays: Anything from recycled yogurt cups with drainage holes to specialized seed trays will work.
- A spray bottle: For misting to keep things humid.
- Rooting hormone (optional but helpful): A fungicidal rooting hormone can give your cuttings a little extra boost and protection.
- A clear plastic bag or dome: To create a mini-greenhouse effect.
- A healthy Ophioglossum vulgatum plant: Of course!
Propagation Methods
For Ophioglossum vulgatum, the most effective method is division. It’s like giving your established plant a little haircut and getting multiple new plants from it!
Division Method:
- Gently extract the plant: Carefully remove your Ophioglossum vulgatum from its pot. You might need to loosen the soil around the edges with a trowel or knife.
- Inspect the root ball: Look for natural divisions in the plant. You’re trying to identify where existing roots and rhizomes (underground stems) are naturally separating.
- Make the cut: Using your sharp, sterile pruning shears or knife, carefully separate a section of the rhizome with at least one basal leaf and a healthy root system. Be as gentle as possible to avoid damaging the delicate roots. If the rhizome is tough to cut, try wiggling the section gently to encourage a natural break.
- Pot it up: Plant your divided section in a small pot filled with your prepared, well-draining potting mix. Make sure the rhizome is just at or slightly below the soil surface, and the roots are spread out.
- Water gently: Water the newly potted section thoroughly but gently.
The “Secret Sauce” (Pro Tips)
Now, for a couple of things I’ve learned over the years that really make a difference:
- Mimic its natural habitat: Ophioglossum vulgatum loves humidity and doesn’t like to dry out completely. After potting your division, cover the pot with a clear plastic bag or place it under a dome. This creates that lovely humid environment that encourages root formation. Just make sure to open it briefly every few days for fresh air to prevent fungal issues.
- Patience is truly a virtue: Don’t expect miracles overnight! These divisions need time to establish. I usually keep them in their humid environment for at least 4-6 weeks, or until I see signs of new growth.
Aftercare & Troubleshooting
Once your divided section has started to show signs of new life – usually small new leaves unfurling – you can gradually acclimate it to lower humidity levels. This means slowly opening the bag or dome more each day over a week or two. Continue to keep the soil consistently moist but not soggy.
The most common issue you’ll encounter is rot. If you see your division becoming mushy or developing dark, water-soaked spots, it’s likely rotting. This is usually a sign of overwatering and poor drainage. Cut away any rotted parts immediately and repot in fresh, drier mix. If it’s too far gone, sadly, it might be time to start again. Yellowing leaves without rot can sometimes mean it’s not getting enough light, or it’s a natural shedding of older foliage for the plant to focus energy on root development.
A Encouraging Closing
So there you have it! While Ophioglossum vulgatum might ask for a little extra attention, the joy of multiplying these unique plants is so worth it. Be patient with yourself and your new green friends. Watch for those subtle signs of growth, and remember that every gardener has had their share of “oops” moments. You’ve got this, and I can’t wait to hear about your adder’s-tongue successes! Happy propagating!
Resource:
https://identify.plantnet.org/k-world-flora/species/Ophioglossum%20vulgatum%20L./data