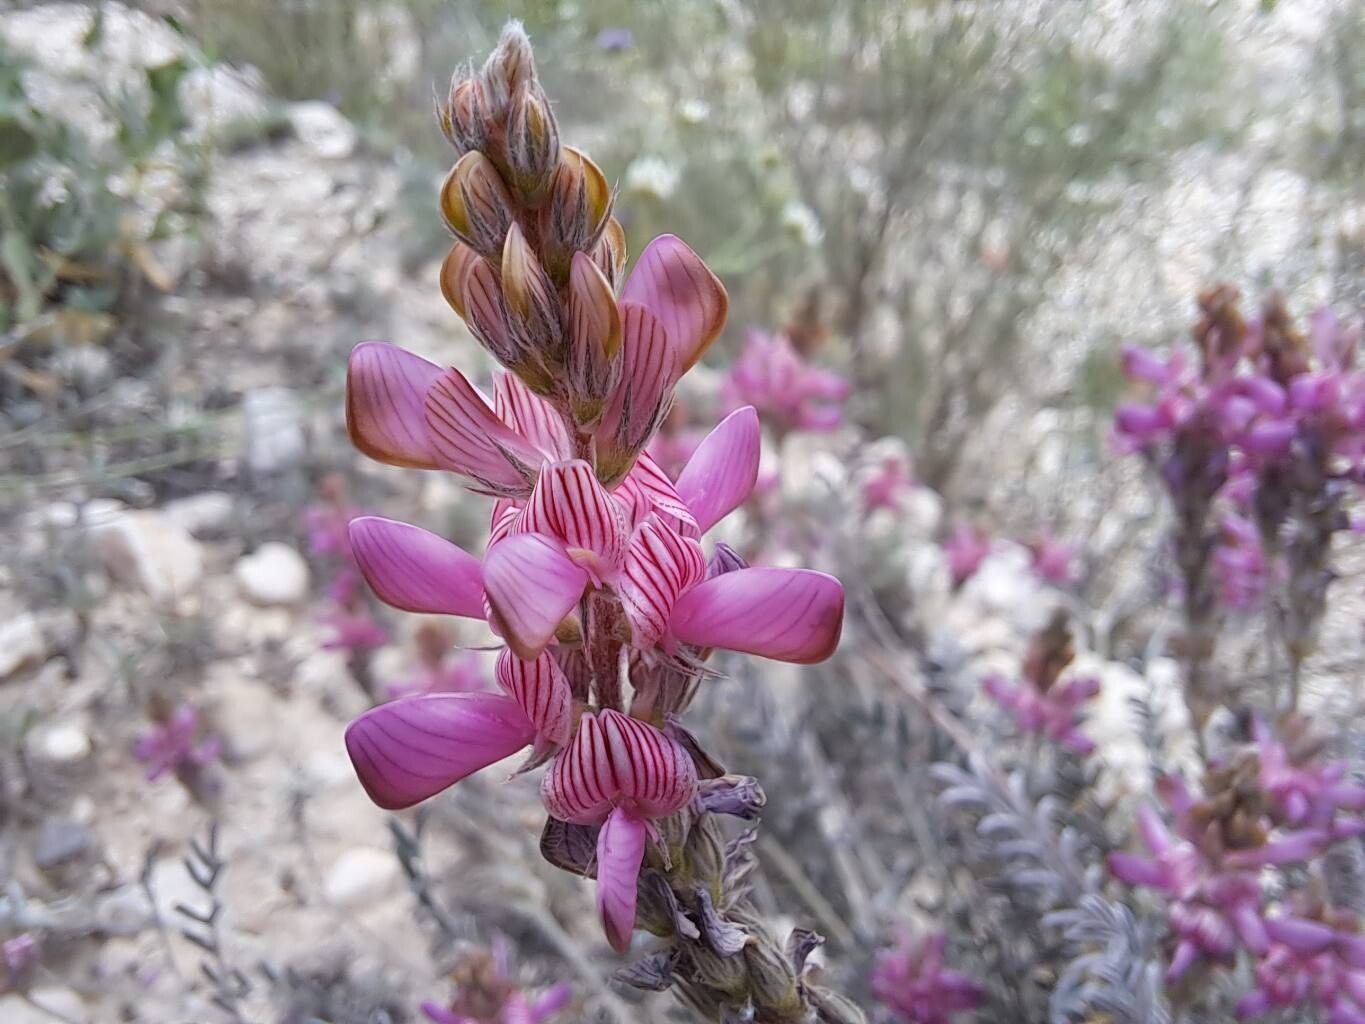
Oh, hello there! Come on in, grab a mug. I’ve been waiting to chat with you about a real gem: Onobrychis stenorhiza. If you haven’t met this beauty, picture this: delicate, spiky blooms that look like tiny, cheerful fireworks, usually in shades of lovely pink and purple. It’s a fantastic plant for attracting pollinators too, which is always a win in my book.
Now, about propagating it… I’d say Onobrychis stenorhiza is a moderately easy plant to work with. It’s not a guaranteed slam dunk for absolute beginners right out of the gate, but with a little attention and patience, you’ll be rewarded with plenty of new plants to share. It’s just incredibly satisfying to nurture a new life from a tiny piece of an existing one, isn’t it?
The Best Time to Start
For the happiest results with Onobrychis stenorhiza, I always aim for late spring to early summer. This is when the plant is in its active growing phase, full of vigor. You want to take cuttings from stems that are firm and have a bit of woody maturity, but not so old that they’re brittle. Think of it as capturing the plant at its energetic peak!
Supplies You’ll Need
Here’s what I usually gather before I get started:
- Sharp pruning shears or a clean knife: For making clean cuts.
- A good quality seed-starting mix or a well-draining potting mix: I often use a 50/50 blend of coco coir and perlite. It keeps things light and airy.
- Rooting hormone (optional but helpful): A powdered or gel form can give your cuttings a nice boost.
- Small pots or propagation trays: Clean and with drainage holes, of course!
- A watering can with a fine rose: To avoid disturbing delicate cuttings.
- A plastic bag or cloche: To create a humid environment.
- Labels and a permanent marker: So you don’t forget what you planted where!
Propagation Methods
I’ve had the most success with Onobrychis stenorhiza using stem cuttings. It’s a straightforward process that yields great results.
- Select Your Stems: Look for healthy, non-flowering stems that are about 4-6 inches long. Gently bend a stem; if it snaps cleanly, it’s probably ready. If it bends without breaking, it might be too soft.
- Take the Cuttings: Using your sharp shears or knife, make a clean cut just below a leaf node (where a leaf attaches to the stem). Remove any lower leaves, leaving just a couple at the very top.
- Prepare the Cuttings (Optional): If you’re using rooting hormone, dip the cut end of the stem into the powder or gel, tapping off any excess.
- Plant Your Cuttings: Fill your pots or trays with your prepared seed-starting mix. Make a small hole with your finger or a pencil. Gently insert the cut end of the stem into the hole, making sure at least one leaf node is buried in the soil. Firm the soil gently around the cutting.
- Water Lightly: Water the soil gently until it’s evenly moist but not soggy.
- Create Humidity: Cover the pots loosely with a plastic bag or a clear cloche. This is crucial for keeping the cuttings from drying out while they develop roots. Make sure the leaves don’t touch the inside of the bag if possible.
The “Secret Sauce” (Pro Tips)
Here are a couple of things I’ve learned over the years that really make a difference:
- Bottom Heat is Your Friend: If you have a propagator with a heat mat, using bottom heat can significantly speed up root development. It mimics the warm soil of summer and encourages those roots to form more quickly. Just a gentle warmth is all that’s needed.
- Don’t Disturb Too Soon: Resist the urge to tug on your cuttings to check for roots! It’s tempting, I know. Wait until you see clear signs of new growth at the top of the plant. That’s a good indicator that roots are forming below.
Aftercare & Troubleshooting
Once you start seeing new leaves unfurl or tiny shoots appear, that’s your cue! It means the roots are developing.
- Gradually Acclimate: Slowly remove the plastic cover over a few days to let the new plants get used to the ambient humidity.
- Watering: Continue to keep the soil consistently moist but never waterlogged. Allow the top inch of soil to dry out slightly between waterings.
- Light: Place your newly rooted cuttings in a bright, indirect light location. Avoid intense direct sun, which can scorch young leaves.
- Repotting: When the roots have filled the pot and are starting to emerge from the drainage holes, it’s time to pot them up into their own individual, slightly larger containers with a good, standard potting mix.
Now, what if things don’t go as planned? The most common issue I see is rot. This usually happens when the cuttings are kept too wet, and there isn’t enough air circulation. If you notice the stem turning mushy or black at the soil line, sadly, that cutting is likely lost. Don’t get discouraged! Improve your drainage, ensure good airflow, and try again.
A Encouraging Closing
Propagating plants is a journey, and Onobrychis stenorhiza is a lovely one to embark on. Be patient with your new cuttings, give them good care, and celebrate every little bit of progress. Before you know it, you’ll have a whole new batch of these delightful flowers to enjoy and share. Happy propagating!
Resource:
https://identify.plantnet.org/k-world-flora/species/Onobrychis%20stenorhiza%20DC./data