Oh, hello there, fellow garden enthusiast! I’m so glad you’ve stumbled upon this little corner of the internet where we get to chat about all things green and growing. Today, we’re diving into the wonderful world of propagating Odontarrhena tortuosa.
Why Propagate Odontarrhena tortuosa?
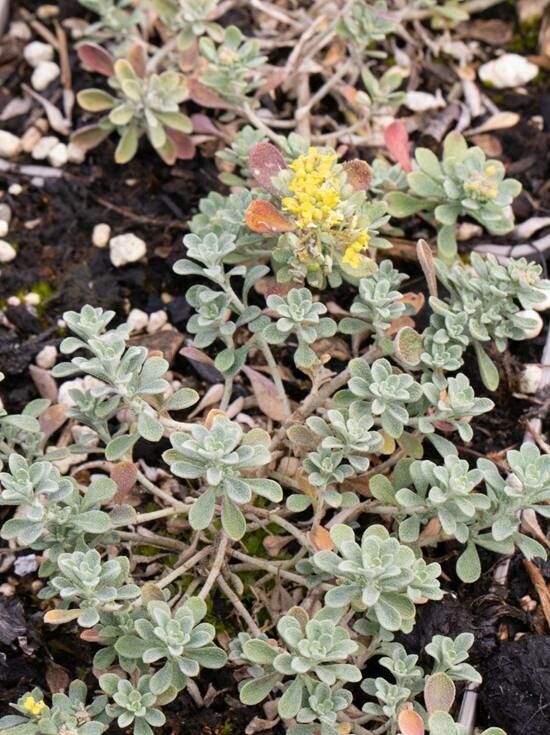
This little gem, with its sunshine-yellow flowers and silvery, aromatic foliage, is truly a delight. It brings a cheerful pop to any garden bed or container, and its scent is just heavenly on a warm day. The reward of successfully coaxing new life from a cherished plant is such a special feeling, isn’t it? Now, to be upfront, Odontarrhena tortuosa can be a touch fussy. It’s not the absolute easiest plant for a complete beginner, but with a little care and attention, you absolutely can achieve great results!
When Does the Magic Happen?
For the best shot at success, I find late spring to early summer is your golden window. This is when the plant is actively growing and has plenty of energy to put towards developing new roots. You’re essentially taking cuttings from healthy, new growth that hasn’t yet gotten tough and woody.
Gathering Your Tools
Here’s what you’ll want to have on hand before you start:
- Sharp, clean pruning shears or a knife: Hygiene is key to preventing disease.
- Rooting hormone powder or gel: This isn’t strictly necessary for every plant, but it gives your cuttings a significant boost.
- A well-draining potting mix: I usually go for a mix of peat moss, perlite, and a little bit of coarse sand. You want something that won’t hold too much moisture.
- Small pots or seed trays: Clean ones, of course!
- A plastic bag or propagator lid: To keep humidity high.
- Watering can with a fine rose or a spray bottle: For gentle watering.
Let’s Get Our Hands Dirty: Propagation Methods
The most reliable way to propagate Odontarrhena tortuosa is through stem cuttings.
Step 1: Take Your Cuttings
Look for healthy, non-flowering shoots. Gently twist or snip off a section about 4-6 inches long. Make your cut just below a leaf node – that’s where the magic of root development often starts.
Step 2: Prepare the Cuttings
Carefully remove the lower leaves from the cutting, leaving just a few at the top. This prevents them from rotting in the soil.
Step 3: Dip and Plant
Dip the cut end of the stem into your rooting hormone. Don’t be shy, give it a good coating. Then, gently insert the cutting into your prepared potting mix, burying the bottom few nodes.
Step 4: Water and Cover
Water the soil lightly so it’s moist but not soggy. Then, cover the pot or tray with a plastic bag or propagator lid. This creates a mini-greenhouse effect, keeping humidity levels high, which is crucial for cuttings that haven’t developed roots yet.
The “Secret Sauce” – Insider Tips!
I’ve learned a few tricks over the years that can really make a difference.
- Don’t let the leaves touch the water if you were considering water propagation (though I really prefer the soil method for this plant). In soil, this translates to ensuring those lower leaves are neatly trimmed so they aren’t sitting in dampness. This is a prime spot for rot to set in.
- Bottom heat is your friend! Placing your pots on a heated propagator mat can significantly speed up the rooting process by encouraging root development from below. It’s like a cozy foot rub for your cuttings!
- Be patient with the trimming. Sometimes, if you’re taking cuttings from a plant that’s already a bit leggy, you might need to gently pinch off any flower buds that appear on the cutting. The plant’s energy is best directed towards growing roots, not flowers, at this stage.
Aftercare and Troubleshooting
Once your cuttings have taken root – you’ll usually see new growth appearing after a few weeks – it’s time to transition them.
Acclimatize Them: Gradually remove the plastic cover over a few days to let them get used to the drier air.
Watering: Water them when the top inch of soil feels dry. Avoid overwatering at all costs!
Light: Give them bright, indirect light. Direct sun can scorch tender new growth.
What if things go wrong? The most common culprit is rot, which usually stems from too much moisture. You’ll notice the stem turning mushy and dark. If you catch it early, you might be able to salvage a healthy section, but often, it’s best to just start again with fresh cuttings. Fungal diseases can also be an issue, which is why good air circulation and clean tools are so important.
Keep Growing!
Propagating plants is a journey. There will be successes, and there will be times when things don’t go quite as planned. Don’t be discouraged! Each attempt is a learning experience. Just keep tending to your green friends, and before you know it, you’ll have a whole new collection of Odontarrhena tortuosa to enjoy. Happy growing!
Resource: