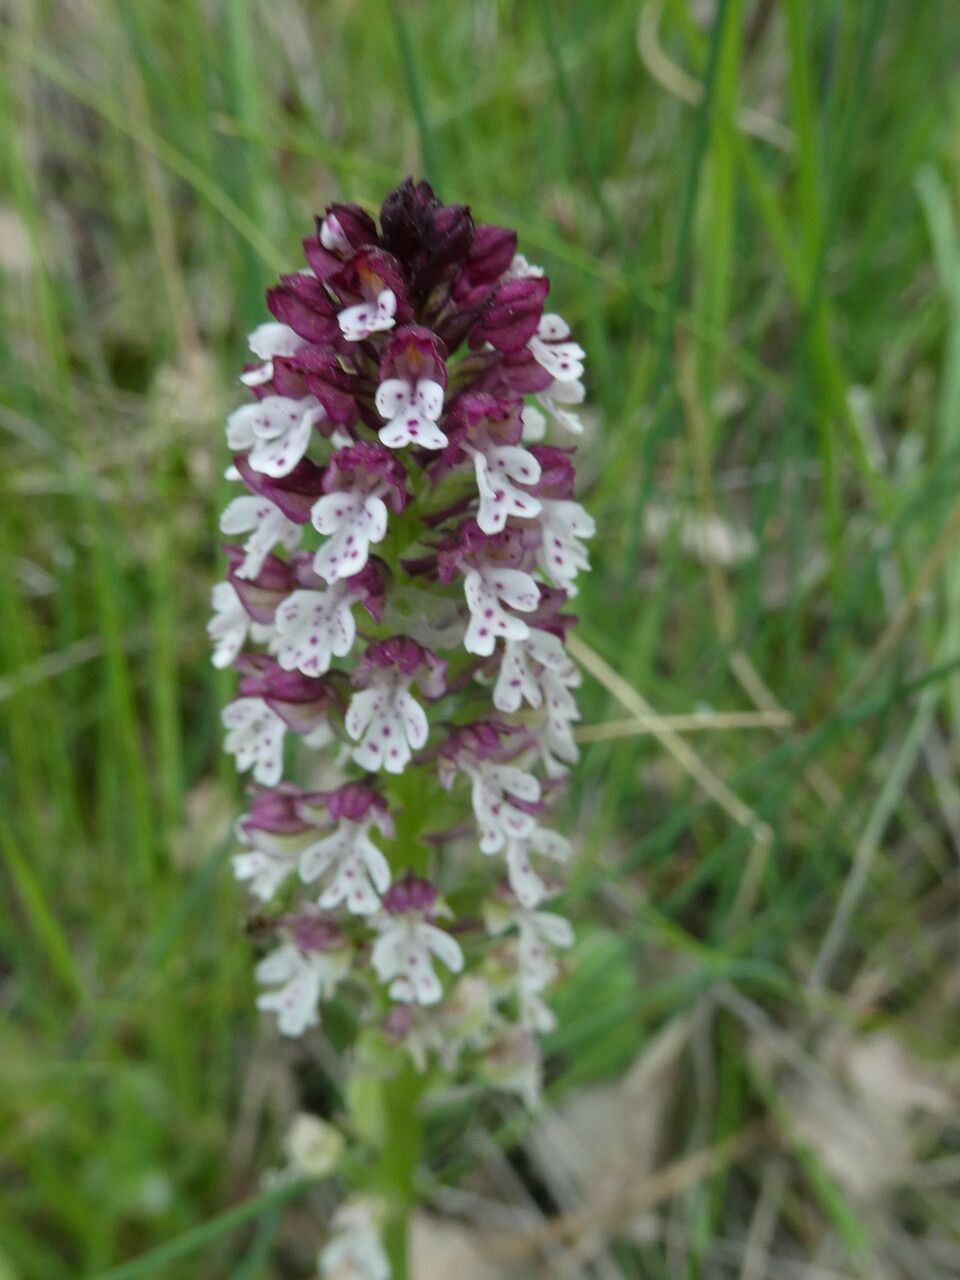
Hello fellow garden enthusiasts! Today, we’re diving into the delightful world of Neotinea ustulata. If you’ve ever seen this orchid, with its striking, deep purple-black buds that unfurl into a delicate pink bloom dusted with tiny speckles, you know its allure. It’s truly a jewel in any garden, and propagating it is a deeply rewarding experience, though I’ll be honest, it’s not exactly a walk in the park for your first-ever propagation attempt. It requires a bit of patience and finesse, but the thrill of success is absolutely worth it!
The Best Time to Start
For Neotinea ustulata, the sweet spot for propagation is generally late spring to early summer. This is when the plant is actively growing and has stored up enough energy from the previous season. You’re looking to take cuttings right after the flowering period has finished, or even before the blooms are fully spent, as the plant is transitioning into its vegetative growth phase.
Supplies You’ll Need
Here’s what you’ll want to have on hand:
- Sterile sharp knife or pruning shears: Absolutely crucial for clean cuts.
- Potting mix: A well-draining, gritty mix is essential. Think about what orchids like – a blend of bark, perlite, and a bit of peat moss or coco coir works wonders. For Neotinea, I often lean towards something mimicking their natural, often limestone-rich, environment.
- Small pots or trays: Clean ones, of course!
- Rooting hormone (optional but recommended): Particularly helpful for woody cuttings.
- Clear plastic bag or propagator: To maintain high humidity.
- Spray bottle: For misting.
- Perlite or gravel: For drainage at the bottom of pots.
Propagation Methods
While Neotinea ustulata can be a bit tricky, the most successful method for home gardeners is typically division, especially since it’s a terrestrial orchid and not one you’d usually take stem cuttings from in the traditional sense.
Division:
- Gently Excavate: When your plant is dormant or just finishing its bloom cycle (late spring/early summer is ideal), carefully dig it up. Be very gentle with the root system. You want to avoid damaging those precious tubers.
- Inspect for Divisions: Look for distinct sections of the plant that have their own root system and at least one healthy shoot or bud. Sometimes, you’ll see new tubers forming.
- Separating the Divisions: Using your sterile knife or pruning shears, carefully cut or pull the sections apart. Ensure each division has a healthy portion of roots attached. If you’re having trouble, a gentle twist with your hands can sometimes work, but always err on the side of caution with the roots.
- Prepare the Pots: Add a layer of perlite or gravel to the bottom of your clean pots for extra drainage. Then, fill them with your prepared, gritty potting mix.
- Plant the Divisions: Place each division into its own pot, burying the tubers just below the surface of the soil. The shoot or bud should be visible.
- Water Gently: Give the newly potted divisions a light watering. You don’t want to drown them, just moisten the soil.
The “Secret Sauce” (Pro Tips)
Here are a couple of things I’ve learned over the years that make a big difference:
- Don’t Overwater New Divisions: This is probably the most common mistake. They have no roots to speak of yet and will rot in a heartbeat if the soil stays waterlogged. Aim for moist, not soggy, conditions.
- Mimic Its Native Environment: Neotinea ustulata often grows in calcareous (chalky) soils. While our potting mix is more of an adaptation, ensuring good grit and some calcium carbonate (like crushed oyster shells or a tiny bit of horticultural lime mixed in sparingly) can really help it thrive.
- Airflow is Key: While you want humidity to encourage rooting, stagnant air can be a breeding ground for fungal diseases. If using a plastic bag, poke a few small holes for ventilation.
Aftercare & Troubleshooting
Once your divisions are planted, place them in a spot with bright, indirect light. Avoid direct sun, especially during the hottest parts of the day, as this can scorch the delicate new growth. Keep the soil lightly moist.
The biggest challenge you’ll face is rot. If you see your division turning mushy, or if the leaves start to yellow and die back rapidly, it’s often a sign of overwatering or poor drainage. If caught early, you might be able to salvage it by carefully removing it from the pot, trimming away any rotten parts with your sterile knife, and repotting it in fresh, dry mix. It’s tough, but sometimes you have to let go of a lost cause to save the others.
Be patient! It can take several weeks, sometimes even months, before you see significant new growth or evidence of established roots. Don’t be discouraged if one or two don’t make it; that’s part of the gardening journey.
A Encouraging Closing
Watching a division take hold and grow into a healthy, blooming plant is such a special feeling. It’s a testament to your care and understanding of this beautiful orchid. Remember to be gentle, observant, and most importantly, enjoy the process of nurturing these little treasures. Happy gardening!
Resource: