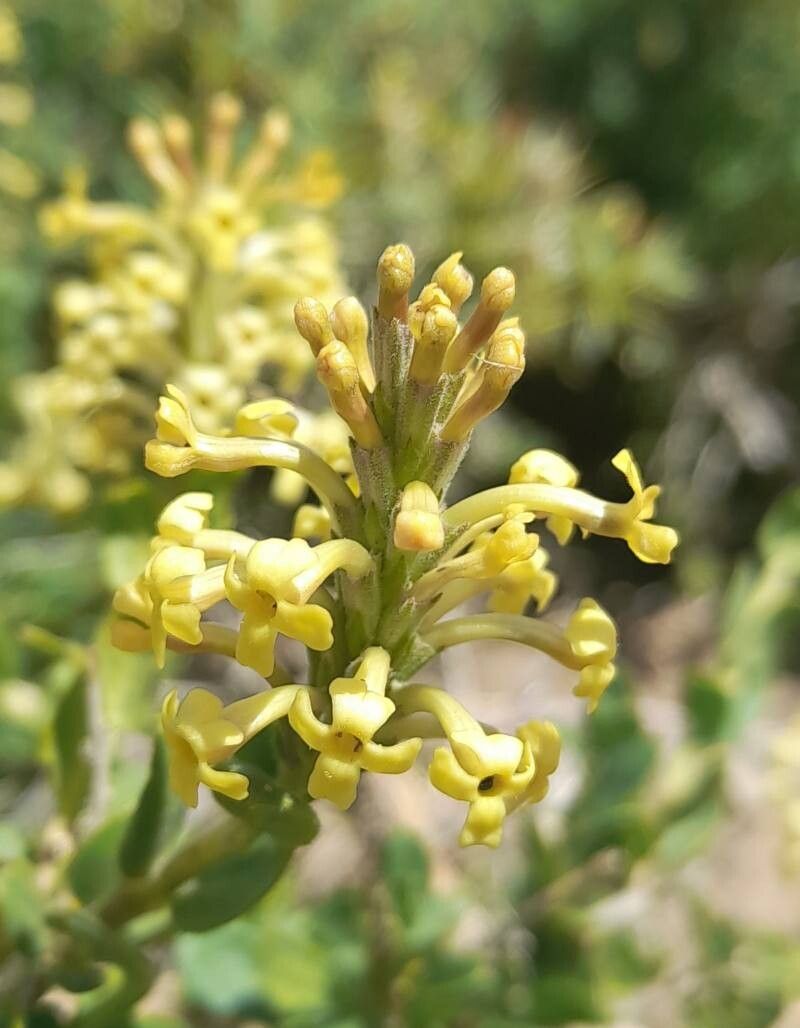
Hello plant friends! Today, I want to chat about a real gem in the garden: Mulguraea ligustrina. You know, the one with those lovely, glossy leaves and that delicate, almost ethereal charm? It’s a plant that brings a certain quiet elegance to any space, and I’ve always found its understated beauty so incredibly rewarding.
As a seasoned gardener, I’ll be honest, Mulguraea ligustrina isn’t always the absolute easiest plant for someone just dipping their toes into propagation. It can be a touch particular. But don’t let that deter you! With a little patience and a follow-through of a few key steps, you can absolutely succeed. And the joy of watching these precious new plants unfurl? Priceless!
The Best Time to Start
For Mulguraea ligustrina, your best bet is to take cuttings in late spring or early summer. This is when the plant is actively growing, and those young, semi-hardwood stems have the best energy reserves to put into developing roots. Avoid taking cuttings from old, woody stems or during the plant’s dormant period. You want vibrant, flexible growth – that’s the stuff that roots!
Supplies You’ll Need
Here’s what you’ll want to have on hand for a successful propagation session:
- Sharp, clean pruning shears or a sharp knife: Essential for making clean cuts.
- Rooting hormone powder or gel: This is a real booster for Mulguraea ligustrina, encouraging stronger root development.
- A well-draining potting mix: I like to use a blend of about 50% perlite and 50% peat moss or coco coir. This ensures good aeration and prevents waterlogging.
- Small pots or trays: Clean ones, please! Old yogurt cups with drainage holes poked in the bottom work in a pinch.
- Clear plastic bags or domes: To maintain humidity around your cuttings.
- Spray bottle with water: For gentle misting.
- Labeling sticks: Don’t forget to label your cuttings! Trust me, you’ll thank yourself later.
Propagation Methods
Let’s get down to business! For Mulguraea ligustrina, I find taking stem cuttings to be the most reliable and rewarding method.
- Select Your Cuttings: Look for healthy, non-flowering stems. You want stems that are slightly firm but still bend a little – not too soft and not too woody. Aim for cuttings that are about 4-6 inches long.
- Make the Cut: Using your sharp shears or knife, make a clean cut just below a leaf node. A leaf node is where a leaf attaches to the stem. This is where the magic happens for root formation.
- Prepare the Cutting: Gently remove the leaves from the bottom half of the cutting. You can leave the top few leaves on. If those top leaves are very large, you can even cut them in half diagonally to reduce water loss through transpiration.
- Apply Rooting Hormone: Dip the bottom cut end of the stem into your rooting hormone. Tap off any excess.
- Plant Your Cuttings: Fill your clean pots with your prepared potting mix. Use a pencil or your finger to create small holes in the soil. Insert the cut end of the Mulguraea ligustrina cutting into the hole, ensuring the leaf nodes you removed are buried. Gently firm the soil around the stem.
- Water and Cover: Water the soil gently so it’s moist but not soggy. Then, cover the pot with a clear plastic bag or dome to create a mini-greenhouse. This is crucial for maintaining humidity. Stick your labeling stick in so you know what’s what!
The “Secret Sauce” (Pro Tips)
Here are a few little tricks I’ve picked up over the years that can make a big difference:
- Bottom Heat is Your Friend: Mulguraea ligustrina absolutely loves a little warmth from below. If you have a heated propagator mat, place your pots on it. Even a sunny windowsill that gets warm might be enough, but bottom heat truly speeds up root development and significantly increases your success rate.
- Don’t Be Afraid to Mist: While you don’t want soggy soil, keeping the leaves themselves slightly moist through daily misting (especially if you don’t have a fully enclosed dome) helps prevent them from drying out while the roots are still forming.
- Cleanliness is Paramount: I can’t stress this enough. Any hint of mold or disease on your cuttings or in your soil will doom your efforts quickly. Always use clean tools and pots. If you reuse pots, wash them thoroughly with hot, soapy water or even a dilute bleach solution.
Aftercare & Troubleshooting
Once your Mulguraea ligustrina cuttings have roots – you’ll know when you see new growth or feel a gentle tug when you try to lift the cutting – it’s time for a little more attention.
Gradually acclimate your new plants to less humid conditions. Open the plastic bag or dome for increasingly longer periods over a week or two before removing it entirely. Continue to water as needed, allowing the top inch of soil to dry out between waterings.
The most common problem you might encounter is rot. You’ll see the stem turn mushy, black, and might even smell a bit foul. This is almost always due to overwatering and poor drainage. If you see this, unfortunately, that cutting is likely lost. Remove it promptly to prevent it from affecting others. Another sign of trouble is wilting that doesn’t perk up after misting – this can also indicate a lack of root development or rot.
A Little Encouragement to Grow On
Propagating plants is such a wonderful way to connect with nature and expand your own green haven. Don’t be discouraged if your first attempt isn’t a showstopper. Every gardener has had cuttings that didn’t make it. Just be patient, celebrate your successes, and learn from your experiences. Soon enough, you’ll have a whole clan of beautiful Mulguraea ligustrina to enjoy, share, or even gift to fellow plant lovers. Happy propagating!
Resource: