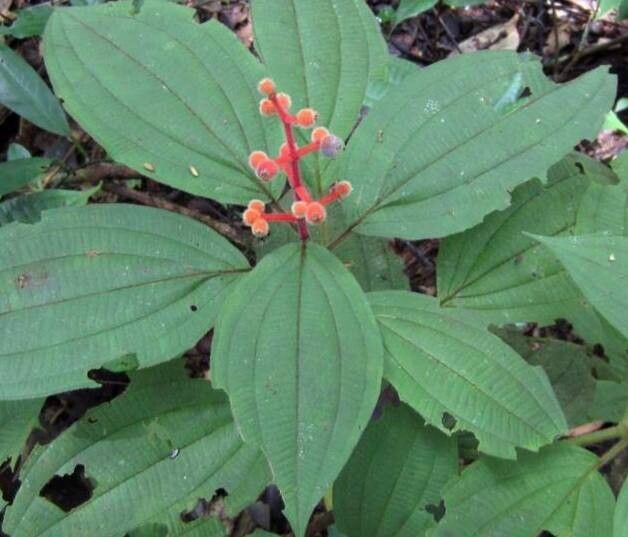
Hey there, fellow plant enthusiasts! Pull up a chair, let’s chat about Miconia ceramicarpa. If you’ve ever been captivated by its glossy, dark green leaves often adorned with delicate, star-like flowers (or if you’re just looking for a new green friend), you’re in for a treat. Propagating this beauty is a fantastic way to fill your home with more of its charm without breaking the bank. It’s a journey that’s quite rewarding, and while it might seem a tad daunting at first glance, I’ve found Miconia ceramicarpa to be surprisingly forgiving. Honestly, with a little patience and the right approach, even beginners can have great success.
The Best Time to Start
When can you start coaxing new Miconias into existence? For me, the sweet spot is always spring or early summer. This is when the plant is actively growing and has that vibrant energy that just screams “let’s make babies!” You’re looking for nice, healthy, new growth – not the super tender, wispy tips, but the stems that have a bit of substance to them. Think of it as harvesting while the plant is in its prime.
Supplies You’ll Need
Before we get our hands dirty, let’s gather our tools. Having everything ready makes the process so much smoother.
- Sharp Pruning Shears or a Clean Knife: For making clean cuts.
- Rooting Hormone (Optional, but Recommended): A little boost never hurts!
- Small Pots or Trays: With drainage holes, of course.
- Well-Draining Potting Mix: I like a 50/50 blend of perlite and a good quality potting soil. You can also use a specialized seedling mix.
- Clear Plastic Bag or Dome: To create a mini greenhouse effect.
- Spray Bottle: For misting.
- Water: For propagation and misting.
- A Small Piece of Wire or Paperclip (for water propagation): More on this later.
Propagation Methods
Let’s get down to business! I find Miconia ceramicarpa is quite happy with stem cuttings, and I often have great luck with a simple water propagation method before moving to soil.
Stem Cuttings (My Go-To)
- Select Your Cutting: Find a healthy stem that’s about 4-6 inches long. Look for one with several sets of leaves.
- Make the Cut: Using your clean shears or knife, make a clean cut just below a leaf node. A leaf node is that little bump on the stem where a leaf emerges. This is where the roots will eventually want to form.
- Prepare the Cutting: Gently remove the lower leaves, leaving just two or three at the very top. This prevents them from rotting in the soil and focuses the plant’s energy on root development.
- Apply Rooting Hormone (If Using): Dip the cut end into your rooting hormone, tapping off any excess.
- Planting: Fill your small pot with your well-draining mix. Make a small hole in the center with your finger or a pencil.
- Insert and Firm: Gently insert the cutting into the hole, making sure the leaf nodes that you removed leaves from are buried. Firm the soil gently around the cutting to ensure good contact.
- Water and Cover: Water the soil thoroughly until water drains from the bottom. Then, cover the pot with your clear plastic bag or dome. This traps humidity, which is crucial for cuttings to root.
Water Propagation (A Good Visual Aid)
- Select and Prepare: Follow steps 1-3 from the stem cuttings method above.
- Place in Water: Put the prepared cutting in a clean jar or glass filled with fresh water.
- The Key Detail: Here’s where the wire or paperclip comes in. You want to carefully create a little perch above the water line using the wire to hold the cutting. This prevents the leaves from sitting in the water and rotting, which is a common mistake I see people make.
- Location: Place your jar in a bright spot, but out of direct sunlight.
- Water Changes: Change the water every few days to keep it fresh and prevent stagnation.
The “Secret Sauce” (Pro Tips)
This is where those little nuggets of wisdom come in handy.
- Bottom Heat is Your Friend: If you’re using stem cuttings and want to speed things up, a heating mat placed under the pots can make a world of difference. It mimics the warmth of spring soil and gives those roots a real kickstart. You don’t need anything fancy, just a general seedling heat mat will do.
- Don’t Rush the Transplant (for water propagation): When you see those gorgeous, robust roots forming in water, you might be tempted to pot it up immediately. Hold on just a minute! Wait until the roots are at least an inch or two long and have started branching a bit from the main root. This gives them more resilience when you transition them to soil.
- Misting is More Than Just Water: When you mist your cuttings, especially those in pots, I always add a tiny, tiny drop of organic liquid fertilizer to the water. It’s like giving them a gentle, diluted nutrient drink from the get-go. Just a whisper of it, mind you!
Aftercare & Troubleshooting
Once you see those first signs of new growth poking out, or happy roots developing in water, it’s time to cheer!
If you started with stem cuttings: Gradually acclimate your new plant to lower humidity by opening the plastic bag or dome a little more each day over a week. Once it seems sturdy, you can remove the cover completely. Continue to keep the soil consistently moist, but not soggy.
If you transferred from water: Water gently, then allow the top inch of soil to dry out slightly before watering again.
Troubleshooting: The most common issue you’ll face is rot. This usually happens if the soil is too wet or you don’t have good airflow. If a cutting looks yellow and droopy, or the stem starts to turn mushy and black, it’s likely rot. Unfortunately, there’s not much you can do once it sets in, so it’s best to discard it. Prevention is key: good drainage, not overwatering, and proper airflow make all the difference. Another sign things aren’t going well is if the cutting just looks sad and limp for weeks with no sign of root development. This might mean it didn’t take, and it’s probably best to try again with a fresh cutting.
A Little Patience Goes a Long Way
Propagating plants is a bit like motherhood, isn’t it? It takes time, a little bit of nurturing, and a whole lot of love. Your Miconia ceramicarpa cuttings might sulk for a bit, but don’t give up! Keep that humidity up, provide bright (but indirect) light, and be patient. Soon enough, you’ll have a whole new generation of these lovely plants gracing your home. Happy propagating!
Resource:
https://identify.plantnet.org/k-world-flora/species/Miconia%20ceramicarpa%20(DC.)%20Cogn./data