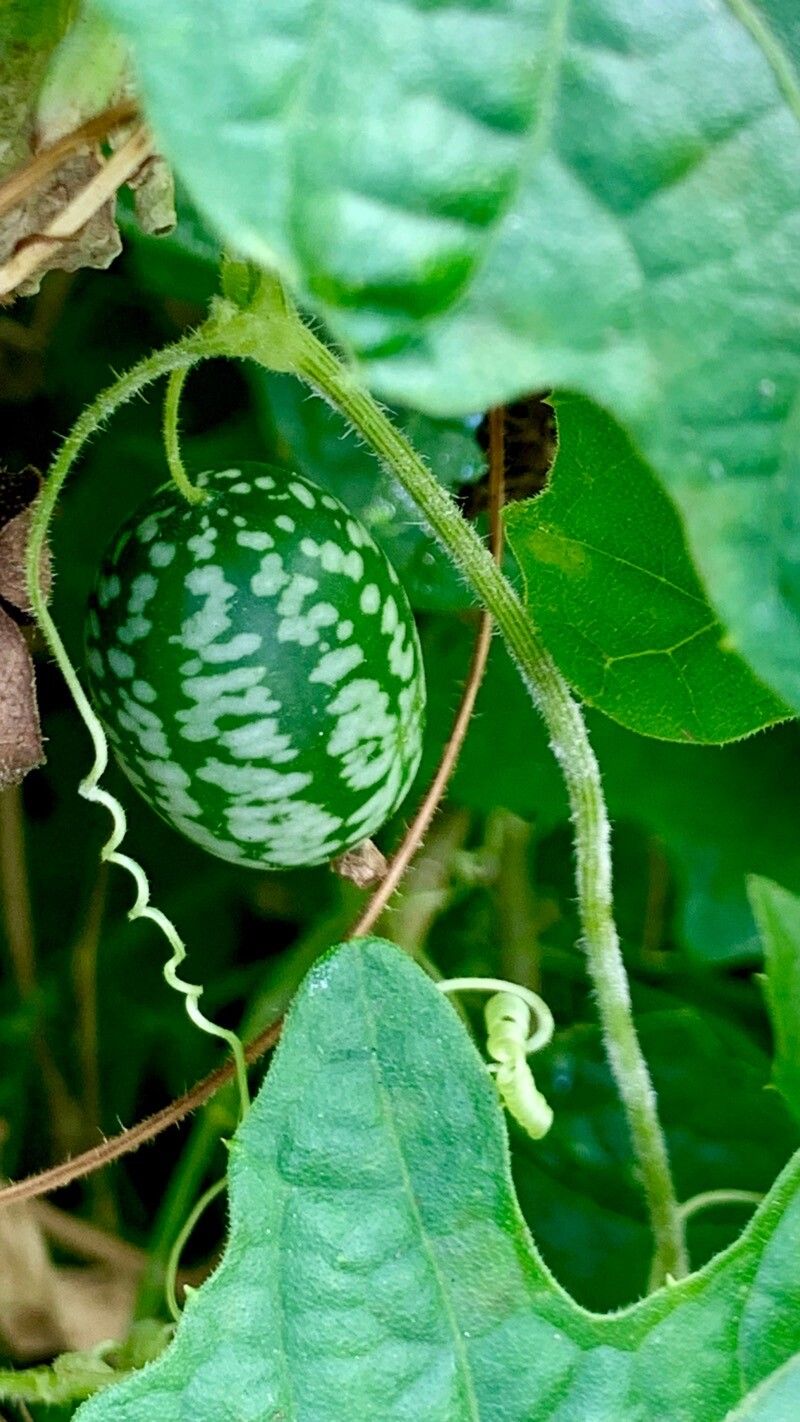
Oh, hello there! Pull up a chair, grab a mug. I’m so excited to chat with you today about a truly delightful little plant: Melothria scabra. You might know it as creeping cucumber, Mexican sour gherkin, or even cucamelon. Whatever you call it, this vining marvel is a real charmer. Its miniature, fruit that look like tiny watermelons are just adorable, and the taste? A delightful, zesty crunch perfect for salads and snacking.
The best part? Propagating it is surprisingly straightforward. I’ve found Melothria scabra to be quite forgiving, which is wonderful news if you’re just dipping your toes into the world of plant propagation. There’s a special kind of joy in coaxing a new plant into existence from a piece of your favorite one. It’s like sharing a bit of your garden’s magic.
The Best Time to Start
I’ve found the sweet spot for propagating Melothria scabra is in late spring to early summer. This is when the plant is in its active growing phase, buzzing with energy. You’ll be taking cuttings from healthy, vigorous stems. Waiting until after the last frost has passed is key, as these little guys don’t like chilly air. It’s all about giving them a warm, sunny start.
Supplies You’ll Need
Before we get our hands dirty, let’s gather our tools:
- Sharp pruning shears or a clean knife: For making clean cuts.
- Potting mix: A light, well-draining mix is essential. I like a blend of peat moss, perlite, and a bit of compost.
- Small pots or trays: With drainage holes, of course!
- Rooting hormone (optional but recommended): This little helper can speed things up.
- Watering can or spray bottle: For gentle watering.
- Plastic bags or a propagator: To create a humid environment.
- A warm spot for your cuttings: This could be a sunny windowsill or a heated propagator.
Propagation Methods
There are a couple of ways to get more Melothria scabra plants, but my favorite is by stem cuttings. It’s reliable and gives you a good success rate.
Stem Cuttings:
- Select Healthy Stems: Look for vibrant, non-flowering stems on your established plant. Aim for stems that are about 4-6 inches long.
- Make the Cut: Using your clean shears or knife, make a clean cut just below a leaf node (that’s the spot where a leaf attaches to the stem). This is where the magic happens, as new roots are more likely to form.
- Prepare the Cutting: Gently remove the lower leaves from the stem, leaving just a couple of leaves at the top. This reduces moisture loss. If the remaining leaves are very large, you can even snip them in half.
- Apply Rooting Hormone (Optional): Dip the cut end of the stem into rooting hormone. Tap off any excess.
- Plant Your Cuttings: Fill your small pots with your prepared potting mix. Make a small hole in the center and insert the cut end of the stem about 1-2 inches deep. Gently firm the soil around it.
- Water Gently: Water the potting mix thoroughly but don’t let it become waterlogged. A gentle watering is best.
- Create Humidity: Cover the pot with a clear plastic bag or place it in a propagator. This creates a mini-greenhouse effect, keeping the humidity high, which is crucial for cuttings. Make sure the leaves don’t touch the plastic.
- Provide Warmth and Light: Place your potted cuttings in a warm spot with bright, indirect light. Avoid direct sun, which can scorch the delicate cuttings.
The “Secret Sauce” (Pro Tips)
Now, for a couple of little tricks I’ve picked up over the years that really make a difference:
- Warm Feet are Happy Feet: I’m a big believer in bottom heat. If you can, place your pots on a heat mat designed for seedlings. The gentle warmth from below encourages root development much faster than just ambient room temperature.
- Don’t Drown Your Dreams: When watering, err on the side of slightly dry rather than too wet. Overwatering is the quickest way to invite rot. I often just mist the leaves and soil surface daily and check the soil moisture by poking a finger in. If it feels dry an inch down, then I’ll water.
- Patience, Young Grasshopper: I know it’s tempting, but don’t yank on your cuttings to check for roots too soon. You’ll damage any developing ones. Wait at least 3-4 weeks before giving a very gentle tug to feel for resistance.
Aftercare & Troubleshooting
Once you start to see tiny roots emerging – and believe me, that first glimpse is a thrill! – it’s time to adjust your care. You can gradually remove the plastic cover over a few days to help the new plants acclimate to normal humidity. Continue to keep them in that bright, indirect light and water them when the top inch of soil feels dry.
The most common sign of failure is wilting or yellowing leaves that progress to mushy stem rot. This is almost always a sign of overwatering or poor drainage. If you see this, act fast. Try to dry out the soil, and if a cutting is really struggling, you might need to discard it and try again. Sometimes, a stem might just fail to root, and that’s okay too. Don’t be discouraged; it’s part of the learning process.
A Encouraging Closing
So there you have it! Propagating Melothria scabra is a rewarding journey, and I hope this guide has given you the confidence to give it a try. Be patient with your cuttings, celebrate every bit of progress, and most importantly, enjoy the simple pleasure of nurturing new life in your garden. Happy propagating!
Resource:
https://identify.plantnet.org/k-world-flora/species/Melothria%20scabra%20Naudin/data