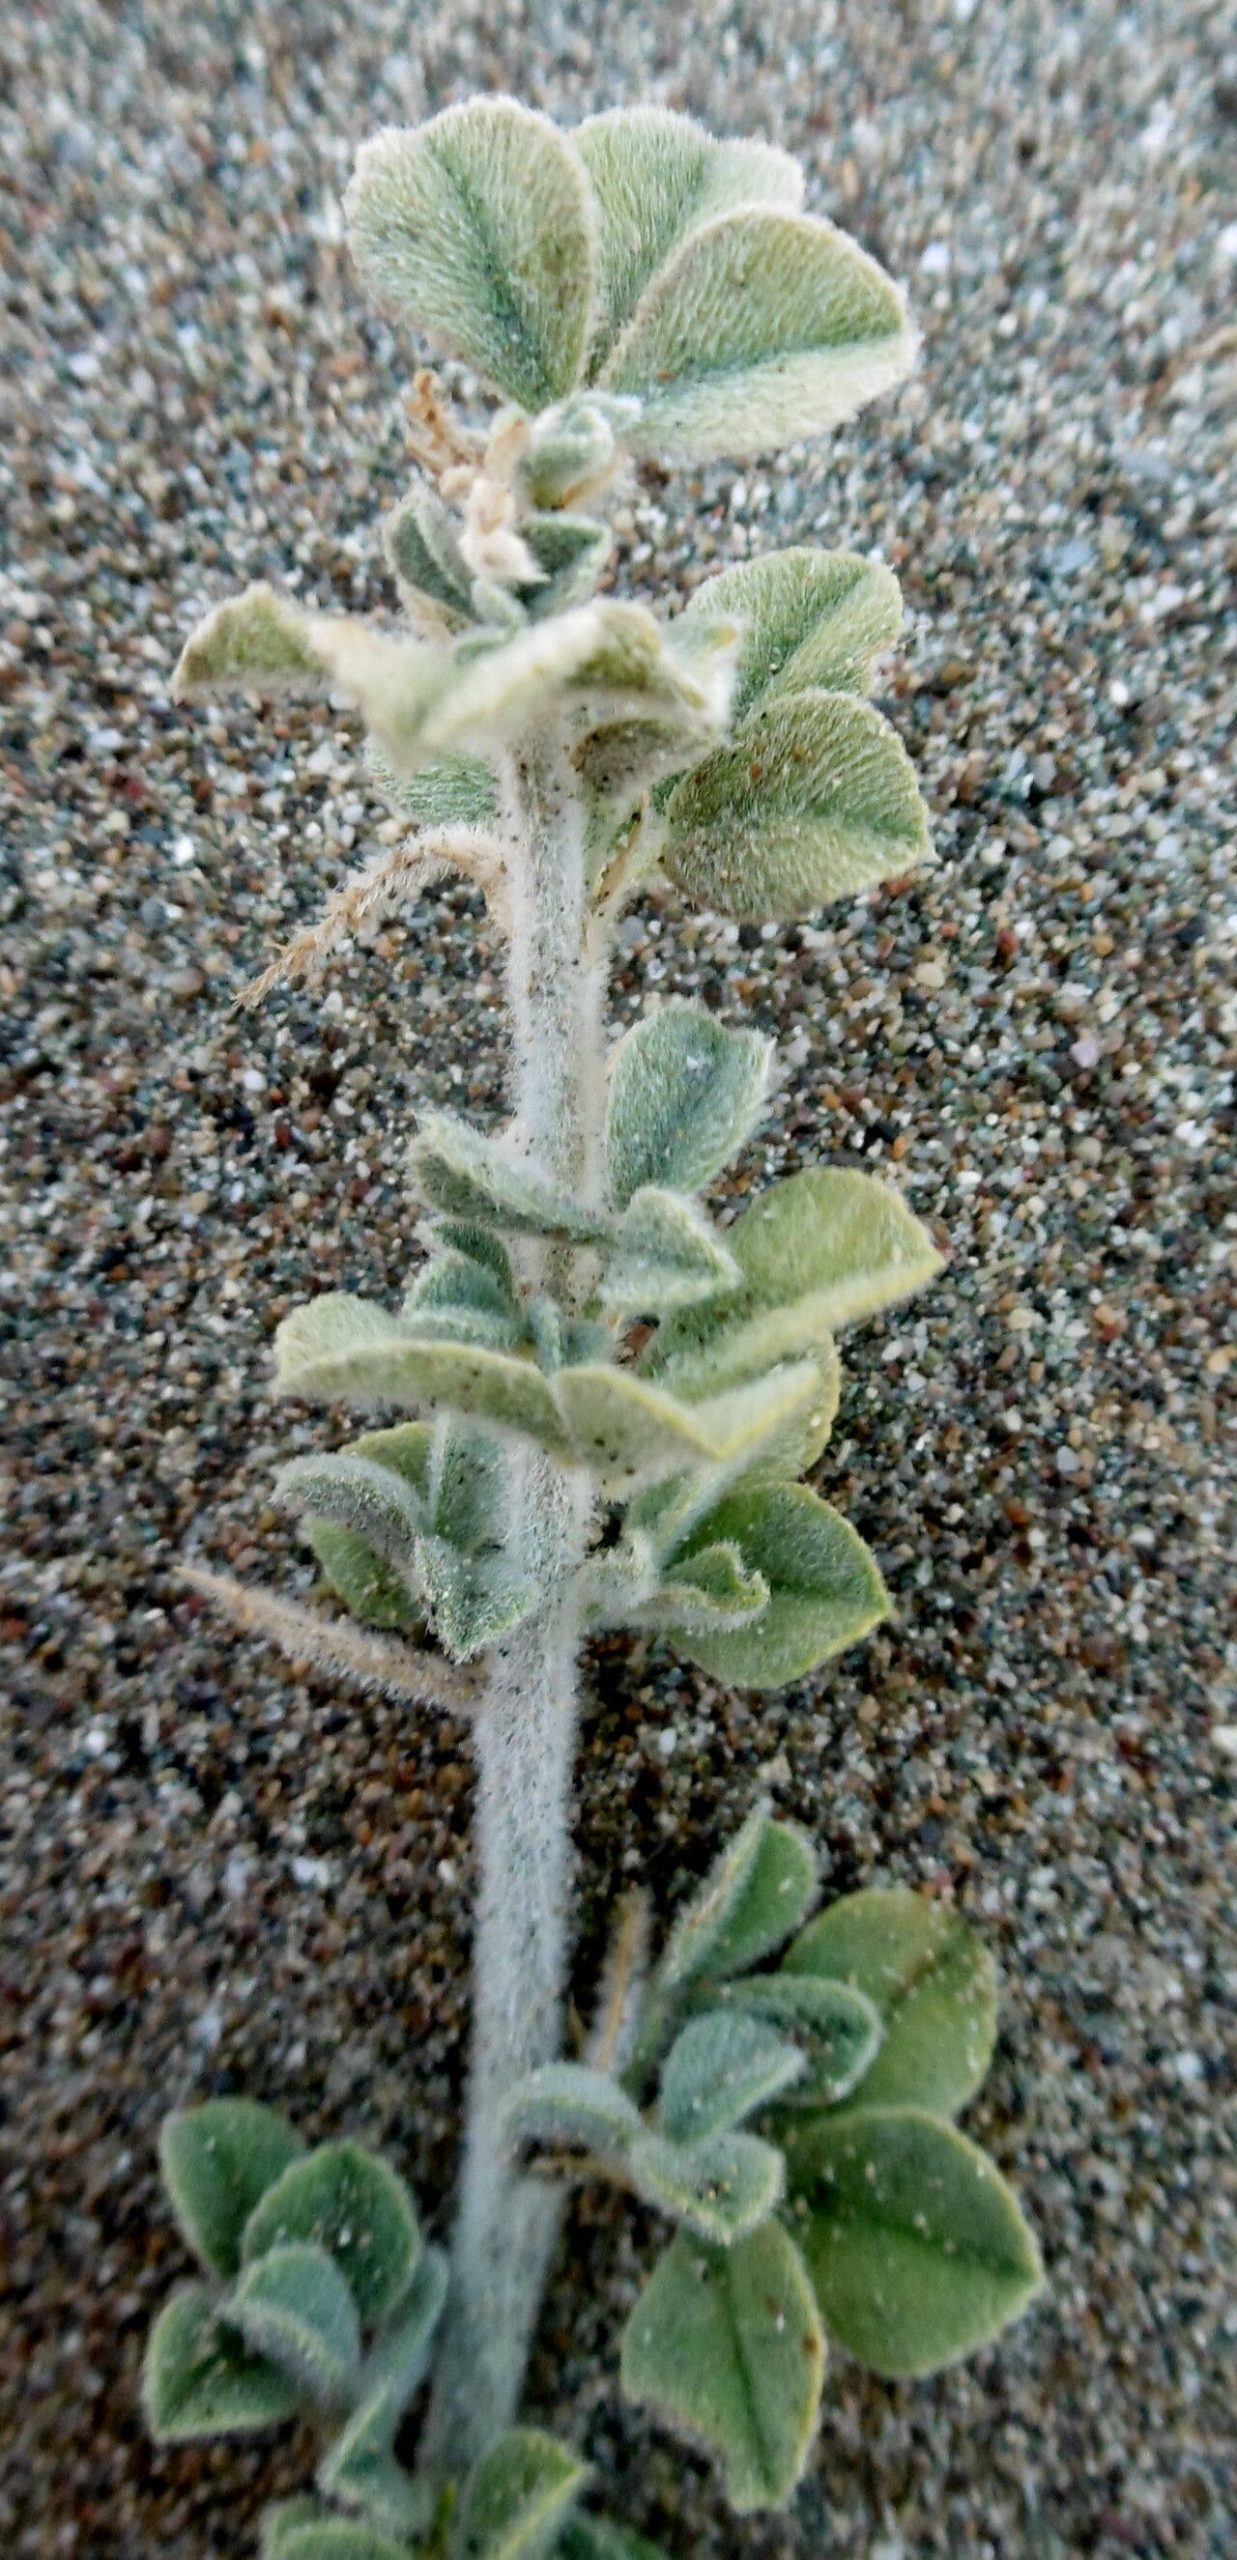
Hello there, fellow garden enthusiasts! I’m so delighted to share today’s topic with you. We’re diving into the wonderful world of Medicago marina, often called the Mediterranean bur clover or sea bur clover. If you’ve ever seen this charming plant gracing a coastal garden or a sunny, sandy spot, you’ll know its appeal. It has these lovely, silvery-green leaves and delicate, pea-like yellow flowers that just scream summer and sunshine.
Now, I know what you might be thinking: “Is it hard to propagate?” Honestly, Medicago marina is a pretty rewarding plant to work with. While it thrives in specific conditions, getting new plants from it is generally not overly difficult. Even if you’re new to the propagation game, you can absolutely give this a try. Imagine filling your garden or pots with more of this beauty – it’s a truly satisfying feeling.
The Best Time to Start
For the highest success rate, my favorite time to propagate Medicago marina is during its active growing season, which usually means late spring through early summer. This is when the plant has plenty of energy stored up, and new growth is vigorous. You’ll want to look for stems that are firm but not woody – think of it as trying to snap a pencil; it should give with a little pressure, not snap cleanly.
Supplies You’ll Need
Gathering your supplies beforehand makes the whole process so much smoother. Here’s what I typically have on hand:
- Sharp Pruning Shears or a Clean Knife: For taking clean cuts. Dull tools can crush stems, making it harder for them to root.
- Rooting Hormone (Optional but Recommended): A powder or gel that encourages root development.
- Well-Draining Potting Mix: A mix designed for succulents or cacti works wonderfully, or you can create your own by combining potting soil with perlite and coarse sand. We want to ensure moisture drains away quickly.
- Small Pots or Seed Starting Trays: Clean containers that allow for good drainage.
- Watering Can or Spray Bottle: For gentle watering.
- Plastic Bags or a Propagation Dome: To create a humid environment around your cuttings.
Propagation Methods
Medicago marina can be propagated in a couple of ways, but my go-to for new plants is usually stem cuttings.
Stem Cuttings:
- Select Your Stems: As mentioned, look for healthy, current-season growth that is semi-hardwood – not too soft and leafy, but not old and woody either. Aim for cuttings about 4-6 inches long.
- Make the Cut: Using your sharp shears or knife, take a clean cut just below a leaf node (where a leaf attaches to the stem). This is where roots are most likely to form.
- Prepare the Cutting: Gently remove the lower leaves from the cutting, leaving just a few at the very top. This prevents them from rotting in the soil.
- Apply Rooting Hormone: If you’re using rooting hormone, dip the cut end into the powder or gel. Tap off any excess. Don’t be tempted to wet the stem first; follow the product instructions for best results.
- Plant Your Cuttings: Make a small hole in your prepared potting mix with a pencil or your finger. Insert the cutting into the hole and gently firm the soil around it. Make sure at least one leaf node is buried beneath the surface.
- Water Gently: Water the soil thoroughly but avoid waterlogging. A gentle shower from a watering can or a mist from a spray bottle is perfect.
- Create Humidity: Cover the pot with a clear plastic bag, securing it around the rim with a rubber band, or place it under a propagation dome. This traps moisture and prevents the cuttings from drying out too quickly. Make sure the leaves don’t touch the plastic.
The “Secret Sauce” (Pro Tips)
Here are a couple of things that have really helped me when propagating Medicago marina:
- Bottom Heat is Your Friend: If you have a propagation mat, placing your pots on it can make a world of difference. It provides gentle warmth from below, which encourages root development much faster than if you just have ambient room temperature. It’s like giving your cuttings a cozy little heated blanket to get them going.
- Don’t Overwater! I cannot stress this enough. Medicago marina loves well-draining soil because it’s adapted to drier conditions. Soggy feet are the quickest way to root rot. It’s better to let the soil dry out a little between waterings than to keep it constantly damp. I often check by sticking my finger about an inch into the soil. If it feels dry, it’s time for a light watering.
Aftercare & Troubleshooting
Once your cuttings have been planted, place them in a bright location but out of direct, hot sun. You want them to have light, but scorch is the enemy at this stage. Periodically check the soil moisture and mist the leaves if they look a little wilted.
The real sign of success is when you see new growth appearing from the top of the cutting. This is often the first indicator that roots have formed. You can also give a very gentle tug on the cutting; if there’s resistance, it’s likely rooted. Once you see a good amount of new growth, you can gradually remove the plastic bag or dome over a few days to acclimate the new plant to normal humidity.
The most common issue you’ll encounter is rot. If your cutting turns yellow, mushy, or black, it’s a sign of too much moisture and not enough air circulation. Unfortunately, once rot sets in, it’s very difficult to recover the cutting. This is why good drainage and careful watering are so crucial. If you see this happening, discard the affected cutting to prevent it from spreading.
A Encouraging Closing
So there you have it! Propagating Medicago marina is a wonderfully accessible way to multiply this charming plant. Be patient with your cuttings; sometimes it takes a little longer than you expect for roots to form. But the joy of nurturing a new life from a simple stem cutting is truly a rewarding experience. Enjoy the process, and happy gardening!
Resource:
https://identify.plantnet.org/k-world-flora/species/Medicago%20marina%20L./data