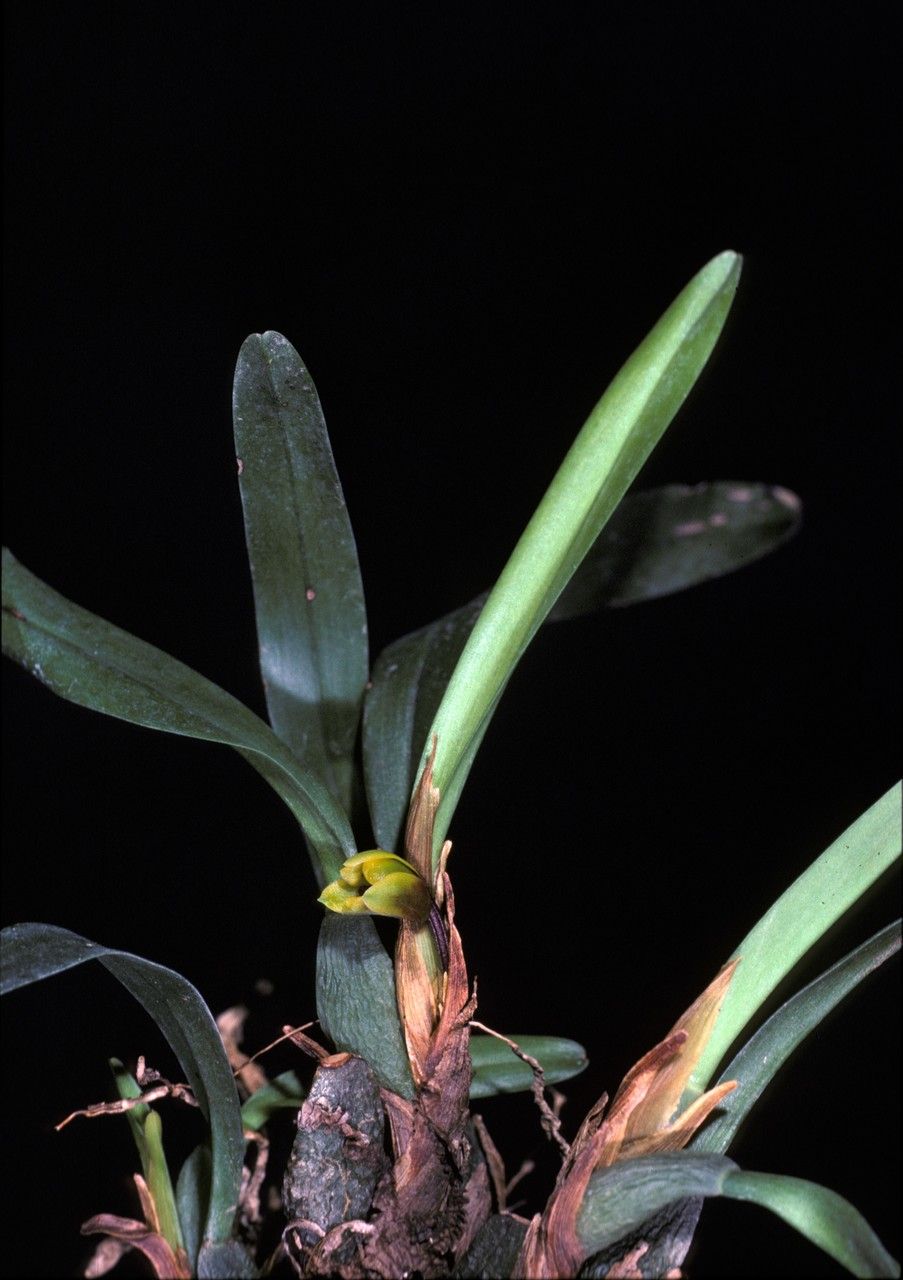
Oh, hello there! Come on in, the coffee’s still warm. So, you’ve fallen for the charms of Maxillaria caespitifica, haven’t you? That delightful little orchid, with its fuzzy pseudobulbs and those sweet, often fragrant flowers tucked away. It’s like finding little treasures in your garden!
And you know, the absolute joy of propagating it yourself? It’s incredibly rewarding. Watching a tiny division or a sleepy stem sprout new life fills me with such a sense of accomplishment. Now, about beginners tackling this one – I’d say Maxillaria caespitifica is moderately easy. It’s not as finicky as some of the more demanding orchids, but it does appreciate a bit of attention to detail. We’ll get you there!
The Best Time to Start
My favorite time to get my hands dirty with Maxillaria caespitifica propagation is just as the plant is finishing up its blooming cycle or when it’s entering its active growth phase. This usually happens for me in late spring or early summer. The plant has built up good energy reserves, and the warmer temperatures encourage quicker root development. Trying to do it in the dead of winter or during a major dry spell can be a recipe for disappointment.
Supplies You’ll Need
Alright, let’s gather our tools. Don’t worry, it’s not much.
- Sterilized pruning shears or a sharp, clean knife: Essential for making clean cuts to prevent disease.
- Orchid potting mix: I like a fast-draining blend, often including bark chips, perlite, and a bit of sphagnum moss. You can buy a specific orchid mix or create your own.
- Small pots or seedling trays: Whatever you have available, just make sure they have good drainage.
- Rooting hormone (optional but helpful): A little sprinkle can give your cuttings a good head start.
- Rubbing alcohol or a bleach solution: For sterilizing your tools between cuts. Trust me on this one!
- Watering can with a fine spray: For gently misting your newly potted propagates.
Propagation Methods
Maxillaria caespitifica is best propagated through division, which is essentially splitting a mature plant into smaller, viable sections.
Division Steps:
- Gently remove the plant from its pot. If it’s healthy and well-established, you might need to carefully ease it out. Sometimes, I’ll gently squeeze the pot to loosen the roots.
- Inspect the root system. Look for natural breaks or sections of the rhizome (the creeping stem that connects the pseudobulbs). You’re looking for divisions that have at least two to three healthy pseudobulbs and some good roots.
- Carefully separate the sections. This is where your sterilized pruners or knife come in. If the roots are intertwined, you might have to gently tease them apart. If it’s a bit stubborn, a clean cut through the rhizome is perfectly fine.
- Remove any old, dead leaves or flower spikes. This helps the plant focus its energy on growing.
- Allow the cut surfaces to air dry for a day or two. This step is crucial to prevent rot. You can lay the divisions on a paper towel in a dry, airy spot.
- Pot up your new divisions. Use your fresh orchid mix and plant each division so the base of the pseudobulbs are just at the surface of the mix. Don’t pack the mix too tightly.
- Water sparingly at first. You don’t want the new divisions sitting in soggy conditions while they establish. A light misting every few days is usually enough until you see signs of new growth.
The “Secret Sauce” (Pro Tips)
Here are a few little nuggets of wisdom I’ve picked up over the years:
- Don’t overcrowd your pots. When you’re dividing, it’s tempting to cram as many pieces into one pot as possible. Resist this! Give each division a bit of breathing room so air can circulate. This significantly reduces the risk of fungal issues.
- Bottom heat is a game changer. Maxillaria caespitifica absolutely loves a little warmth from below, especially when they’re trying to root. A seedling heat mat placed under the pots can really speed up root formation and overall establishment.
- Don’t be afraid of the knife (if it’s clean!). Sometimes those rhizomes are tough! A clean cut is far better than tearing or ripping roots. Just remember to sterilize your tool before and after you use it – it’s a habit worth keeping.
Aftercare & Troubleshooting
Once you’ve potted up your divisions, keep them in a bright, indirect light location. Avoid direct sun, which can scorch those tender new leaves. Mist them lightly when the surface of the potting mix feels dry.
The first sign that things are going well is new root growth – you’ll see them peeking out of the drainage holes or pushing their way through the potting mix. You might also see a new shoot emerging from the base of a pseudobulb. Patience is key here! It can take several weeks to see significant progress.
The most common sign of trouble is rot. If you notice pseudobulbs looking mushy, turning black, or smelling off, it’s usually a sign of overwatering or poor air circulation. Act quickly! Try to remove the rotted parts with your sterilized knife. If a division is beyond saving, it’s heartbreaking, but don’t let it discourage you.
A Little Encouragement
Propagating plants is a journey, and each one is a unique learning experience. Be patient with your Maxillaria caespitifica divisions. They might seem slow to start, but with a little care and attention, you’ll be rewarded with beautiful new plants to enjoy. So, go ahead, get your hands dirty, and savor the process! Happy growing!
Resource:
https://identify.plantnet.org/k-world-flora/species/Maxillaria%20caespitifica%20Rchb.f./data