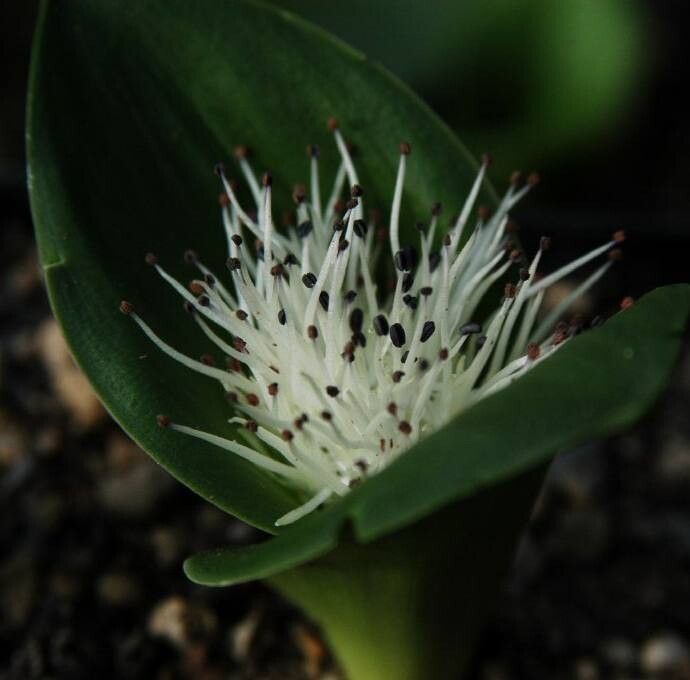
Hello, fellow plant lovers! I’m so thrilled you’re curious about Massonia pygmaea. This little gem, with its charming, star-shaped flowers and often striking foliage, is a truly special addition to any collection. If you’re looking for a rewarding propagation project, this is it! Now, I won’t pretend it’s as foolproof as dividing a spider plant, but with a little patience and understanding, you’ll be well on your way to success. Let’s dig in!
The Best Time to Start
Generally, the best time to propagate Massonia pygmaea is when the plant is actively growing, but not in its peak flowering or fruiting stage. For many species, this means late spring or early summer, after the main flush of growth has occurred. You want to catch them in a vigorous state, ready to put energy into new roots. Avoid trying to propagate when the plant is stressed or dormant.
Supplies You’ll Need
Here’s what you’ll want to have on hand before you begin:
- Sharp, clean pruning shears or a sharp knife: A clean cut is crucial to prevent disease.
- Well-draining potting mix: I like a mix of coarse sand, perlite, and a good quality peat-free potting compost. Something with excellent aeration is key.
- Small pots or seed trays: Choose containers with drainage holes.
- Rooting hormone (optional but recommended): A powder or liquid can give your cuttings a helpful boost.
- Watering can with a fine rose: Gentle watering helps prevent disturbing delicate new roots.
- A spray bottle: For maintaining humidity.
- Clear plastic bags or a propagator: To create a humid environment.
- Labels: Don’t forget to label your pots!
Propagation Methods
For Massonia pygmaea, division is usually the most successful and straightforward method. This plant tends to form clumps over time, making it ideal for this technique.
Division:
- Gently remove the parent plant from its pot. If it’s stuck, tap the sides of the pot firmly and try to ease it out.
- Carefully remove as much of the old soil as you can from around the roots. You might need to use your fingers or a gentle brush.
- Identify natural divisions within the clump. Look for where the plant naturally splits into smaller sections, each with its own set of roots and at least one growing point.
- Using your clean pruning shears or knife, carefully separate the divisions. Make sure each piece has a good portion of healthy roots attached. If the roots are very tangled, you can gently tease them apart.
- Allow the cut surfaces to callus over. This is an important step! Let the divisions sit in a dry, airy spot for a day or two. This helps prevent rot.
- Pot up each division into its own small pot. Use your well-draining potting mix. Plant them at about the same depth they were growing previously.
- Water lightly. Just enough to settle the soil. Avoid overwatering at this stage.
- Place the pots in a warm, bright spot out of direct sunlight. Maintain consistent moisture, but don’t let them get waterlogged.
The “Secret Sauce” (Pro Tips)
Here are a couple of things I’ve learned over the years that really seem to make a difference:
- The Art of the Callus: As I mentioned, allowing those cut surfaces to dry and form a protective callus is non-negotiable. Think of it as giving your plant a tiny band-aid before it goes into the soil. It vastly reduces the risk of fungal infections and rot, which are the biggest culprits when things go wrong with divisions.
- Bottom Heat is Your Friend: While not strictly essential for division, if you were to attempt cuttings (which is much trickier for this plant), providing gentle bottom heat can dramatically speed up root development. A small seedling heat mat set to a cozy temperature (around 70-75°F or 21-24°C) is perfect. It encourages the roots to start forming from the bottom up.
Aftercare & Troubleshooting
Once your divisions are potted, keep them in a bright location that doesn’t get scorching sun. Water them when the top inch of soil feels dry. You want a consistent, but not soggy, moisture level. Mist them occasionally if the air is particularly dry.
Signs of Failure: The most common problem you might encounter is rot. If your divisions look limp, mushy, or discolored, and the soil is consistently wet, rot is likely the issue. Unfortunately, once rot sets in, it’s often hard to recover. Prevention is key, which is why that well-draining soil and the drying period are so crucial. If you see a bit of leaf yellowing, don’t panic! New growth will eventually emerge from a healthy division.
Happy Propagating!
Growing new plants from cuttings or divisions is such a wonderfully engaging way to connect with nature. It’s a process that teaches us patience, keen observation, and the sheer delight of watching something new come to life. So, take a deep breath, gather your supplies, and give Massonia pygmaea a try. Even if your first attempt isn’t perfect, you’ll learn so much. Enjoy the journey and the beautiful new blooms that await!
Resource:
https://identify.plantnet.org/k-world-flora/species/Massonia%20pygmaea%20Schltdl.%20ex%20Kunth/data