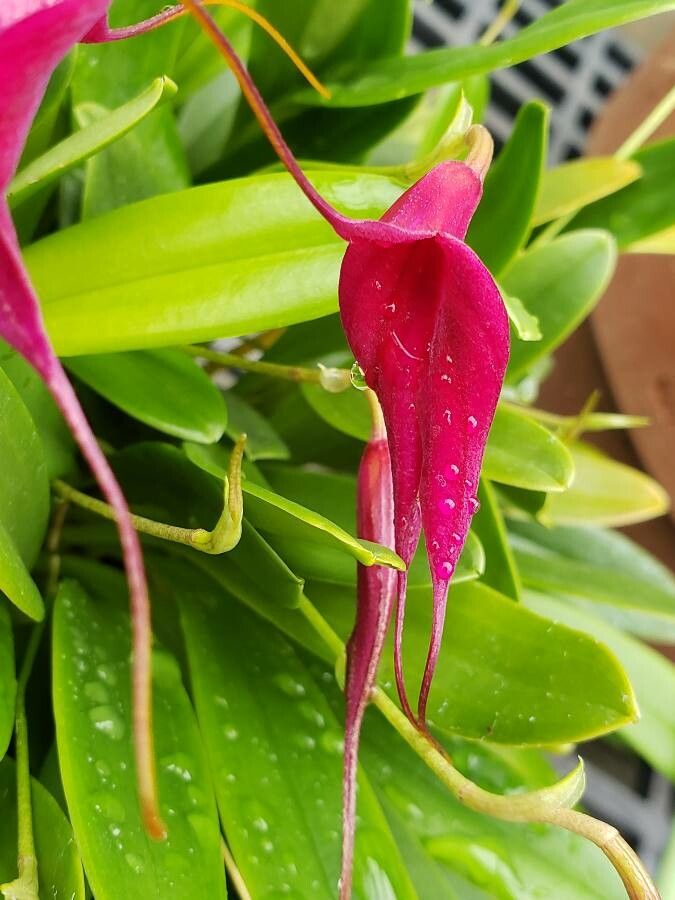
Hello fellow plant enthusiasts! Today, we’re going to talk about a truly special gem in the orchid world: Masdevallia deceptrix. If you’ve ever seen one of these beauties gracing a greenhouse bench or a friend’s collection, you’ll know why. Their intricate, almost sculpted blooms are simply captivating. They have this delicate charm that just pulls you in.
Now, you might be wondering about propagating them. Is it tricky? Well, let me be honest. Masdevallia deceptrix isn’t the absolute easiest orchid to start from scratch, especially for a complete beginner. It requires a bit of finesse and attention to detail. But oh, the reward when you succeed! Seeing your own little deceptrix sprout and thrive is an incredibly satisfying feeling. It’s like unlocking a little bit of gardening magic.
The Best Time to Start
Timing is everything, right? For Masdevallia deceptrix, the sweet spot for propagation is usually during its active growth period. This typically means after the plant has finished its main blooming cycle and is putting out new shoots. In many climates, this might fall in late spring or early summer. You want to work with a healthy, vigorous plant that has plenty of energy to invest in creating a new life. Avoid propagating when the plant is stressed or during its resting phase.
Supplies You’ll Need
Before we dive in, let’s gather our tools. Having everything ready makes the whole process much smoother:
- Sharp, sterile pruning shears or a clean razor blade: For making precise cuts. Sterilize them with rubbing alcohol before and between cuts.
- Appropriate potting medium: A well-draining orchid mix is crucial. I usually go for a blend of fine-grade bark, perlite, and a bit of sphagnum moss. You want something that holds moisture but doesn’t stay soggy.
- Small pots or community trays: Clean, with drainage holes.
- Rooting hormone (optional but recommended): A powdered or gel form can give your cuttings a helpful boost.
- Clear plastic bags or propagation domes: To create a humid environment.
- Spray bottle with clean water: For misting.
- Labels and a permanent marker: To keep track of your projects!
Propagation Methods
For Masdevallia deceptrix, the most reliable method for home gardeners is division. While stem cuttings are possible for other orchids, with Masdevallias, division is generally more successful and less stressful for the parent plant.
Division: A Gentle Separation
- Prepare your plant: Make sure your Masdevallia is potted in a clear pot if possible, so you can see the root structure. Gently remove the plant from its pot. You might need to gently loosen the old potting media from the roots if it’s compacted.
- Identify divisions: Look for natural breaks in the plant’s growth. You’re looking for sections that have at least two to three healthy pseudobulbs (those swollen stem-like structures where leaves emerge) and a good root system. You can often see distinct fans of leaves coming from separate points.
- Make the cut: Using your sterile shears or razor blade, carefully cut between the divisions. Try to keep the roots of each division as intact as possible. If you encounter significant resistance, don’t force it; try to find a weaker point or gently tease the roots apart.
- Potting the divisions: Once you have your divisions, inspect the roots. Trim away any dead or mushy roots. Then, pot each division into its own small pot using your prepared orchid mix. You want the base of the pseudobulbs to be at or just slightly above the surface of the media.
- Provide initial care: After potting, water lightly to settle the media. Then, place the potted divisions in a location with bright, indirect light and high humidity. A humidity dome or covering them loosely with a clear plastic bag works wonderfully. Open the bag for a few minutes each day to allow for air circulation.
The “Secret Sauce” (Pro Tips)
Now, for a couple of things I’ve learned over the years that really make a difference:
- The “no-drip” rule for humidity: When you’re misting your divisions inside their bags or domes, be mindful of condensation. You want a humid environment, but you don’t want water dripping from the plastic onto the leaves. Excessive moisture sitting on foliage can lead to fungal issues. So, while maintaining humidity is key, ensure there’s good air exchange within the dome to prevent constant drips.
- Gentle roots are happy roots: When you’re separating divisions, be incredibly patient. If the roots are tangled, a quick soak in lukewarm water can sometimes help loosen them. Gently teasing them apart with your fingers or a blunt tool is far better than ripping them. A damaged root system is a major setback for a new cutting.
Aftercare & Troubleshooting
Once your divisions show signs of new growth – a new leaf emerging or tiny white root tips appearing – you’re on the right track! Continue to keep them in bright, indirect light and maintain high humidity. As they establish, you can gradually reduce the humidity and start a very diluted feeding schedule with a balanced orchid fertilizer.
The biggest enemy of new Masdevallia cuttings is rot. If you see a division starting to turn mushy, black, or disintegrating, it’s usually a sign of too much moisture and not enough air circulation. In this case, quickly remove the affected part (if possible), sterilize your tools, and try to increase airflow. Sometimes, a good soak with a fungicide can help, but often, if rot sets in deeply, it’s difficult to recover. Another sign of trouble is a complete lack of new growth after a long period. This could mean the roots aren’t viable, or the plant is simply not happy with its conditions.
Happy Growing!
Mastering the propagation of Masdevallia deceptrix is a journey, and like all good gardening journeys, it’s filled with learning and discovery. Be patient with your new divisions. Give them the consistent, gentle care they need. Don’t get discouraged if every attempt isn’t a runaway success. The process itself is so rewarding, and soon enough, you’ll have more of these exquisite orchids to admire and share. Happy growing, friends!
Resource: