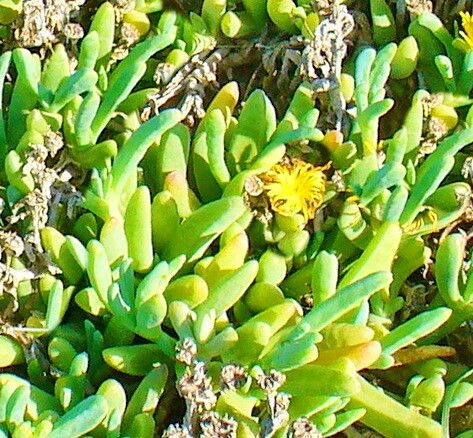
Hey there, fellow plant lovers! Grab your favorite mug, and let’s chat about something truly special: Malephora framesii, or as I affectionately call it, the “Dewdrop Ice Plant.” If you’ve ever seen this succulent gracing a sunny spot, you’ll know why it captures the heart. Its plump, jewel-like leaves shimmer with tiny water vesicles, making it look perpetually kissed by morning dew. And the flowers! Oh, the vibrant, almost neon pink bursts are an absolute treat.
Now, I know starting new plants can sometimes feel a little daunting, but trust me, propagating Malephora framesii is a wonderfully rewarding journey, and it’s a fantastic choice for beginners. You’ll be amazed at how easily you can fill your garden or windowsill with these beauties.
The Best Time to Start
My go-to time for propagating Malephora framesii is late spring through early summer. This is when the plant is actively growing and has plenty of energy to put into developing those precious roots. You want to work with healthy, firm stems, not those that are looking a bit stretched or limp.
Supplies You’ll Need
Don’t worry, we don’t need anything too fancy here. Just gather these few things:
- Sharp, clean pruning shears or a sharp knife: A clean cut is crucial to prevent disease.
- Rooting hormone (optional, but helpful): This can give your cuttings a little boost.
- Well-draining potting mix: I love a mix of succulent/cacti soil with a healthy dose of perlite or pumice.
- Small pots or trays: Terracotta pots are great because they breathe.
- Watering can or spray bottle: For gentle watering.
- A sunny spot or grow light: For light, but not direct, scorching sun initially.
Propagation Methods
Let’s get our hands dirty! There are a couple of super effective ways to multiply your Dewdrop Ice Plant.
Stem Cuttings: My Favorite
This is generally the easiest and most successful method for Malephora framesii.
- Take your cutting: Using your clean shears, snip off a healthy stem that is at least 3-4 inches long. Look for a stem with several sets of leaves.
- Let it callous: This is a critical step! Lay your cutting on a clean surface in a dry, shaded spot for 2-5 days. You want the cut end to dry out and form a bit of a scab. This prevents rot when you plant it.
- Dip in rooting hormone (optional): Once calloused, lightly dip the cut end into your rooting hormone powder. Tap off any excess.
- Plant the cutting: Fill your small pot with your well-draining mix. Make a small hole with your finger or a pencil and gently insert the calloused end of the cutting about an inch deep. Firm the soil around it.
- Water lightly: Give the soil a very gentle watering. You want it moist, not soggy. Let the soil dry out somewhat between waterings.
Water Propagation (With a Caveat!)
While you can root some succulents in water, I find it trickier with Malephora framesii because of rot potential. If you do try it:
- Prepare the cutting: Follow steps 1 & 2 above for taking and callousing your cutting.
- Place in water: Trim off the lowest leaves. Place the cutting in a small vase or jar so that only the cut stem is submerged in water, and none of the leaves touch the water.
- Change water regularly: Change the water every few days to keep it fresh.
- Be patient: Roots should appear after a few weeks. Once you have a good network of roots (about an inch long), immediately plant it in soil to avoid further issues.
The “Secret Sauce” (Pro Tips)
Here are a couple of my tried-and-true tricks:
- Bottom Heat is Your Friend: If you can, place your pots on a gentle warming mat designed for plants. This warmth from below really encourages root development. Think of it as a cozy heatwave for your little cuttings!
- Don’t Overwater, Ever! This is the golden rule for almost all succulents, and it’s especially important for cuttings. Allow the soil to dry out between waterings. They can get all the hydration they need from their stored water in their leaves for a while. Soggy soil is the fast track to rot.
Aftercare & Troubleshooting
Once you see signs of new growth, like tiny leaves emerging from the tip or the cutting feeling slightly resistant when you gently tug it, you know roots are forming! You might see those “dewdrops” looking even perkier.
Caring for your new plant:
- Gradual Acclimation: Once rooted, gradually introduce your new plant to brighter light.
- Watering: Continue to water only when the soil is dry.
- Repotting: You can gently repot into larger containers as the plant grows.
Common Signs of Failure:
- Rot: The most common problem! If a cutting turns mushy, black, or slimy, it’s usually due to overwatering or not letting it callous properly. Sadly, it’s best to discard it and try again.
- Wilting/Drooping: This can sometimes indicate thirst, but more often with cuttings, it’s a sign that something is wrong with root development, or it’s just adjusting. Be patient, but if it continues and looks limp, it might not have made it.
A Little Encouragement
Propagating can be a bit of a learning curve, but with Malephora framesii, you’re already starting with a plant that’s eager to grow. Be patient with yourself and your little cuttings. Enjoy watching those new roots emerge and that first spark of new growth – it’s a truly magical moment in the garden. Happy propagating!
Resource: