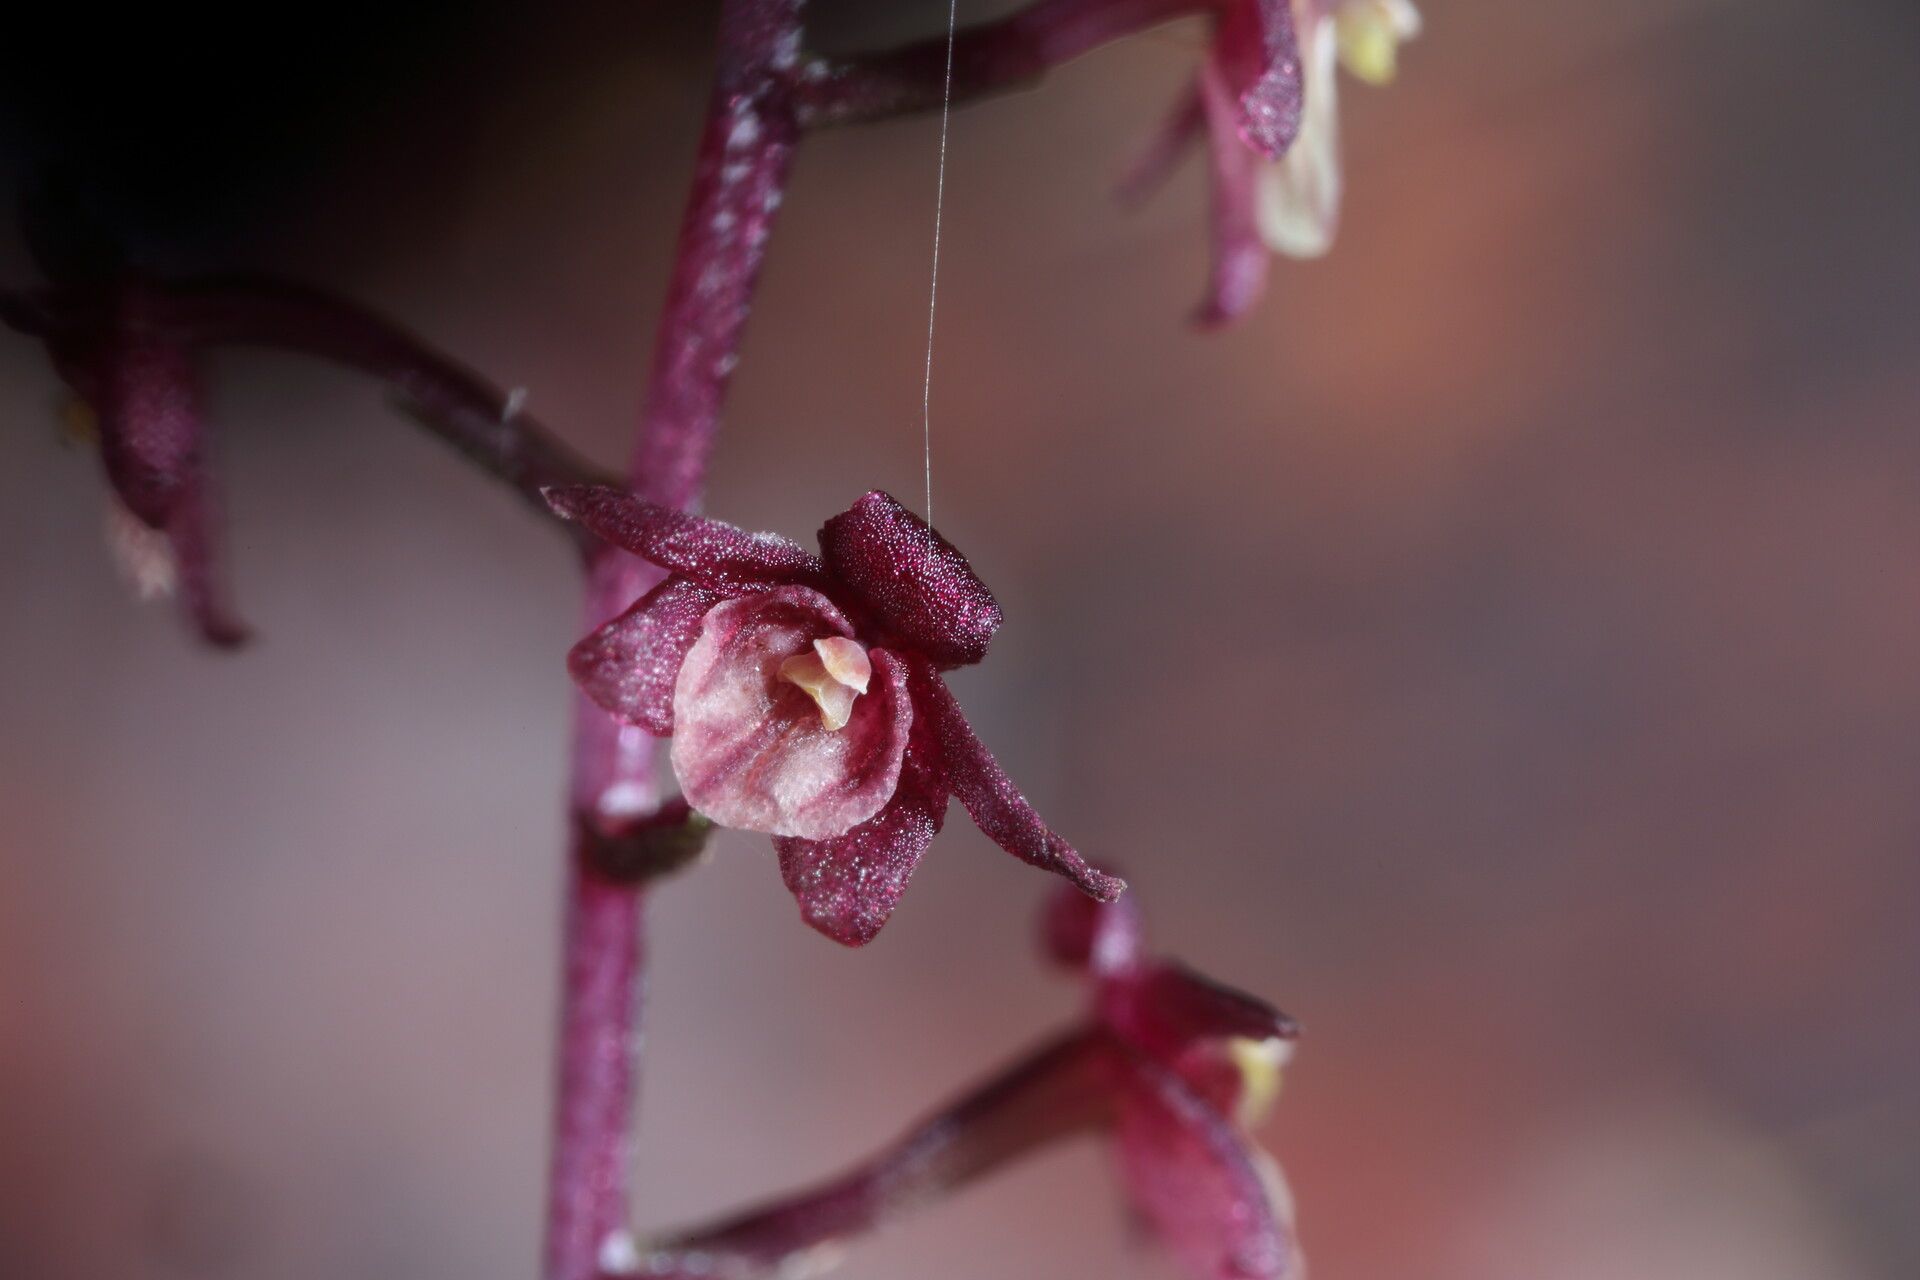
Well, hello there, fellow plant lovers! It’s so wonderful to connect with you today. If you’re anything like me, you’ve probably fallen head over heels for the delicate charm of Malaxis weberbaueriana. You know, with its dainty, almost ethereal blooms that seem to dance in the slightest breeze? I find them absolutely captivating, and there’s a special kind of joy that comes from coaxing a new life from an existing one. Propagating these beauties can be a bit of a journey, I’ll admit. For the absolute beginner, it might feel a tad daunting, but with a little patience and a good dose of understanding, I promise you, it’s incredibly rewarding.
The Best Time to Start
When it comes to giving your Malaxis weberbaueriana the best shot at happy multiplication, spring is truly your golden ticket. This is when the plant is gearing up for active growth, meaning it’s full of energy and ready to channel it into developing new roots and shoots. Look for stems that are robust and healthy, ideally those that have finished blooming or are just starting to show new growth at their base. Trying to propagate when the plant is dormant or stressed is like asking someone to run a marathon without any training – it’s just not going to end well.
Supplies You’ll Need
Before we get our hands dirty, let’s gather our essentials. Having everything at the ready makes the whole process so much smoother.
- Sharp, sterilized pruning shears or a clean knife: Essential for making clean cuts that prevent disease.
- Well-draining potting mix: I always opt for a blend of orchid bark, perlite, and a touch of coco coir. This mimics their natural epiphytic tendencies.
- Small pots or seedling trays: Cleanliness is key here!
- Rooting hormone (optional but recommended): A little boost can go a long way for encouraging root development. Look for one suitable for orchids or delicate plants.
- Clear plastic bag or propagation dome: This creates a humid microclimate, which is crucial for new cuttings.
- Water: Preferably distilled or rainwater, as Malaxis can be sensitive to minerals.
- A light-filled spot: Bright, indirect light is perfect. Avoid direct sun, which can scorch delicate new growth.
Propagation Methods
Malaxis weberbaueriana is typically propagated through division, which is quite straightforward once you get the hang of it. Think of it as giving your plant a helpful haircut to encourage new growth.
- Gently remove the plant from its pot. Be as delicate as possible to avoid damaging the roots.
- Inspect the root ball. You’re looking for distinct sections where new growth is emerging, usually indicated by pseudobulbs or shoots.
- Using your sterilized pruning shears or knife, carefully separate these sections. Aim to get at least one or two healthy pseudobulbs and a good portion of roots with each division. If the roots are tangled, a gentle tease with your fingers might help, but don’t force it.
- Allow the cut surfaces to callus over for a few hours. This is a crucial step to prevent rot. You can place the divisions in a dry, airy spot.
- Pot up each division into its own small pot filled with your prepared potting mix. Plant them so the base of the pseudobulb is just at the soil surface.
- Water lightly. You want the potting mix to be consistently moist, but not waterlogged.
The “Secret Sauce” (Pro Tips)
Now, let’s talk about those little tricks that seasoned gardeners swear by. These aren’t strictly necessary, but they can certainly give your propagation efforts a real edge.
- The “humidity tent” is your friend. Once you’ve potted your divisions, pop them into a clear plastic bag or cover them with a propagation dome. This traps moisture and creates the humid environment these sensitive plants crave during their establishment phase. Just make sure to open it for a few minutes each day to allow for air circulation and prevent fungal issues.
- Bottom heat can work wonders. If you have a seedling heat mat, placing your potted divisions on it can significantly speed up root development. Just ensure the heat isn’t too intense; you want to encourage, not cook!
- Don’t overwater, even in the humidity tent. This is probably the number one mistake people make. While they love humidity, perpetually soggy soil is a death sentence for most orchids and Malaxis are no different. Let the surface of the potting mix dry out slightly between waterings.
Aftercare & Troubleshooting
Once your new divisions have been potted, the real work begins – nurturing them into mature plants! Continue to keep them in bright, indirect light and maintain that crucial humidity. Water when the top inch of the potting mix feels dry to the touch. You’ll start to see new growth appearing within a few weeks to a couple of months.
Now, what if things don’t go as planned? The most common culprit, as you might guess, is root rot. This shows up as mushy, black roots and wilting leaves. If you see this, act quickly. You may need to unpot the division, trim away the rotted roots with your sterilized tool, and repot into fresh, dry potting mix. Sometimes, a healthy division just doesn’t take. Don’t be discouraged! It happens to the best of us. Nature has its own timeline, and not every cutting will succeed.
A Little Patience, A Lot of Joy
Propagating Malaxis weberbaueriana is a wonderful way to expand your collection and deepen your connection with these fascinating plants. It might take a little time and a few attempts, but the satisfaction of watching a tiny division mature into its own beautiful specimen is truly unparalleled. So, be patient with yourself and the process. Enjoy the journey, embrace the learning, and soon you’ll have a whole clan of these delightful blooms gracing your home. Happy growing!
Resource: