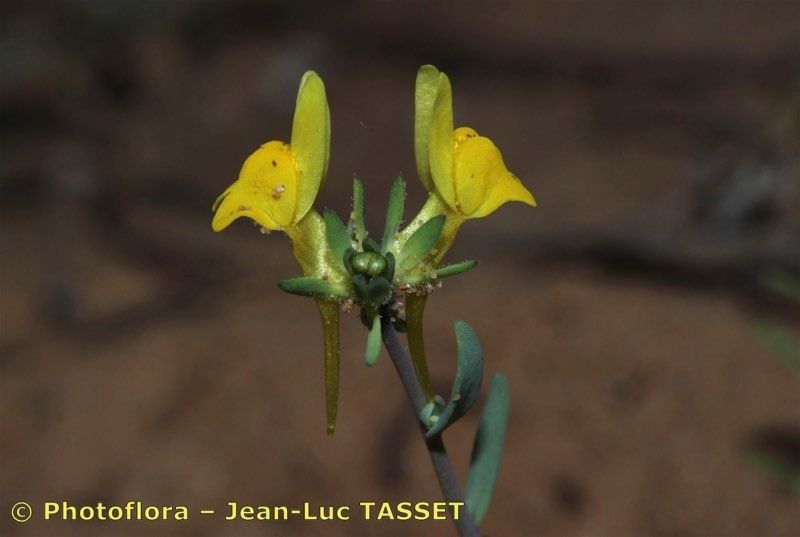
Alright, fellow plant lovers, gather ’round! Today, we’re diving into the delightful world of Linaria munbyana, also known as Algerian Toadflax. If you’re a fan of those charming, delicate, snapdragon-like flowers that seem to spill over garden walls and pots with such effortless grace, then you’re in for a treat. Propagating this beauty is a wonderfully rewarding endeavor, allowing you to fill your garden or share these beauties with friends. For beginners, I’d say Linaria munbyana is moderately easy to propagate. It’s not quite as foolproof as a succulent, but with a little attention, you’ll be rewarded with plenty of new plants.
The Best Time to Start
My go-to time for propagating most things, including our lovely Linaria munbyana, is in the late spring to early summer. This is when the plant is actively growing and has an abundance of fresh, pliable stems. You’re looking for stems that are firm but not woody – think of them as being in that perfect “pencil-tip” stage. Starting then gives your new cuttings plenty of time to establish roots before the heat of summer or the cooler weather of autumn sets in.
Supplies You’ll Need
Before we get our hands dirty, let’s make sure we have everything we need for a successful propagation session.
- Sharp Pruning Shears or a Craft Knife: Clean cuts are essential to prevent disease.
- Rooting Hormone (Optional but Recommended): A little helper to encourage root development. Look for one suitable for softwood cuttings.
- Small Pots or Seed Trays: Clean containers are a must.
- Well-Draining Potting Mix: I like a mix of equal parts peat moss or coir, perlite, and a little bit of fine compost. This ensures aeration and prevents waterlogging.
- Watering Can or Spray Bottle: For gentle watering.
- Clear Plastic Bags or a Propagator Lid: To create a humid environment.
- Labels and a Marker: So you don’t forget what you’ve planted where!
Propagation Methods
Linaria munbyana is quite amenable to a few different propagation techniques. I find stem cuttings to be the most reliable and productive method.
Stem Cuttings
This is my personal favorite for Linaria munbyana.
- Select Your Cuttings: Find a healthy, non-flowering stem on your established plant. Using your clean pruning shears or craft knife, take cuttings that are about 4-6 inches long. Make the cut just below a leaf node (where a leaf attaches to the stem).
- Prepare the Cuttings: Gently remove the leaves from the bottom half of each cutting. This is important because any leaves below the soil or water will rot and can introduce disease. You can leave the top couple of leaves intact.
- Apply Rooting Hormone (Optional): If you’re using rooting hormone, dip the cut end of each stem into the powder or gel. Tap off any excess.
- Potting Up: Fill your small pots or trays with your well-draining potting mix. Make a small hole in the center of each pot with your finger or a pencil.
- Planting: Gently insert the cut end of each prepared cutting into the hole in the soil. Firm the soil gently around the stem to ensure good contact.
- Water Gently: Water thoroughly but gently. You want the soil to be evenly moist, but not soggy. A spray bottle is excellent for this initial watering to avoid disturbing the cuttings.
- Create Humidity: Cover the pots with a clear plastic bag, securing it around the rim with a rubber band, or place them under a propagator lid. This creates a mini-greenhouse effect, keeping the humidity high, which is crucial for cuttings.
Water Propagation (A Gentler Approach)
While I prefer soil, some gardeners have success with water propagation, especially for Linaria munbyana.
- Prepare Cuttings: Follow steps 1 and 2 from the stem cutting method.
- Place in Water: Fill a clean jar or glass with fresh water. Place the prepared cuttings into the water, ensuring that no leaves are submerged.
- Location: Place the jar in a bright spot, but out of direct sunlight.
- Change Water: Change the water every few days to keep it fresh and prevent bacterial growth.
- Transplanting: Once you see good root development (about 1-2 inches long), you can transplant the cuttings into pots filled with your well-draining potting mix. Water them well as you would a potted cutting.
The “Secret Sauce” (Pro Tips)
Now, for a few of those little tricks I’ve picked up over the years that can really make a difference.
- Bottom Heat is Your Friend: If you have a heat mat for seedlings or propagation, using it under your pots of cuttings can seriously speed up root formation. Linaria munbyana appreciates a little warmth to get things going.
- Don’t Over-Crowd: Resist the temptation to cram too many cuttings into one pot. Give them a little space. This improves air circulation, which is vital for preventing fungal diseases. It also makes it easier to handle them individually when they’re ready for transplanting.
- Watch for “Callusing”: Sometimes, if you’re a bit impatient or have taken cuttings in slightly less-than-ideal conditions, the cut end might look a little dry or slightly “callused” before roots appear. This isn’t necessarily a bad sign; it just means the plant is sealing its wound and getting ready to put out roots.
Aftercare & Troubleshooting
Once your cuttings have started to show signs of life, it’s time for a change of pace.
- Rooting Signs: You’ll know your cuttings are rooting when you see new growth appearing at the tip or where the leaves sprout. You might also feel a gentle resistance when you lightly tug on a cutting – don’t pull too hard!
- Acclimatizing: Once roots are established, you’ll need to gradually acclimatize your new plants to normal conditions. Start by opening the plastic bag for a few hours each day, then remove it completely.
- Watering: Continue to water regularly, allowing the top inch of soil to dry out slightly between waterings.
- Troubleshooting – Rot: The most common issue you’ll encounter is rot, which usually happens if the soil is too wet or the humidity is too high for too long without adequate air circulation. If you see stems turning mushy and black at the soil line, sadly, those are a lost cause. Remove them immediately to prevent the rot from spreading. Ensure your potting mix is draining well and try to provide a bit more air circulation.
A Little Encouragement
Propagating plants is a beautiful dance between you and nature. Not every cutting will make it, and that’s okay! Celebrate the successes, learn from the challenges, and most importantly, enjoy the process. Watching a tiny cutting transform into a flourishing plant is one of gardening’s greatest joys. Happy propagating, and may your Linaria munbyana bloom abundantly!
Resource:
https://identify.plantnet.org/k-world-flora/species/Linaria%20munbyana%20Boiss.%20&%20Reut./data