Oh, hello there! Come on in and grab a mug. We’re going to chat about one of my absolute favorite lilies: Lilium speciosum, the Showy Lily.
Bringing Home the Beauty: My Love for Lilium Speciosum
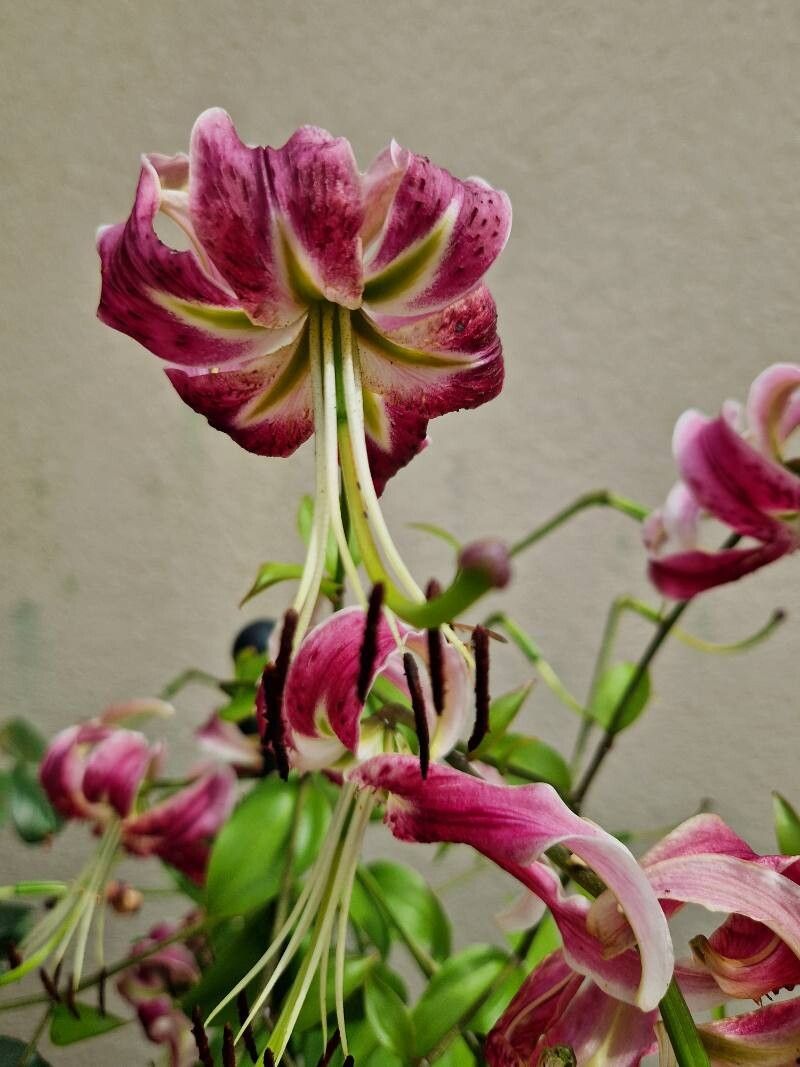
There’s something truly magical about these lilies. Their elegant, recurved petals, often fragrant, seem to cascade in a most captivating way. They bring such a refined beauty to the garden, don’t they? And the best part? You can have more of them! Propagating Lilium speciosum isn’t exactly a walk in the park for a complete novice, I’ll admit. It takes a little patience and a keen eye, but it’s incredibly rewarding when you see those first tiny roots emerge. Think of it as a lovely challenge, a chance to deepen your connection with these stunning plants.
When to Get Your Hands Dirty: The Best Time to Start
For Lilium speciosum, the real sweet spot for propagation is late summer to early autumn, just as the plant is finishing up its flowering performance. This is when the bulb is still robust, having stored up all its energy from the summer sun and is preparing for its winter rest. It’s the perfect moment to gently work with the bulbs.
Your Propagation Toolkit
Here’s what you’ll want to have on hand for this exciting project:
- Sharp, clean pruning shears or a small knife: We need clean cuts to prevent disease.
- A good quality, well-draining potting mix: I often use a blend of peat moss, perlite, and a bit of coarse sand. Something that lets water drain away freely is key!
- Small individual pots or trays: Yogurt cups with drainage holes poked in the bottom work in a pinch!
- Rooting hormone powder (optional but recommended): This can give your cuttings a helpful boost.
- A spray bottle with water: For keeping things gently moist.
- Labels and a permanent marker: You’ll thank yourself later for keeping track!
Making More Magic: Propagation Methods
With Lilium speciosum, we’re primarily going to focus on dividing the parent bulb and working with what we call “bulbils” or “scales.”
Method 1: The Gentle Art of Bulb Division
This is my go-to method for lilies.
- Dig with Care: In late summer or early autumn, when the foliage is starting to yellow but before it fully dies back, carefully dig around the parent lily. You want to expose the bulb without damaging its roots or any developing offsets.
- Separate the Offsets: Gently tease apart any smaller bulbs (offsets) that have formed around the main bulb. They might be attached by a small neck; if so, use your clean knife to make a clean cut. If they’re already separate, even better!
- Inspect and Plant: Examine each offset. If it looks plump and healthy, it’s good to go. If there’s any sign of rot or damage, it’s best to discard it. Plant each offset in its own pot, burying it about 4-6 inches deep, with a bit of potting mix beneath and on top.
Method 2: Working with Bulbils and Scales
This method is a bit more involved but can yield exciting results.
-
Bulbils: Sometimes, you’ll see small, bulb-like structures forming in the leaf axils along the stem, or even from fallen flowers. These are bulbils!
- Harvest Gently: Once they reach a decent size (about pea-sized is good), carefully pluck them off.
- Plant Them Up: Pot them individually in a well-draining mix, just like the offsets, burying them about an inch deep.
-
Scales: This is a bit like propagating an onion or garlic.
- Remove Scales: Gently pull off several healthy-looking outer scales from the bulb. Try to get the entire scale, from the base to the tip.
- Rooting Hormone (Optional): Dip the cut end of each scale into rooting hormone powder.
- Planting the Scales: Insert the scaled end of each scale about an inch deep into your prepared potting mix. You want the base of the scale to be in contact with the soil.
The “Secret Sauce”: My Insider Tips
Here are a couple of things I’ve learned over the years that make a big difference:
- Don’t Rush the Roots: When you’re planting your offsets, bulbils, or scales, resist the urge to constantly check for roots. Let them do their thing undisturbed. Peeking too often can disrupt delicate root formation.
- Embrace the Humidity Tent: For scales or bulbils, creating a humid environment is crucial. Once potted, place the entire tray or pots inside a clear plastic bag, sealing it loosely. This traps moisture and encourages those tiny roots to sprout. Just make sure to open it for a few minutes every few days to allow for air circulation and prevent mold.
Aftercare and When Things Go Wrong
Once your new Lilium speciosum babies have started to show progress – you’ll see tiny green shoots emerging from the soil – it’s time for a slightly different approach.
- Water Wisely: Keep the soil consistently moist but never waterlogged. I like to water from the bottom if possible, letting the pot sit in a tray of water for about 15-30 minutes until the topsoil feels damp.
- Light and Warmth: Place your new plants in a bright spot, but out of direct, scorching sun. A little warmth can also be beneficial, especially for developing scales. If you’re propagating in a cooler environment, a gentle bottom heat mat can be a game-changer.
- Troubleshooting – The Rot Factor: The most common issue you’ll encounter is rot. This usually happens when the soil stays too wet for too long. If you see your cutting looking limp, mushy, or developing black spots, it’s likely succumbing to rot. Unfortunately, there’s not much you can do once it sets in, but learning from it is key for next time. Ensure good drainage and avoid overwatering. Sometimes, if you catch rot very early on a scale, you can try cutting away the affected part and replanting the healthy section, but it’s a long shot.
Happy Growing!
Propagating Lilium speciosum is a journey, not a race. Don’t get discouraged if not every attempt is a roaring success. Be patient with your little darlings, enjoy the process of nurturing them, and you’ll soon be rewarded with an even more spectacular display of these beautiful lilies in your garden. Happy planting!
Resource:
https://identify.plantnet.org/k-world-flora/species/Lilium%20speciosum%20Thunb./data