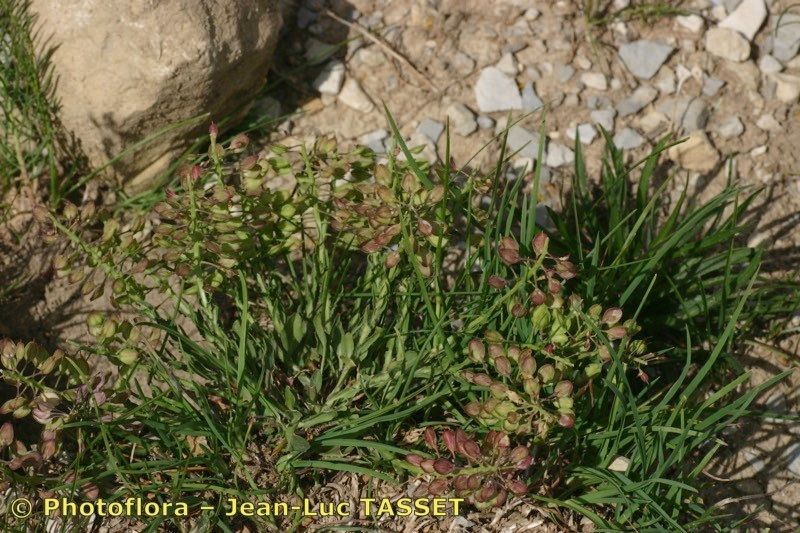
Ah, Lepidium villarsii! What a delightful little plant to have gracing the garden. Its delicate, feathery foliage and charming little white flowers bring a touch of whimsy, don’t they? And if you’ve ever admired a particularly lush specimen, you’ve probably thought about how wonderful it would be to have more. Trust me, propagating Lepidium villarsii is a truly satisfying endeavor. You get to experience the magic of new life emerging from just a small piece of your existing plant. For beginners, I’d say it’s moderately easy. It’s not rock solid, but with a little attention, you’ll be rewarded.
The Best Time to Start
Honestly, the sweet spot for propagating Lepidium villarsii is late spring or early summer. This is when the plant is actively growing and has plenty of vigor. You’re looking for healthy, new growth, often called “softwood” or “semi-hardwood” cuttings. Avoid taking cuttings from flowering stems; you want the plant’s energy focused on root development, not seed production.
Supplies You’ll Need
Here’s a little kit to get you started:
- Sharp pruning shears or a clean knife: For making clean cuts.
- Rooting hormone (optional but recommended): A powder or gel to encourage root growth.
- Potting mix: I prefer a light, well-draining mix, usually a blend of peat moss or coir, perlite, and a bit of compost. You can also buy specific cutting mixes.
- Small pots or seedling trays: With drainage holes, of course!
- Plastic bags or a propagator: To create a humid environment.
- Watering can or spray bottle: For gentle watering.
Propagation Methods
Let’s dive into a couple of reliable ways to get more Lepidium villarsii.
Stem Cuttings: My Go-To
This is usually the most successful method for many plants, and Lepidium villarsii is no exception.
- Take Cuttings: In late spring or early summer, select healthy, non-flowering stems. Using your sharp shears, cut a piece that’s about 3-6 inches long. Make sure each cutting has at least two sets of leaves.
- Prepare the Cuttings: Gently remove the lower leaves. You want a clean stem where roots can form. If your cutting is quite large, you can even pinch off the top few leaves to encourage bushier growth later on.
- Dip and Plant: If you’re using rooting hormone, lightly dip the cut end into the powder or gel. Then, make a small hole in your potting mix with a pencil or your finger. Insert the cut end of the stem into the hole, ensuring it’s firm.
- Water and Cover: Gently water the soil around the cutting. Then, place the pot inside a plastic bag or cover it with a propagator lid. This traps humidity, which is crucial for the cuttings to callus over and start rooting.
Division: Simple and Effective
If you have an established clump of Lepidium villarsii that’s gotten a bit too big for its boots, division is a breeze.
- Dig Up the Plant: In early spring, before it gets too hot, carefully dig up the entire plant. Try to get as much of the root ball as possible.
- Separate the Roots: Gently shake off excess soil. You should be able to see natural divisions in the root system. You can often gently pull the plant apart by hand. If it’s a bit stubborn, use a clean trowel or knife to make the separation, ensuring each section has roots and some top growth.
- Replant Immediately: Plant each division into a prepared spot in the garden or into pots with fresh potting mix. Water them well.
The “Secret Sauce” (Pro Tips)
Here are a few little tricks I’ve picked up over the years that can really boost your success:
- Don’t let those leaves touch the water! If you’re doing water propagation (which works for some herbaceous plants, but I find cuttings in soil more reliable for Lepidium villarsii), make sure only the stem is submerged. Leaves sitting in water will rot, taking your cutting with them.
- Bottom heat is your friend. If you have a heat mat designed for propagation, placing your pots on it can significantly speed up root development. It mimics the warmth of the soil in summer and encourages those little roots to get a wiggle on.
- Air circulation is key. While you want humidity for your cuttings, stagnant air can lead to fungal problems. If you’re using a plastic bag, open it for a few minutes each day to let some fresh air in.
Aftercare & Troubleshooting
Once you see new growth appearing on your cuttings – usually after 3-6 weeks – that’s a good sign roots are forming!
- Gradual Acclimation: If you’ve been using a propagator or plastic bag, start to gradually reduce the humidity over a week or two. This helps the new plant adjust to normal conditions.
- Check for Roots: You can gently tug on a cutting to see if there’s resistance. If there is, it’s likely rooted!
- Watering: Keep the soil consistently moist, but not waterlogged. Overwatering is the quickest way to invite root rot, which you’ll recognize as a slimy, mushy stem base and wilting leaves even when the soil is wet. If you suspect rot, it’s tough to save, but you can try propagating a fresh cutting.
- Patience is paramount. Sometimes a cutting just won’t take. Don’t get discouraged! Gardening is a journey of experimentation.
A Encouraging Closing
Propagating Lepidium villarsii is such a rewarding way to expand your collection and share the beauty of this plant with friends. Be patient with the process, observe your cuttings closely, and don’t be afraid to try again if your first attempt isn’t perfect. Happy propagating, and enjoy those lovely new plants!
Resource:
https://identify.plantnet.org/k-world-flora/species/Lepidium%20villarsii%20Gren.%20&%20Godr./data