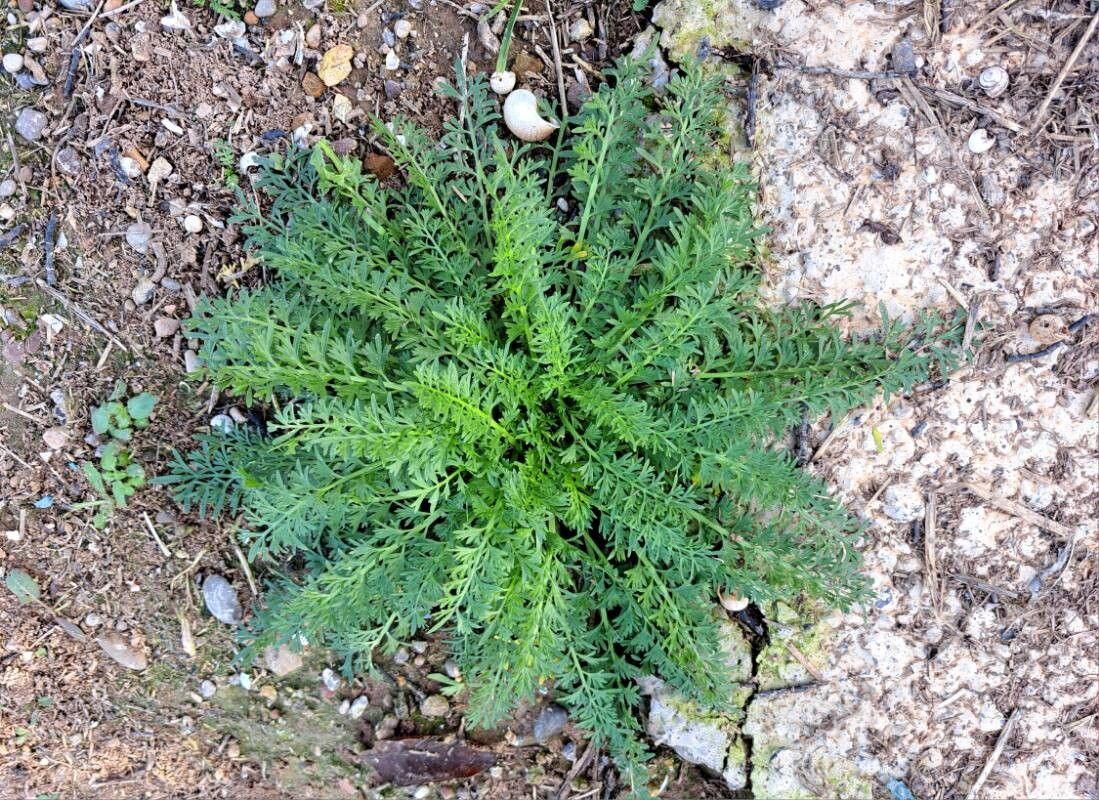
Hello there, fellow garden enthusiasts! It’s so lovely to connect with you again. Today, we’re diving into the charming world of Lepidium didymum. You might know it better as twin-pod pepperweed, and trust me, it’s a little gem to have in your garden. It’s a wonderfully fast-growing, sprawling annual with delicate, feathery foliage and tiny white flowers, followed by those distinctive, heart-shaped seed pods. It adds such a lovely texture and a hint of wild charm to any border or even a pot on the patio.
For me, propagating Lepidium didymum is an absolute delight. Watching a tiny snippet transform into a flourishing plant is pure magic. And the good news? This is a genuinely beginner-friendly plant to propagate! If you’re just dipping your toes into the world of plant reproduction, this is an excellent one to start with. You’ll likely have success with minimal fuss.
The Best Time to Start
The sweet spot for propagating Lepidium didymum is definitely late spring through early summer. This is when the plant is actively growing and has plenty of energy to put into developing new roots. You can also try in early autumn, especially if you have a protected space like a greenhouse where you can keep them going through cooler months. Aim to take your cuttings from healthy, vigorous stems that are not flowering or setting seed.
Supplies You’ll Need
Gathering your supplies makes the whole process smoother. Here’s what I usually have on hand:
- Sharp pruning shears or a clean knife: For making neat cuts.
- Small pots or trays: 3-4 inch pots are perfect.
- A good quality seed-starting mix or a blend of potting soil and perlite (around 50/50): This ensures excellent drainage, which is crucial for preventing rot.
- Worm castings (optional but recommended): A little boost of nutrients.
- A watering can with a fine rose: For gentle watering.
- Plastic bags or a propagation dome: To create a humid environment.
- Rooting hormone (optional): While Lepidium didymum usually roots quite readily without it, it can speed things up.
Propagation Methods
I find that taking stem cuttings is the most reliable and straightforward method for Lepidium didymum.
- Take Your Cuttings: Select a healthy, non-flowering stem. Using your sharp pruning shears or knife, take a cutting that is about 4-6 inches long. Make the cut just below a leaf node (where a leaf attaches to the stem). This is where roots are most likely to form.
- Prepare the Cuttings: Gently remove the lower leaves from the cutting. You want to leave just a few leaves at the very top. This reduces water loss and prevents leaves from rotting in the soil.
- Apply Rooting Hormone (Optional): If you’re using rooting hormone, dip the cut end of the stem into the powder or gel. Tap off any excess. This step isn’t always necessary, but it can give your cuttings a little extra encouragement.
- Plant Your Cuttings: Fill your small pots with your prepared soil mix. Make a hole in the center of the soil with your finger or a pencil. Insert the cut end of the Lepidium didymum cutting into the hole, ensuring that at least one leaf node is buried beneath the surface. Gently firm the soil around the stem.
- Water and Cover: Water gently to settle the soil around the cuttings. Now, here’s where the humidity comes in. Either place a plastic bag loosely over the pot (making sure the leaves don’t touch the plastic) or cover the pots with a propagation dome. This creates a mini-greenhouse effect.
The “Secret Sauce” (Pro Tips)
Here are a couple of little tricks I’ve learned over the years that can make a big difference:
- Don’t Let the Leaves Touch the Water: When you water, make sure the soil is moist but not waterlogged. And, as I mentioned, when you cover your cuttings, ensure no leaves are directly touching the plastic or dome. Any contact can encourage rot.
- Bottom Heat is Your Friend: If you have a propagator with a heating element, or even just a warm spot away from direct, harsh sun, placing your pots on it can really speed up root development. It mimics the warmth of spring and makes the plant think it’s go-time!
- Be Patient with Your Cuttings: While Lepidium didymum is fast, it still needs time. Don’t be tempted to pull them out to check for roots too soon.
Aftercare & Troubleshooting
Once your cuttings have started to root, you’ll see new growth appearing. This is a fantastic sign!
- Acclimatize: Gradually remove the plastic bag or dome over a few days to allow the new plant to adjust to the ambient humidity.
- Watering: Water when the top inch of soil feels dry to the touch. Avoid letting them dry out completely, but also don’t keep them soaking wet.
- Light: Place your new plants in a bright spot with indirect sunlight. Direct, scorching sun can be too harsh for young cuttings.
- Troubleshooting – Rot: The most common issue you might encounter is rot. If you see stems turning mushy and black, or leaves wilting despite moist soil, it’s likely rot. This is usually caused by overwatering and poor air circulation. Don’t be discouraged if a few don’t make it; it happens to all of us! Just remove the affected cuttings and try again, focusing on better drainage and airflow.
A Gentle Encouragement
Propagating Lepidium didymum is a wonderful way to multiply your enjoyment of this charming plant. Be patient with the process, trust your instincts, and don’t be afraid to experiment. Nature is incredibly resilient, and with a little care and attention, you’ll soon have a whole host of beautiful pepperweed plants to share or tuck into more garden nooks. Happy propagating, and enjoy the journey!
Resource:
https://identify.plantnet.org/k-world-flora/species/Lepidium%20didymum%20L./data