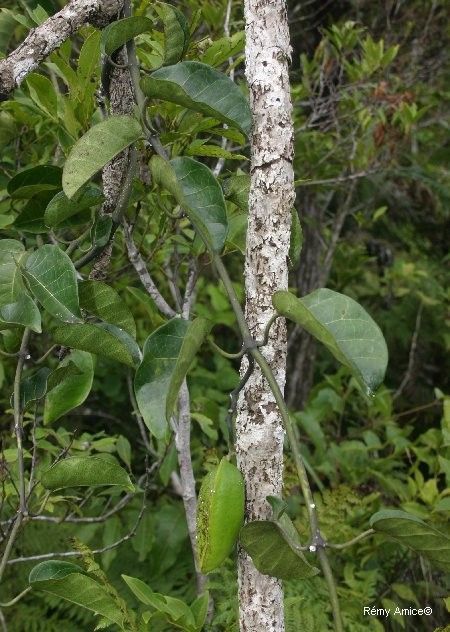
Oh, Leichhardtia tylophoroides! Isn’t she a beauty? I just adore the way her tendrils twist and turn, and those delicate, star-shaped flowers are just dreamy. If you’re looking to add more of this lovely vine to your collection, or perhaps share it with a friend, propagating it is a truly rewarding experience. Now, I’ll be honest, for absolute beginners, Leichhardtia can be a little finicky. But don’t let that daunt you! With a few key pointers, you’ll be well on your way to success.
The Best Time to Start
For the highest success rate, I always find that late spring or early summer is the prime time to take cuttings. This is when the plant is actively growing, and its energy is buzzing, making it more receptive to forming new roots. You want to select stems that are healthy and firm, but not yet woody. Think of it as taking a piece of the plant when it’s full of life and vigor!
Supplies You’ll Need
Gathering your tools beforehand makes the whole process go much smoother. Here’s what you’ll want to have on hand:
- Sharp Pruning Shears or a Clean Knife: For making clean cuts. We don’t want to crush those precious stems.
- Rooting Hormone (Optional, but Recommended): A good quality rooting powder or gel can give your cuttings an extra boost.
- Well-Draining Potting Mix: I like to use a blend of equal parts peat moss or coir, perlite, and coarse sand. This ensures great aeration and prevents waterlogging. You can buy special cactus and succulent mixes too, which often work wonderfully.
- Small Pots or Propagation Trays: Clean pots are a must to prevent disease. Small ones are perfect for cuttings.
- Plastic Bags or a Propagator: To maintain humidity around your cuttings.
- Watering Can with a Fine Rose or a Spray Bottle: For gentle watering.
Propagation Methods
Leichhardtia tylophoroides is wonderfully amenable to propagation by stem cuttings. It’s my go-to method because it’s effective and you can get several new plants from one mature specimen.
Stem Cuttings:
- Select Your Cuttings: Find healthy, non-flowering stems that are about 3-6 inches long. Look for stems that have at least two sets of leaves.
- Make the Cut: Using your sharp shears or knife, take a clean, angled cut just below a leaf node (where the leaf attaches to the stem).
- Prepare the Cutting: Gently remove the lower leaves from the bottom inch or so of the stem. This prevents them from rotting when placed in the soil or water.
- Apply Rooting Hormone (Optional): If using, dip the cut end into your rooting hormone, tapping off any excess.
- Plant Your Cuttings: Fill your small pots with your prepared potting mix. Make a small hole in the center with a pencil or your finger. Insert the cut end of the stem into the hole and gently firm the soil around it.
- Water Thoroughly: Water the soil well until it drains from the bottom of the pot. Let excess water drain away.
- Create a Humid Environment: Cover the pot with a clear plastic bag or place it in a propagator. Make sure the leaves don’t touch the plastic. You can use stakes to keep the bag from collapsing.
- Provide Bright, Indirect Light: Place your pots in a location that receives plenty of bright, but filtered light. Avoid direct sunlight, which can scorch the young cuttings.
- Be Patient! Check the soil moisture regularly and mist the leaves occasionally if the bag isn’t holding enough humidity. Roots can take anywhere from 4 to 8 weeks to form. You can gently tug on a cutting; if there’s resistance, it has rooted.
The “Secret Sauce” (Pro Tips)
Here are a couple of things I’ve learned over the years that can really make a difference:
- Bottom Heat is Your Friend: If you can, place your pots on a gentle heating mat. This little bit of warmth from below mimics springtime soil temperatures and can significantly speed up root development. It’s like giving them a cozy little foot bath!
- Don’t Over-Water, Ever! This is the most common mistake. Leichhardtia cuttings hate soggy soil. It’s much better to let the soil dry out slightly between waterings than to overdo it. If you see water consistently pooling, your drainage isn’t good enough.
- Cleanliness is Crucial: I can’t stress this enough – sterilize your tools before you start! A quick wipe down with rubbing alcohol can prevent the transfer of any fungal or bacterial diseases that could doom your cuttings before they even get started.
Aftercare & Troubleshooting
Once your cuttings have developed a good root system (you’ll see new growth, and they’ll feel firmly rooted), it’s time to transition them.
- Gradual Acclimatization: Slowly remove the plastic bag over a few days to help them adjust to lower humidity.
- Repotting: Gently transplant your rooted cuttings into slightly larger pots with fresh, well-draining potting mix.
- Watering: Continue to water when the top inch of soil feels dry. Avoid letting them sit in water.
- Light and Fertilizer: They’ll appreciate the same bright, indirect light as your established plants. You can start feeding them with a diluted liquid fertilizer during the growing season once they show consistent new growth.
The most common sign of trouble is rot. If your cuttings look mushy, yellow, or black at the base, or if they suddenly wilt and fall apart, it’s usually a sign of too much moisture in the soil. If you catch it early, you might be able to salvage a healthy section and try again. Black, mushy stems are a clear indication of a problem.
A Word of Encouragement
Propagating plants is a journey, and sometimes it’s a learning experience. Don’t get discouraged if your first few attempts aren’t perfect. Each cutting is a tiny miracle, and watching those roots emerge fills me with delight every single time. Be patient, trust the process, and enjoy the magic of creating new life! Happy gardening!
Resource: