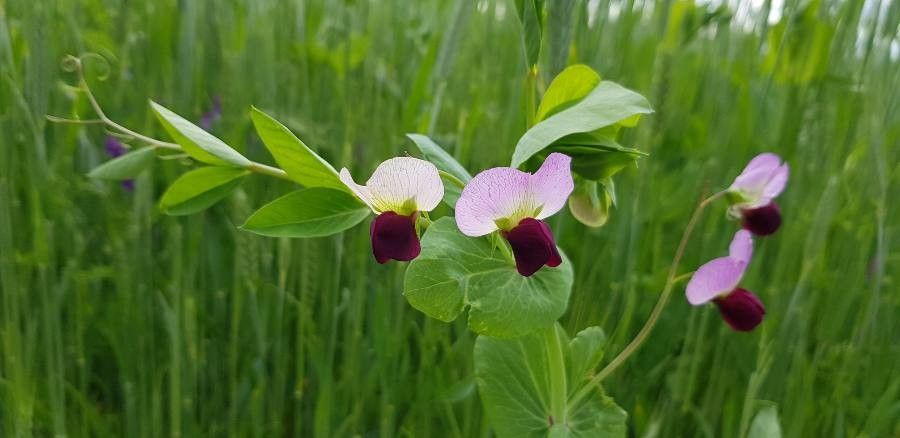
Hello there, fellow garden enthusiasts! Isn’t it just wonderful when you find a plant that truly sings in your garden? For me, that’s Lathyrus oleraceus, also known as the sweet pea. Oh, the intoxicating scent! And the delicate, almost impossibly beautiful blooms. It’s a plant that just brings so much joy, and the thought of creating more of it yourself? Utterly rewarding.
Now, I know some plants can feel a bit intimidating to propagate, but I’m happy to tell you that sweet peas, for the most part, are quite amenable to a little coaxing. This is definitely a project that beginners can tackle with confidence!
The Best Time to Start
When it comes to sweet peas, timing is everything for the best success. Generally, late summer or early autumn is your sweet spot, especially if you’re aiming for plants that will bloom the following spring. This allows them to establish a good root system before the colder weather really sets in. You can also start them indoors in late winter to get a head start on the growing season.
Supplies You’ll Need
Gathering your supplies upfront makes the whole process so much smoother. Here’s what I usually have on hand:
- Seed trays or small pots: About 3-4 inches deep are perfect.
- A good quality seed-starting mix: I prefer something light and well-draining. You can mix in some perlite for extra aeration.
- Sharp secateurs or clean scissors: For making clean cuts.
- Rooting hormone (optional but helpful): Especially if you’re trying stem cuttings.
- Watering can with a fine rose: To water gently.
- Labels and a permanent marker: Trust me, you’ll thank yourself later!
- A warm spot: This could be a sunny windowsill or a heated propagator.
Propagation Methods
Sweet peas are most commonly and successfully propagated by seed, but if you’re looking to clone a particularly special variety or want to try something a little different, stem cuttings can work too.
From Seed (The Classic Approach):
This is by far the easiest and most reliable method for sweet peas.
- Soaking: Sweet pea seeds have a hard coat. To help them along, soak your seeds in warm water for 12-24 hours before planting. They should swell slightly; if they don’t, they might not germinate, so it’s worth the wait.
- Sowing: Fill your seed trays or pots with the seed-starting mix, leaving about an inch of space at the top.
- Planting: Sow the soaked seeds about 1 inch deep, pointy end up if you can discern it. If you’re planting multiple seeds in a tray, space them about 2-3 inches apart.
- Watering: Water gently but thoroughly. The soil should be moist but not waterlogged.
- Location: Place the trays in a warm, bright spot. A windowsill that gets plenty of light is ideal.
- Germination: You should see seedlings emerge within 7-14 days.
From Stem Cuttings (A Bit More Advanced):
This method is best done in late spring or early summer when the plant is actively growing.
- Selection: Look for healthy, non-flowering shoots that are about 4-6 inches long.
- Taking the Cutting: Using your sharp secateurs or scissors, make a clean cut just below a leaf node (where a leaf joins the stem). Remove the lower leaves, leaving just a couple at the top.
- Rooting Hormone (Optional): If you have rooting hormone, dip the cut end into it. This can significantly increase your chances of success.
- Planting: Fill small pots with your seed-starting mix. Make a hole in the center with a pencil or your finger.
- Insert the Cutting: Gently insert the cut end of the stem into the hole. Firm the soil around it.
- Watering: Water gently to settle the soil.
- Environment: This is crucial! You want to create a humid environment. You can do this by placing a plastic bag over the pot, supported by stakes so it doesn’t touch the leaves, or by using a propagator. Keep them in a bright, warm spot, out of direct sunlight.
The “Secret Sauce” (Pro Tips)
Here are a couple of things I’ve learned over the years that really make a difference:
- Don’t overcrowd when sowing seeds: While it might seem like a good idea to cram them in, giving each seedling a bit of space from the start will result in stronger, healthier plants that are less prone to damping off. I usually sow 2-3 seeds per pot and will thin to the strongest seedling once they’ve emerged.
- Bottom heat is your friend (for cuttings): If you’re trying stem cuttings, especially, a heated propagator or placing your pots on a heat mat can dramatically speed up root development. It mimics that lovely warm soil of early spring.
Aftercare & Troubleshooting
Once your seeds have germinated or your cuttings have rooted (you’ll know they’ve rooted by new leaf growth and slight resistance when you gently tug), it’s time for them to grow on!
- Watering: Continue to water regularly, allowing the top inch of soil to dry out slightly between waterings.
- Light: Ensure they continue to get plenty of bright light. If your seedlings are getting leggy (tall and thin), it means they need more light.
- Potting Up: As they grow, you might need to pot them up into larger containers. Handle them by their leaves, not their delicate stems.
- Hardening Off: Before planting them out permanently, it’s vital to harden them off. Gradually expose them to outdoor conditions over a week to ten days. Start with an hour or two in a sheltered spot, increasing the time and exposure each day.
Now, what if things go wrong? The most common culprit with seedlings is damping off. This is a fungal disease that causes young stems to rot at soil level, and the seedling collapses. It’s usually caused by overwatering and poor air circulation. If you see this, sadly, that seedling is lost, but you can try to improve conditions for the others. For cuttings, if they start to yellow and wilt without new growth, they might not have rooted, or the conditions might be too dry or too wet. Sometimes, it’s just a matter of trial and error!
So there you have it! Sweet peas are such a joy to grow, and propagating them yourself is a wonderful way to spread their beauty and fragrance. Be patient with the process, enjoy watching those tiny sprouts emerge, and don’t be discouraged if you have a few little setbacks. The satisfaction of nurturing a plant from its very beginning is truly special. Happy gardening!
Resource:
https://identify.plantnet.org/k-world-flora/species/Lathyrus%20oleraceus%20Lam./data