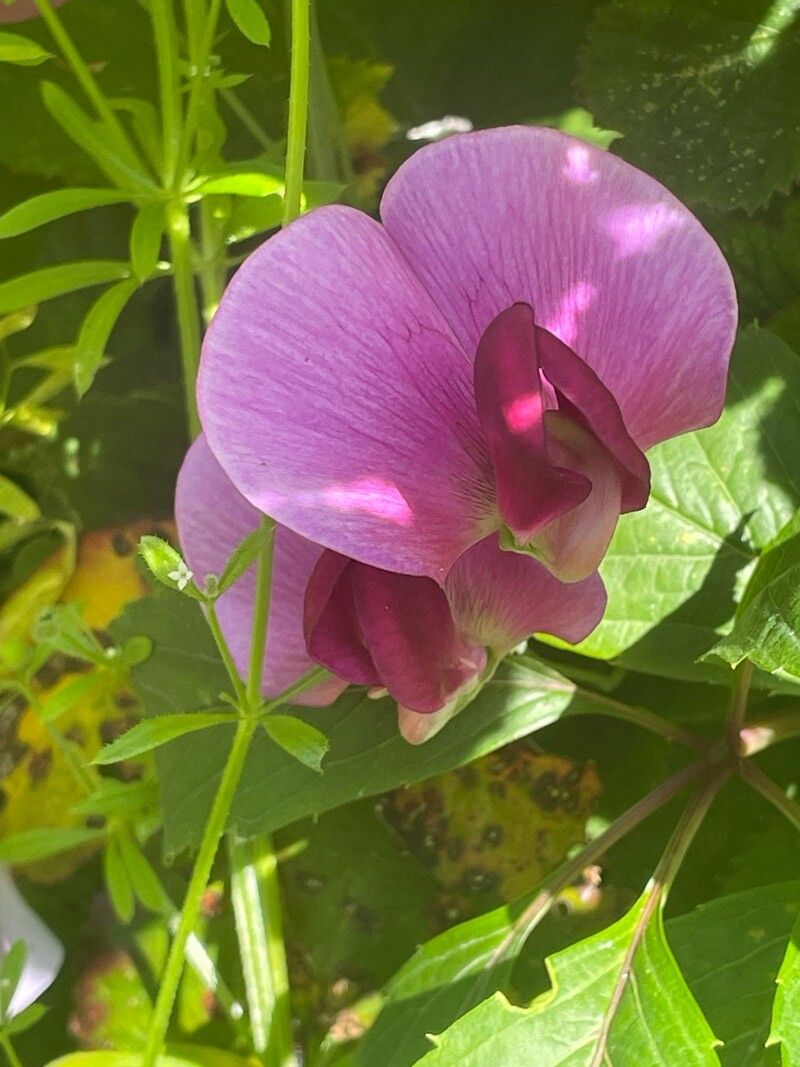
Oh, hello there fellow garden enthusiasts! Pull up a chair and let’s chat about one of my absolute favorites: Lathyrus grandiflorus, or the Wild Sweet Pea. If you’ve ever seen its large, gorgeous blooms gracing a trellis or spilling over a wall, you know the magic I’m talking about. The scent is delicate, the colors are divine, and the sheer abundance of flowers is just… well, it’s enough to make your heart sing.
Starting your own Lathyrus grandiflorus from cuttings or seed is such a rewarding endeavor. It’s not the trickiest plant to propagate, but a few little tricks can make all the difference between a plant that thrives and one that just barely gets by. I’m excited to share what I’ve learned over the years to help you succeed!
The Best Time to Start
For Lathyrus grandiflorus, my favorite time to get busy propagating is late spring to early summer, after the main flowering flush has passed. This is when the plant is putting its energy into new growth, making it more receptive to taking root. You’ll be looking for vigorous, non-flowering shoots that are pencil-thick and about 4-6 inches long. Think of it as giving it a little haircut from which new life will spring.
Supplies You’ll Need
Here’s what you’ll want to have on hand before you dive in:
- Sharp, clean pruning shears or a sharp knife: For making clean cuts. Dull tools can damage the stems.
- Rooting hormone: This is a helpful boost, especially for woodier types of cuttings. I prefer the powdered form.
- A good potting mix: A light, airy mix is crucial. I often use a blend of equal parts peat moss, perlite, and a bit of compost. You can also buy specialized propagation mixes.
- Small pots or seed trays: With good drainage holes, of course!
- A plastic bag or propagator lid: To create a humid environment for your cuttings.
- Labels and a marker: Never underestimate the importance of labeling! You’d be surprised how quickly you forget what you planted where.
Propagation Methods
While you can grow these from seed, I find propagating from stem cuttings to be exceptionally satisfying and often yields quicker results for me.
Here’s how I do it:
- Select Your Cuttings: As I mentioned, look for those healthy, non-flowering shoots in late spring or early summer. They should be at least 4 inches long.
- Make the Cut: Using your sharp shears or knife, make a clean cut just below a leaf node. This is the spot where a leaf attaches to the stem, and it’s where the magic of root formation often happens. Remove the cuttings from the parent plant carefully.
- Prepare the Cuttings: Gently strip off the lower leaves, leaving just a couple of small leaves at the very top. You can dip the cut end into water briefly to help the rooting hormone adhere.
- Apply Rooting Hormone: Dip the cut end of each stem into your rooting hormone powder. Tap off any excess – you don’t need a thick coating.
- Pot Up: Fill your small pots with your prepared potting mix. Make a dibble hole in the center with your finger or a pencil.
- Insert the Cuttings: Gently place each cutting into the hole, ensuring the rooting hormone-coated end is well covered by the soil. Firm the soil gently around the stem, making sure it’s snug. You can usually fit 2-3 cuttings per small pot, spaced a couple of inches apart.
- Water Gently: Water the pots thoroughly but gently. You want the soil to be moist, not waterlogged.
- Create Humidity: Now, for the crucial part. Place your pots inside a propagator or cover them loosely with a clear plastic bag. This traps moisture and creates that humid microclimate your cuttings need. Make sure the leaves aren’t touching the inside of the bag if you’re using one.
The “Secret Sauce” (Pro Tips)
Here are a couple of things I’ve learned that really make a difference:
- Bottom Heat is Your Friend: If you have a heated propagator mat, use it! A gently warmed soil base (around 70-75°F or 21-24°C) significantly speeds up root development. Even a slightly warm spot in your greenhouse works wonders.
- The Air Gap Trick: When you pot up your cuttings, make sure there’s an air gap between the soil surface and where you trimmed the lower leaves. This helps prevent that crucial lower stem from rotting in the damp soil. I often trim the leaves right at the stem.
Aftercare & Troubleshooting
Once your cuttings are nestled in their new homes, keep them in a bright spot but out of direct, scorching sunlight. Check the moisture levels regularly. The soil should feel consistently moist, like a wrung-out sponge.
You’ll know your cuttings are happy when you see new leaf growth appearing. This usually takes a few weeks. Gently tug on a cutting – if there’s resistance, you’ve got roots! Once they have a good root system, you can transplant them into slightly larger pots.
The most common problem you’ll encounter is rot. If a cutting turns mushy and black, it’s likely succumbed to too much moisture and not enough air. Discard any affected cuttings immediately to prevent it from spreading. Another sign of trouble is wilting that doesn’t perk up after watering, which could indicate poor rooting or too much drying out.
A Little Patience Goes a Long Way
Propagating plants is a beautiful dance with nature, and it requires a bit of patience. Don’t be discouraged if not every cutting takes. Some just aren’t ready, or the conditions aren’t quite right. Celebrate the successes, learn from the failures, and most importantly, enjoy the process of nurturing new life. Happy gardening!
Resource:
https://identify.plantnet.org/k-world-flora/species/Lathyrus%20grandiflorus%20Sm./data