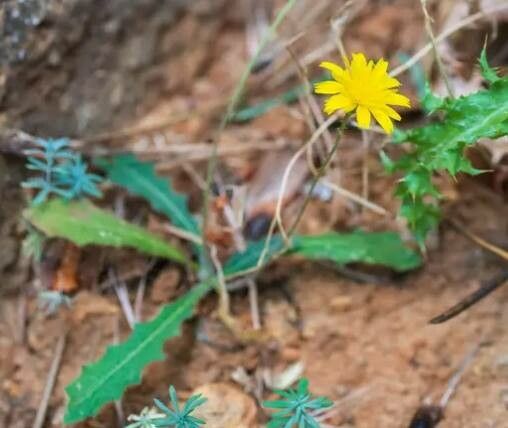
Oh, Krigia dandelion! You know, the one with those cheerful, sunny yellow flowers that pop up like little beacons in the garden. I’ve always adored them. They’re so unassuming yet incredibly rewarding to grow. And capturing that magic, propagating them yourself? That’s a special kind of garden joy. This little beauty is quite generous with its offspring, making it a wonderfully beginner-friendly plant to get your hands dirty with.
The Best Time to Start
For Krigia dandelion, spring is really your golden ticket. Around April or May, when the plant is actively growing but before it gets too hot and stressed, is ideal. You want to propagate from healthy, vigorous parent plants. If you miss spring, don’t fret too much; I’ve had good luck in early fall too, provided there’s enough time for the new plantlets to establish before winter truly sets in.
Supplies You’ll Need
It’s always good to have your tools ready before you dive in. Here’s what I usually pull out:
- Sharp pruning shears or a clean, sharp knife. Anything to make a clean cut is your friend.
- Well-draining potting mix. I like a blend of peat moss, perlite, and a bit of compost.
- Small pots or seed trays. Clean ones, please!
- Watering can with a fine rose. Gentle watering is key.
- Optional: Rooting hormone. While not always essential for Krigia, it can give you a little boost of confidence.
- Optional: A plastic bag or propagation dome. This helps keep humidity up.
Propagation Methods
Krigia dandelion is wonderfully adaptable. Here are the ways I find most successful:
Division: Like Making Twins from One Happy Plant
This is my go-to method for Krigia, especially when I see a cluster of plants forming.
- Gently excavate: Carefully dig up the entire clump of your Krigia dandelion. Try to disturb the roots as little as possible.
- Loosen it up: Gently shake off excess soil. You’ll see where the different crowns or root masses are connected.
- The gentle pull: Using your hands, or a clean trowel if it’s a bit stubborn, carefully separate the clump into smaller sections. Each section should have a bit of root and at least one or two healthy-looking stems or buds.
- Replant and water: Plant each new division into its own pot filled with your well-draining mix. Water it in gently but thoroughly.
Stem Cuttings: Little Green Shoots of Hope
This works best when the plant is in full growth mode during spring.
- Find a healthy stem: Look for a non-flowering stem that’s about 4-6 inches long. Make a clean cut just below a leaf node. This is where roots are most likely to form.
- Prepare the cutting: Remove any lower leaves that would be below the soil line to prevent rot.
- Dipping in magic (optional): If you’re using rooting hormone, dip the cut end into it.
- Planting delight: Stick the prepared cutting into a pot filled with your potting mix. Make sure at least one leaf node is buried.
- Water and cover: Water gently and, if you have one, pop a plastic bag over the pot or cover it with a propagation dome to create a steamy environment.
The “Secret Sauce” (Pro Tips)
Here are a few little tricks I’ve learned over the years that make a big difference:
- Whisper to your cuttings: When you plant stem cuttings, don’t let the leaves touch the water if you’re using a very moist mix. This seems counterintuitive, but it dramatically reduces the risk of rot setting in before roots form.
- Embrace the warmth: If you’re doing stem cuttings, bottom heat can be a game-changer. A heated propagation mat can significantly speed up the rooting process and increase your success rate. You’ll see roots forming much faster!
- Patience with division: When dividing, don’t be afraid to be firm but gentle. Sometimes the roots are really intertwined. A good wash of the root ball can reveal where the best separation points are.
Aftercare & Troubleshooting
Once your Krigia babies have set roots – you’ll see new growth or feel a gentle tug when you lightly pull on a cutting – they’re ready for a bit more robust care.
- Gradual acclimation: If you used the plastic bag method, gradually remove it over a few days to let your new plants get used to normal humidity levels.
- Consistent moisture: Keep the soil moist but not waterlogged. Think of it like a wrung-out sponge – damp, not swimming.
- Bright, indirect light: Place your new plants in a spot that gets plenty of bright, indirect light. Avoid harsh, direct sun, which can scorch tender new growth.
Now, if things go awry, don’t despair! The most common issue I see is rot. This usually happens if the cutting or division is kept too wet or doesn’t have enough air circulation. If you see wilting that looks mushy and discolored, it’s likely rot. The best approach is often to start over with fresh material and adjust your watering or ventilation. Another sign of failure is simply no new growth – this can sometimes mean the cutting or division wasn’t viable or the conditions weren’t quite right.
A Encouraging Closing
Taking cuttings or dividing plants takes a little bit of faith and a whole lot of patience. But there’s such a deep satisfaction in nurturing new life from a single stem or a divided clump. Be patient with your Krigia dandelion, observe how it responds, and don’t be afraid to experiment. Happy propagating!
Resource:
https://identify.plantnet.org/k-world-flora/species/Krigia%20dandelion%20Nutt./data