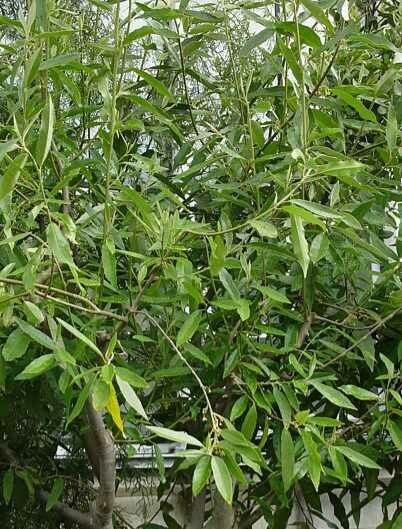
Oh, hello there! Grab your favorite mug, and let’s chat about a truly special tree: Kiggelaria africana. You might know it as the Wild Peach, or the truly evocative Sausage Tree – though that’s actually a different beauty! Kiggelaria africana is a handsome, South African native, often gracing landscapes with its glossy leaves and, if you’re lucky, charming little fruits. For me, growing this tree from scratch is incredibly rewarding. It’s a slow burn, not the fastest grower, but that gradual unfurling of life is its own kind of magic.
Now, truth be told, is Kiggelaria africana a beginner-friendly plant to propagate? I’d say it falls into the “moderately challenging” category. It’s not impossible by any means, but you’ll likely have a higher success rate if you follow a few key guidelines. Patience is definitely your best gardening friend here!
The Best Time to Start
My favorite time to take cuttings from Kiggelaria africana is during the late spring or early summer. This is when the plant is actively growing, and its stems are developing soft wood that’s more pliable and eager to root. You want to select stems that are new growth, not old, woody bits. Think of it as taking cuttings from a teenager – full of vim and vigor!
Supplies You’ll Need
Before we get our hands dirty, let’s gather our tools. Having everything ready makes the process so much smoother:
- Sharp Pruning Shears or a Knife: For clean cuts, which are crucial to prevent damage and disease.
- Rooting Hormone Powder or Gel: This isn’t strictly essential for every plant, but for Kiggelaria africana, it can give your cuttings a significant boost.
- Well-Draining Potting Mix: I like a blend of equal parts peat moss (or coco coir), perlite, and coarse sand. This ensures good aeration and drainage, which is vital to prevent rot.
- Small Pots or Seedling Trays: Clean containers are a must!
- Plastic Bags or a Propagator: To create a humid environment around your cuttings.
- Watering Can or Spray Bottle: For gentle watering.
- Labels: To keep track of what you’ve propagated and when!
Propagation Methods
While you can try growing Kiggelaria africana from seed, I find taking stem cuttings gives me more control and a faster start.
Here’s how I do it:
- Select Your Cuttings: Choose healthy, non-flowering stems from your established Kiggelaria africana. Look for stems that are about pencil-thick and have a few sets of leaves. They should be bendy, not brittle.
- Take the Cuttings: Using your sharp pruning shears, make a clean cut just below a leaf node (where a leaf joins the stem). Aim for cuttings that are about 4-6 inches long.
- Prepare the Cuttings: Gently remove the lower leaves, leaving just two or three at the very top. This reduces water loss. If the remaining leaves are quite large, I often snip them in half diagonally.
- Apply Rooting Hormone: Dip the cut end of each stem into your rooting hormone powder or gel. Tap off any excess.
- Plant Your Cuttings: Fill your clean pots with your prepared potting mix. Make a small hole in the center of the soil with a pencil or your finger. Insert the cut end of the cutting into the hole, ensuring the rooting hormone stays on the stem. Firm the soil gently around the base. You can plant several cuttings in one pot, spaced a few inches apart.
- Create Humidity: Water the soil gently. Then, cover the pot with a clear plastic bag, creating a mini-greenhouse. You can use stakes to keep the plastic from touching the leaves. Alternatively, place the pots in a propagator.
The “Secret Sauce” (Pro Tips)
Here are a few tricks I’ve picked up over the years that make a real difference with Kiggelaria africana:
- Bottom Heat is Your Best Friend: If you have space, place your pots on a heated propagator mat. This gentle warmth from below encourages root development much faster than relying on ambient room temperature. It’s a game-changer!
- Don’t Drown Your Dreams: While humidity is key, soggy soil is the enemy. Ensure excellent drainage in your potting mix, and only water when the top inch of soil feels dry to the touch. Overwatering is the most common reason for cuttings to rot.
- Air Circulation Matters: Once a day, lift the plastic bag for a few minutes to allow for fresh air exchange. This helps prevent fungal diseases from taking hold.
Aftercare & Troubleshooting
Once your cuttings are planted, place them in a bright spot but out of direct sunlight. This will scorch those tender new leaves. Keep the soil consistently moist but not waterlogged.
You’ll know your cuttings are rooting when you see new leaf growth. This can take anywhere from 4 to 12 weeks, so be patient! Once you see a good amount of new growth and feel some gentle resistance when you tug lightly on a cutting, it’s time to gradually acclimate them to normal humidity. Start by opening the plastic bag more frequently, then remove it altogether.
The main thing to watch for is wilting followed by browning and mushiness, or a blackening at the base of the stem. This is usually a sign of rot, often caused by too much moisture and not enough air circulation. If you spot this, sadly, that cutting is likely lost. Don’t get discouraged; simply remove the affected cutting and check the moisture levels of the others.
A Encouraging Closing
Propagating your own Kiggelaria africana is a wonderful journey. It’s about connecting with nature, learning to read the subtle signs a plant gives you, and the immense satisfaction of nurturing new life. So, take a deep breath, enjoy the process of getting your hands in the soil, and remember that even experienced gardeners have their share of failures. Each attempt is a learning experience. Happy propagating!
Resource:
https://identify.plantnet.org/k-world-flora/species/Kiggelaria%20africana%20L./data