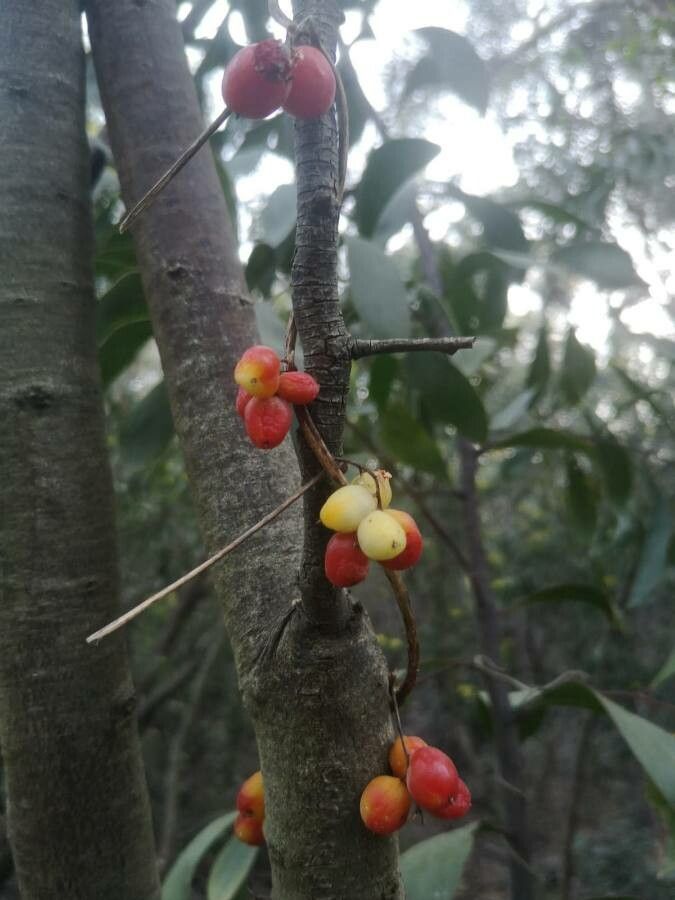
Hello fellow plant lovers! I’m so excited to chat with you today about a truly captivating vine: Kadsura longipedunculata. This beauty, with its glossy, dark green leaves and delicate, often fragrant, often pinkish flowers followed by brightly colored berries, is a real showstopper. It brings a touch of the exotic to any garden, whether you’re growing it up a trellis, letting it sprawl, or even training it into a living sculpture.
Now, the big question: is it hard to propagate? Honestly, I’d say Kadsura is moderately easy, making it a fantastic project for those looking to step up their propagation game beyond the really common houseplants. It’s incredibly rewarding to watch those tiny roots emerge and see a whole new plant come to life from a single cutting!
The Best Time to Start
For the highest chance of success, I always recommend taking cuttings in late spring or early summer. This is when the plant is actively growing, and your cuttings will have the best energy reserves to put into developing roots. You want to be looking for stems that are mature but still somewhat flexible – not brand new, floppy growth, but not old, woody stuff either. Think of it as “semi-hardwood.”
Supplies You’ll Need
Gathering your supplies beforehand is half the battle! Here’s what I usually have on hand:
- Sharp pruning shears or a clean, sharp knife: Essential for making clean cuts so the stem doesn’t get damaged.
- Rooting hormone (powder or gel): This isn’t strictly essential for all plants, but for Kadsura, it really gives cuttings a helpful boost.
- A light, well-draining potting mix: I like to use a blend of perlite, peat moss, and a bit of compost. You can also buy a good quality seed starting mix.
- Small pots or a propagation tray: Clean pots are a must to avoid disease.
- Plastic bags, propagator lid, or a clear plastic bottle: To create a humid environment around your cuttings.
- Water: For watering and potentially for water propagation.
Propagation Methods
I’ve had great success with stem cuttings for Kadsura. Here’s how I do it:
- Take Your Cuttings: Select a healthy stem from your parent plant. Using your clean shears, take cuttings that are about 4-6 inches long. Make your cut just below a leaf node (the point where a leaf attaches to the stem). Remove any leaves from the bottom half of the cutting. You want to leave a couple of leaves at the top.
- Apply Rooting Hormone: Dip the cut end of the stem into your rooting hormone, tapping off any excess.
- Pot Them Up: Fill your small pots or propagation tray with your prepared potting mix. Make a small hole in the center with your finger or a pencil.
- Insert the Cutting: Gently place the cut end of the stem into the hole, ensuring the leaf nodes you removed are below the soil surface. Firm the soil around the cutting to hold it upright.
- Water Gently: Water the soil thoroughly but gently. You don’t want to wash the cuttings out!
- Create Humidity: Cover the pot or tray with a plastic bag, propagator lid, or a clear plastic bottle with the bottom cut off. This traps moisture, creating a mini-greenhouse. Make sure the leaves aren’t touching the plastic if possible, as this can encourage rot.
Water Propagation (An Alternative): Sometimes, I’ll try water propagation for Kadsura too. Take your cuttings and remove all but the top leaves. Place them in a jar or vase of clean water, ensuring the leaf nodes are submerged but the leaves are above the water. Change the water every few days. You should see roots developing in a few weeks. Once the roots are about an inch long, you can carefully pot them up into soil.
The “Secret Sauce” (Pro Tips)
Here are a couple of things I’ve learned that make a big difference:
- Bottom Heat is Your Friend: Kadsura roots much faster and more reliably if you can provide gentle bottom heat. A seedling heat mat placed under your propagation tray can work wonders. It encourages root development without overheating the foliage. You don’t want it to be hot, just warm to the touch.
- Don’t Overcrowd: Give your cuttings a little space. If they’re crammed together in a tray, air circulation suffers, and that can lead to fungal issues. If using pots, one cutting per pot is ideal for a beginner.
Aftercare & Troubleshooting
Once you see new leaf growth on your cuttings, that’s a fantastic sign they’re starting to root! This usually takes anywhere from 4 to 8 weeks, sometimes longer.
- Gradual Acclimation: When your cuttings look established (you can gently tug on them and feel resistance), it’s time to start acclimating them to normal conditions. Gradually open the plastic cover over a week or two, allowing them to get used to lower humidity.
- Watering: Keep the soil consistently moist but not waterlogged. As they grow, you can ease off on the watering frequency, letting the top inch of soil dry out between waterings.
- Troubleshooting – Rot: The most common problem you might encounter is rot. If your cutting turns black and mushy, or the leaves wilt and yellow dramatically, it’s likely rot. This is usually caused by too much moisture and poor air circulation. Unfortunately, a rotten cutting is usually a lost cause, but don’t get discouraged! Just learn from it and try again. Ensure your soil drains exceptionally well and your humidity isn’t too high.
A Encouraging Closing
Propagating plants is an act of faith and patience. You’re essentially coaxing life into existence! Don’t be afraid to experiment and learn. Each cutting is a chance to grow your collection and gain valuable experience. Take your time, enjoy the process, and soon you’ll have a beautiful Kadsura to share (or keep all to yourself!). Happy propagating!
Resource: