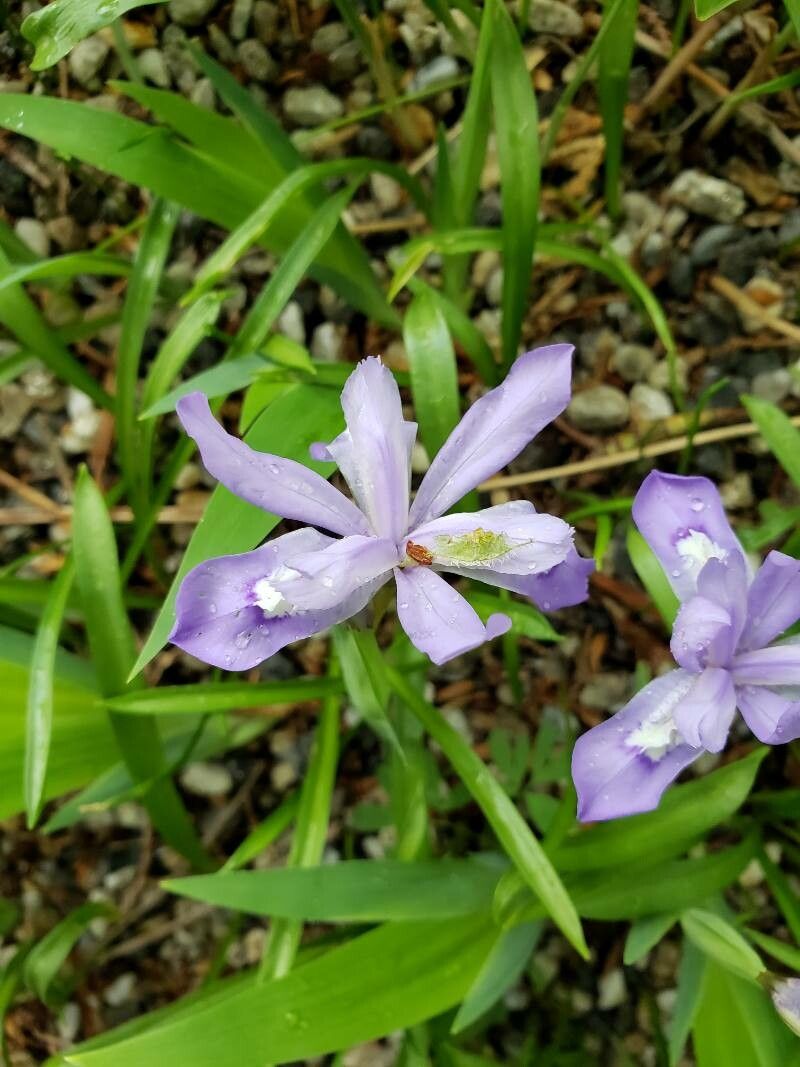
Hello fellow garden enthusiasts! If you’re looking for a delightful addition to your shady spots, let me introduce you to Iris cristata, the crested iris. This charming little gem carpets the woodland floor with its delicate, sky-blue flowers in spring. It’s not just pretty; it’s a rewarding plant to multiply. And happily for us, propagating crested iris is quite approachable, even for those dipping their toes into the world of plant propagation for the first time.
The Best Time to Start
When it comes to Iris cristata, timing is everything for success. The absolute best time to get your hands dirty is right after flowering has finished, which usually happens in late spring to early summer. This gives your new divisions or cuttings ample time to establish themselves before the heat of summer or the chill of winter sets in.
Supplies You’ll Need
Gathering your tools beforehand makes the whole process smoother. Here’s what you’ll want on hand:
- Sharp pruning shears or a clean knife: For making neat cuts.
- Well-draining potting mix: A good blend for perennials or a mix of compost, perlite, and peat moss works wonders.
- Small pots or trays: With drainage holes, of course!
- Rooting hormone (optional but helpful): Especially for cuttings, this can speed things along.
- A watering can with a fine rose: For gentle watering.
- Labels and a permanent marker: To keep track of your new babies.
Propagation Methods
Iris cristata is most commonly and successfully propagated through division. It’s a natural process for this rhizomatous iris.
Method: Division
- Digging Up: Gently dig up the parent plant during the recommended time (after flowering). You want to loosen the soil around it and lift the entire clump.
- Cleaning the Rhizomes: Carefully shake off excess soil from the rhizomes. You’ll see the thick, fleshy underground stems, which are the rhizomes.
- Separating: Inspect the rhizomes. You’ll notice they naturally have growth points (eyes) and shoot from various directions. Using your hands or a clean knife, gently break or cut apart the rhizomes, ensuring each piece has at least one growth bud and a good portion of healthy root.
- Trimming (Optional): If the roots are excessively long, you can trim them back slightly to make planting easier, but don’t go overboard.
- Planting: Prepare your new pots or garden beds with your well-draining soil mix. Plant each divided rhizome so that the top of the rhizome is just at or slightly below the soil surface. You want the growth buds pointing upwards. Water thoroughly.
The “Secret Sauce”
Here are a couple of tricks I’ve learned over the years that can really make a difference:
- Don’t Overcrowd: When planting divisions, give them a little breathing room. It might seem tempting to pack them in, but allowing space for air circulation helps prevent fungal issues as they establish.
- Embrace the Shade: Iris cristata loves a dappled, shady spot. When starting new plants, whether in pots or in the ground, mimic their natural habitat. Direct sun, especially intense afternoon sun, can scorch delicate new growth and dry out young roots too quickly.
Aftercare & Troubleshooting
Once your divisions are planted, the fussing is minimal, but consistent care is key.
- Watering: Keep the soil consistently moist but not waterlogged. This is especially important for the first few weeks as roots take hold. As they grow, they’ll become more drought-tolerant.
- Monitoring: Keep an eye out for new leaf growth. This is the best sign that your division is happy and settling in.
- Troubleshooting Rot: The most common issue you’ll face is rot. If you notice a rhizome or new shoot turning mushy and black, it’s likely due to overwatering or poor drainage. If caught early, you can try gently cleaning off the affected area with a sterile knife and replanting in drier soil. Sometimes, sadly, it’s best to remove the rotted piece to prevent it from spreading.
And there you have it! Propagating Iris cristata is a simple joy that lets you expand your garden’s beauty and share it with friends. Be patient with your new plants; they might surprise you with their resilience. Happy gardening!
Resource:
https://identify.plantnet.org/k-world-flora/species/Iris%20cristata%20Aiton/data