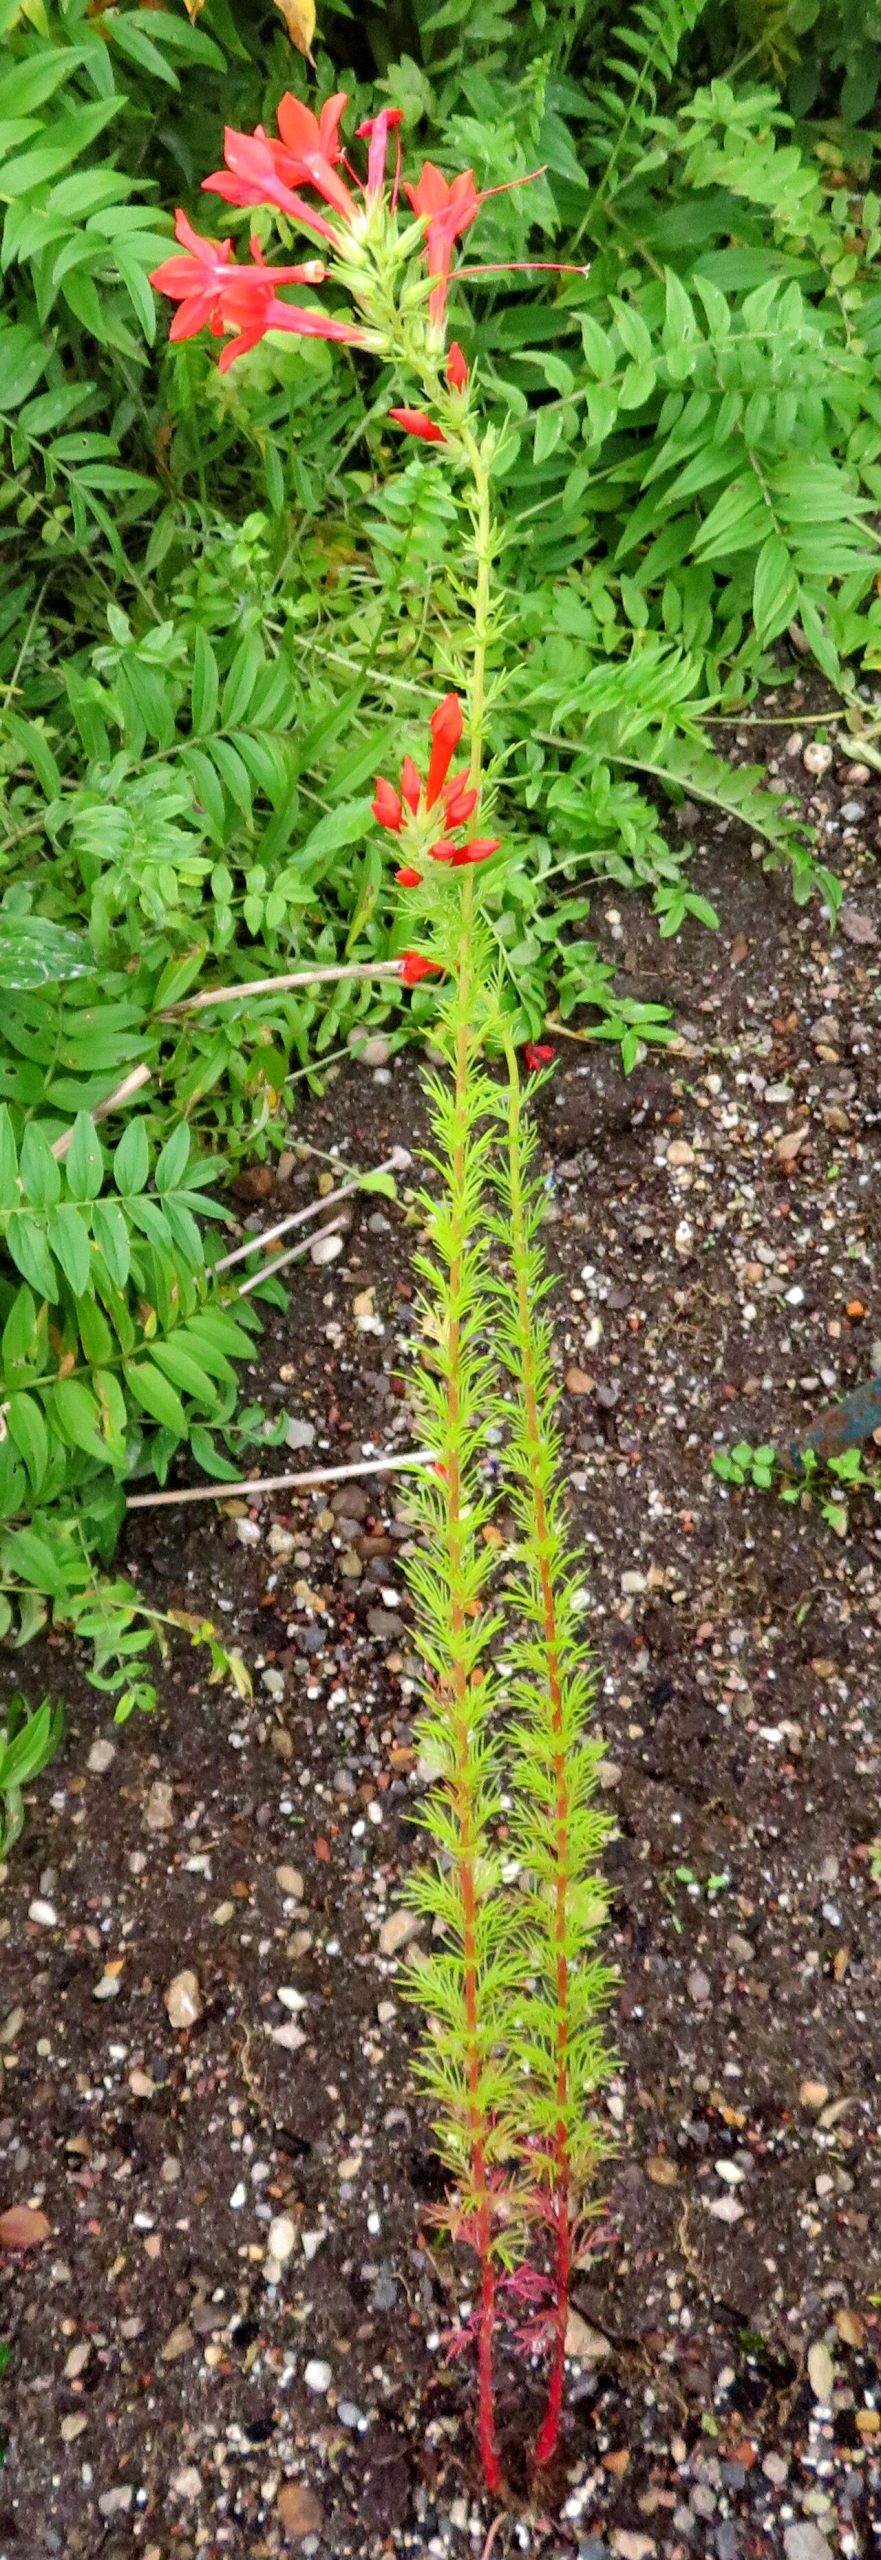
Hey there, fellow garden enthusiasts! It’s so lovely to have you here. Today, we’re diving into the magical world of propagating Ipomopsis rubra, our darling Scarlet Mock Flower. If you’ve ever seen this beauty gracing a meadow or a cottage garden, you know what I mean. Its tall, airy spires of vibrant red, trumpet-shaped blooms are simply breathtaking. And the best part? Getting more of these beauties for yourself is incredibly rewarding. For beginners, I’d say propagating Ipomoea rubra falls somewhere in the middle. It’s not the absolute easiest plant to start from seed, but with a little patience and the right approach, you can absolutely do it.
The Best Time to Start
For Ipomoea rubra, the sweet spot for propagation is typically in late spring to early summer. This is when the plant is actively growing and has plenty of energy to put into developing new roots. You’re looking for stems that are young and leafy, but not yet flowering. If you’re starting from seed, sowing them in early spring, either indoors or directly outside after the last frost, is your best bet.
Supplies You’ll Need
You won’t need a whole lot to get started. Here’s a quick rundown of what I usually have on hand:
- Sharp Secateurs or Scissors: Clean tools are essential for preventing disease.
- Well-Draining Potting Mix: A good quality seed-starting mix or a blend of peat moss and perlite works wonders.
- Small Pots or Seed Trays: For starting your cuttings or seeds.
- Rooting Hormone (Optional but Recommended): A little helps encourage robust root development. Look for one with IBA.
- Spray Bottle: For gently misting your cuttings.
- Plastic Bag or Dome: To create a humid environment for cuttings.
- Watering Can: For gentle watering.
- Labels: Trust me, you’ll thank yourself later for labeling what you planted!
Propagation Methods
Ipomoea rubra can be propagated through both seed and stem cuttings. I find stem cuttings to be quite reliable and a bit faster.
From Seed:
- Gather Your Seeds: If you’re lucky enough to have a mature plant, you can collect seeds from dried seed pods in the fall. Allow them to dry completely before storing them in a cool, dark place.
- Sow Your Seeds: In early spring, thinly sow seeds on the surface of your potting mix in seed trays or pots. Gently press them in to ensure good contact with the soil, but don’t bury them too deeply. They need light to germinate.
- Water and Light: Mist the soil lightly with your spray bottle. Keep the soil consistently moist but not waterlogged. Place them in a bright spot, but out of direct, harsh sunlight.
- Germination: You should start to see seedlings emerge within 2-4 weeks. Once they have a couple of true leaves, you can carefully transplant them into their own individual pots.
From Stem Cuttings:
- Take Cuttings: In late spring or early summer, select healthy, non-flowering stems from a mature plant. Using your sharp secateurs, cut stems about 4-6 inches long, making the cut just below a leaf node.
- Prepare the Cuttings: Gently remove the lower leaves from the cutting, leaving just a few at the top. This helps prevent rot and encourages root formation.
- Apply Rooting Hormone (Optional): Dip the cut end of the stem into rooting hormone powder or gel, tapping off any excess.
- Plant the Cuttings: Insert the treated end of the cutting into your prepared, moist potting mix. Make a small hole with a pencil or your finger to avoid rubbing off the hormone. Plant a few cuttings per pot, spacing them a couple of inches apart.
- Create Humidity: Mist the cuttings lightly and cover the pot with a clear plastic bag or a propagation dome. This creates a mini-greenhouse effect, keeping the humidity high, which is crucial for root development.
- Placement: Place the pots in a warm spot with bright, indirect light. Avoid direct sun, which can scorch the delicate cuttings.
The “Secret Sauce” (Pro Tips)
Over the years, I’ve picked up a few tricks that really seem to give cuttings an extra boost.
- Bottom Heat is Your Friend: If you can, place your pots on a heat mat designed for seedlings. This gentle warmth from below encourages faster and more robust root development, especially for cuttings.
- Don’t Be Afraid to Experiment with Water: While I usually opt for soil for Ipomoea rubra, some gardeners have success with water propagation. If you try this, make sure no leaves are touching the water. Just the stem should be submerged. Change the water every few days to keep it fresh.
- Patience with Seed Starting: Don’t get discouraged if your Ipomoea rubra seeds don’t sprout immediately. They can sometimes be a bit slow to get going. Consistent moisture and warmth are key.
Aftercare & Troubleshooting
Once your cuttings have developed a good root system – you’ll know because you’ll see new leafy growth appearing and they’ll resist a gentle tug – it’s time for them to move into the next stage.
- Acclimate Gradually: Before removing the plastic bag or dome, gradually increase ventilation over a few days by opening the bag or dome for longer periods. This helps the young plants adjust to normal humidity levels.
- Watering: Water your new plants when the top inch of soil feels dry. Water thoroughly until it drains from the bottom of the pot.
- Light: Continue to provide bright, indirect light. You can slowly introduce them to more direct sunlight as they mature.
- Fertilizing: Once your new plants are established and showing good growth, you can start feeding them with a diluted liquid fertilizer about once a month.
Troubleshooting: The most common issue you’ll encounter is rot. This usually happens due to overwatering or poor air circulation. If you see stems turning mushy or black at the soil line, it’s a sign of rot. Unfortunately, once it sets in, it’s hard to save. Ensure good drainage and don’t let your cuttings sit in soggy soil. Another sign of failure is if cuttings simply wilt and dry out, which can be caused by insufficient humidity or too much direct sun.
A Closing Thought
Propagating Ipomoea rubra is such a fulfilling journey. It’s a wonderful way to deepen your connection with these beautiful plants and share their charm with friends and family. Be patient with the process, celebrate every tiny bit of new growth, and remember that even experienced gardeners have their learning curves. Happy propagating, and may your gardens bloom vibrantly!
Resource:
https://identify.plantnet.org/k-world-flora/species/Ipomopsis%20rubra%20(L.)%20Wherry/data