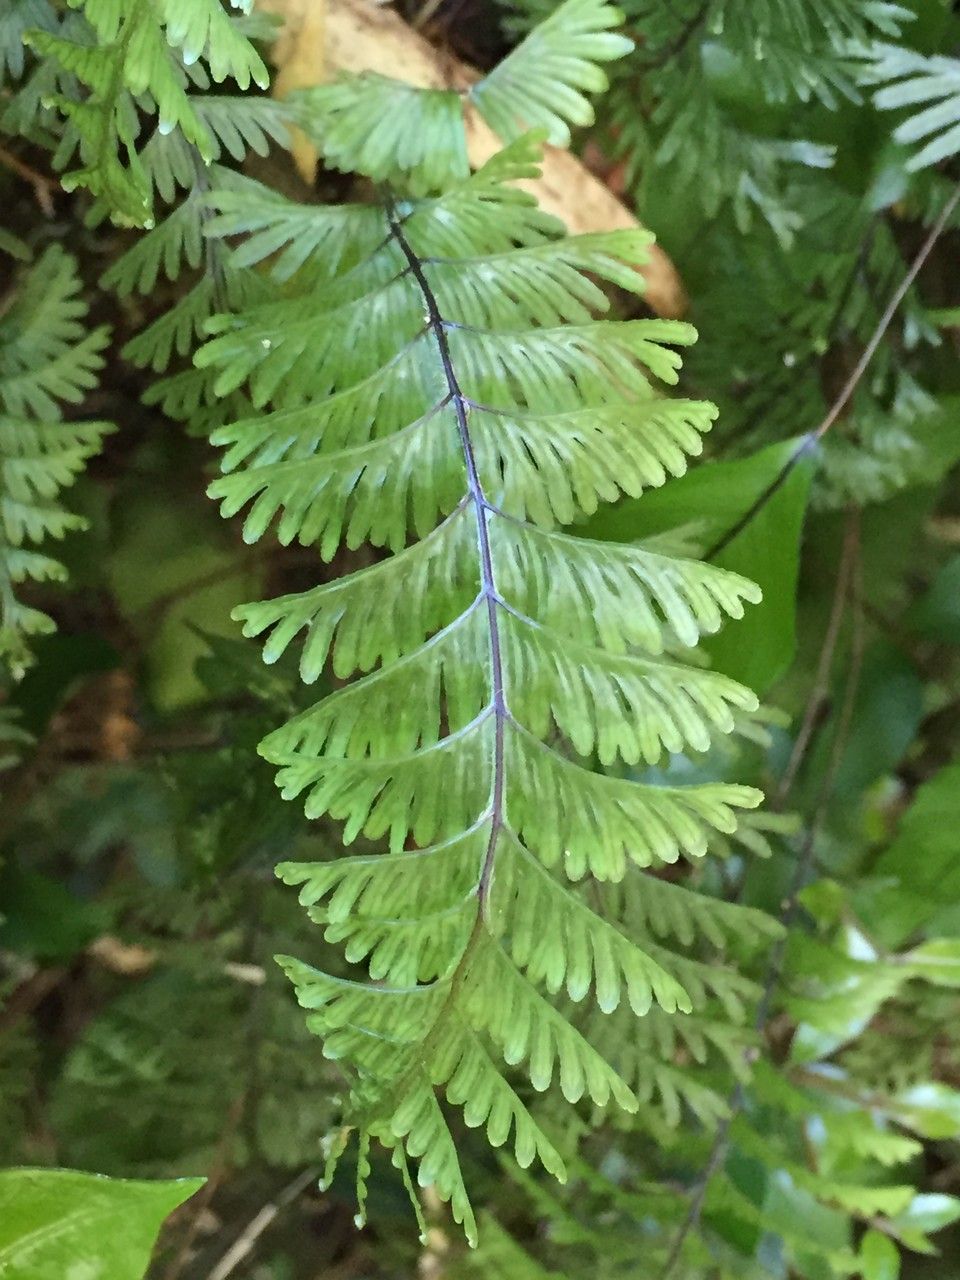
Hello, fellow plant lovers! I’m so excited to talk to you today about a fern that’s truly captured my heart: Hymenophyllum pectinatum, also known as the comb-leaf filmy fern. If you’re looking for something a little different, something that adds a delicate, lace-like texture to your shady corners, this is your girl. And the best part? You can create more of these beauties yourself!
Propagating Hymenophyllum pectinatum can feel a bit like magic. Seeing a tiny snippet of a fern transform into a whole new plant is incredibly rewarding. Now, I won’t lie, this isn’t the absolute easiest plant for a complete beginner to propagate. It craves humidity and a specific kind of moisture. But with a little patience and attention to detail, you can absolutely succeed.
The Best Time to Start
For Hymenophyllum pectinatum, the sweet spot for propagation is during its active growing season. This generally means spring and summer for most of us. You’re looking for healthy, vigorous growth, not something that’s stressed or spent. New fronds unfurling are a great indicator that the plant has the energy to spare for new beginnings.
Supplies You’ll Need
Don’t worry, it’s not a long list! You probably have most of this on hand already:
- Sharp pruning shears or a clean craft knife: For making precise cuts.
- Small pots or propagation trays: Terracotta or plastic works fine.
- A well-draining potting mix: I love a mix of peat moss, perlite, and a bit of horticultural charcoal. This keeps things airy and prevents waterlogging.
- Water: Clean, distilled or rainwater is best. Tap water can have minerals that these delicate ferns don’t love.
- A clear plastic bag or propagation dome: To keep humidity high.
- Optional: Rooting hormone powder: While not strictly necessary for this fern, it can give an extra boost.
- Optional: Small pebbles or perlite: For bottom watering if you choose that method.
Propagation Methods
Hymenophyllum pectinatum is best propagated through division or stem cuttings.
Division
This is my favorite method for ferns.
- Gently remove the fern from its pot.
- Inspect the root ball. You’re looking for distinct clumps or sections of rhizomes (the creeping stems often found just at the soil surface) with fronds attached.
- Carefully tease apart the clumps. If they’re stubborn, use your clean knife or shears to make a clean cut through the rhizome, ensuring each new section has roots and at least a couple of fronds.
- Pot up each division into its own small pot, using your prepared, moist potting mix.
Stem Cuttings (Stolons)
Filmy ferns often produce stolons, which are creeping, horizontal stems that can root and form new plants.
- Identify a healthy stolon that has a small, nascent frond and appears to have tiny root structures (or looks like it’s ready to sprout them).
- Using your sharp shears or knife, make a clean cut to remove the stolon, ensuring you keep the nascent frond and any potential root buds.
- Lay the stolon on the surface of your prepared, moist potting mix in a small pot or tray. You can gently press it into the soil so it makes good contact.
- Alternatively, you can root these in water, but be very careful here (more on that in the “Secret Sauce”!).
The “Secret Sauce” (Pro Tips)
Here are a couple of things I’ve learned over the years that really make a difference with these delicate ferns:
- Humidity is King (and Queen!): These ferns demand high humidity. Once you’ve potted your division or cutting, immediately place the pot inside a clear plastic bag or under a propagation dome. Seal it up to create a mini-greenhouse. You’ll want to open it for a few minutes each day to allow for air circulation and prevent fungal issues.
- Don’t Drown Your Cuttings (Especially in Water): If you’re rooting stolons in water, make absolutely sure only the base of the stolon touches the water. If the delicate frond sits in water, it will rot almost instantly. I tend to favor soil propagation for this reason. If you do use water, use a very shallow amount.
- Bottom Heat is Your Friend: While not essential, placing your propagation setup on a gentle heat mat can significantly speed up the rooting process. It mimics the warmth of the soil surface and encourages root development.
Aftercare & Troubleshooting
Once your new fern divisions or cuttings start to show more vigorous new growth, it’s a good sign that they’ve rooted!
- Gradually Acclimate: Don’t just rip open that plastic bag! Slowly begin to increase the amount of time you leave the bag open over a week or so. This allows the new plant to adjust to lower humidity levels.
- Keep it Moist: Continue to water regularly, but avoid soggy soil. The potting mix should feel like a wrung-out sponge.
- Troubleshooting: The most common issue you’ll face is rot. This is usually a sign of too much water and not enough air circulation. If you see browning, mushy fronds, or the cutting is just falling apart, it’s likely rot. Unfortunately, there’s not much you can do once it sets in. Prevention is key! Ensure excellent drainage and good airflow. If you see a tiny bit of rot on a otherwise healthy cutting, you can try carefully trimming it away with sterilized scissors.
A Little Patience Goes a Long Way
Propagating Hymenophyllum pectinatum might take a little longer than some other plants, but the joy of watching it thrive and expand your collection is well worth the wait. Be patient, observe your little plant closely, and trust your instincts. Happy propagating!
Resource:
https://identify.plantnet.org/k-world-flora/species/Hymenophyllum%20pectinatum%20Cav./data