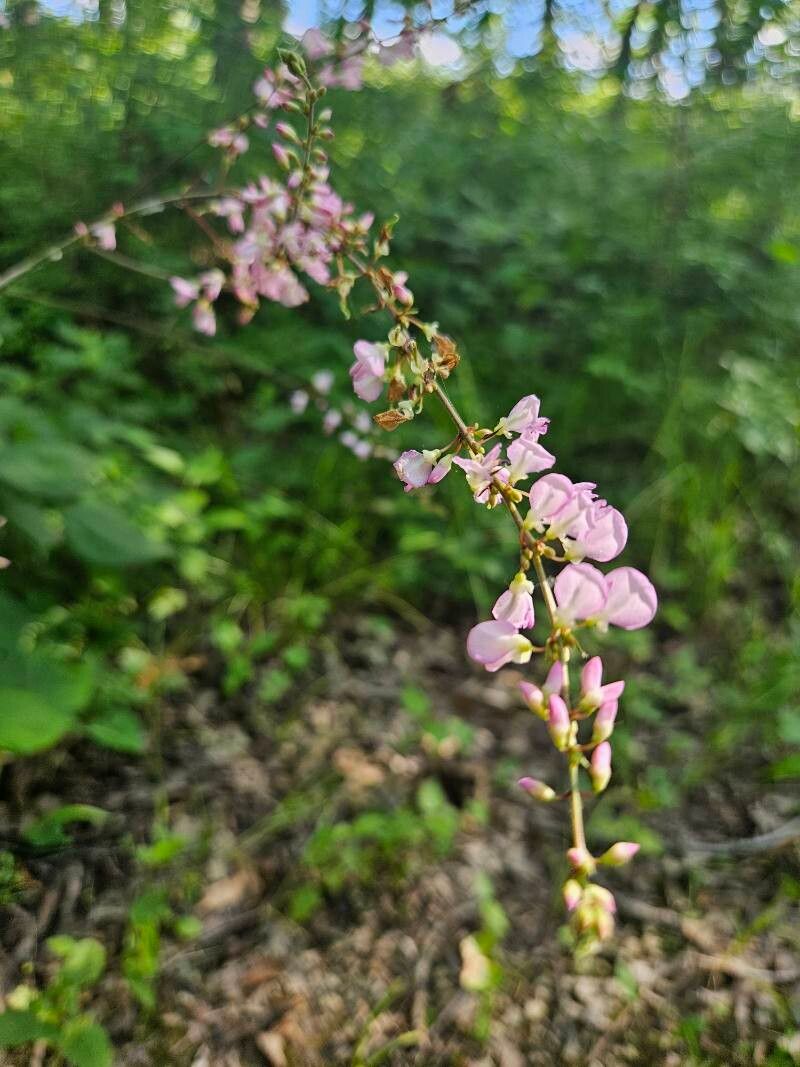
Hello fellow plant lovers! It’s so good to have you here. Today, we’re going to dive into the wonderful world of Hylodesmum glutinosum, or as many of us affectionately call it, Sticky Tick Trefoil. I’ve been working with a lot of different plants for two decades now, and this one holds a special place in my heart. Its delicate, airy foliage and charming little flowers can bring such a sweet, subtle beauty to any garden corner. Plus, the satisfaction of coaxing a brand-new plant from a piece of an existing one? Pure magic. Now, if you’re a beginner gardener, I’d say Hylodesmum is moderately easy to propagate. It’s not quite as foolproof as, say, a pothos, but with a little attention, you’ll be well on your way to success.
The Best Time to Start
For the highest success rate with Hylodesmum glutinosum, I find that the late spring to early summer is your golden window. This is when the plant is actively growing, putting out lots of fresh, tender shoots. Young, vigorous growth has a better chance of rooting quickly. Aim to take your cuttings when the plant isn’t stressed by extreme heat or drought.
Supplies You’ll Need
Gathering your tools beforehand makes the whole process much smoother. Here’s what I always have on hand:
- Sharp Pruning Shears or a Craft Knife: Clean cuts are essential for preventing disease and encouraging rooting.
- Well-Draining Potting Mix: A blend of peat moss, perlite, and vermiculite works wonders. You want it to hold moisture but not become waterlogged. I often use a mix formulated for seedlings or a basic potting soil amended with extra perlite.
- Small Pots or Seed Trays: Clean pots that are around 3-4 inches in diameter are perfect for starting cuttings.
- Rooting Hormone (Optional, but Recommended): This is a powder or gel that can significantly speed up root development and increase your success rate.
- Plastic Bags or a Clear Dome Lid: These are for creating a humid environment, which cuttings absolutely adore.
- Watering Can or Spray Bottle: For gentle watering.
Propagation Methods
We’ll focus on a couple of reliable methods that work beautifully for Hylodesmum glutinosum.
Stem Cuttings
This is my go-to method for this lovely plant.
- Select Your Cuttings: Look for healthy, non-flowering stems that are about 4-6 inches long. You want to see at least two or three sets of leaves. Make a clean cut just below a leaf node (where a leaf attaches to the stem).
- Prepare the Cuttings: Gently remove the lower leaves, leaving only the top two sets. This prevents them from rotting once you place the cutting in the soil.
- Apply Rooting Hormone (If Using): Dip the cut end of the stem into your rooting hormone, tapping off any excess.
- Plant the Cuttings: Fill your small pots with the well-draining potting mix and moisten it gently. Make a small hole with your finger or a pencil and insert the cut end of the stem into the hole. Firm the soil gently around the stem to ensure good contact.
- Create a Humid Environment: Water the soil lightly. Then, cover the pot with a clear plastic bag secured with a rubber band, or place it under a clear dome lid. You can also poke a few holes in the bag for a bit of air circulation if you’re worried about too much moisture.
- Place in Bright, Indirect Light: Find a spot that gets plenty of light but no direct, harsh sun, which can scorch the delicate cuttings. A bright windowsill out of direct sun is ideal.
Water Propagation (for the patient!)
While stem cuttings in soil are my favorite, water propagation can also work, though it requires a bit more attention.
- Select and Prepare Cuttings: Follow steps 1 and 2 from the stem cutting method.
- Place in Water: Fill a small jar or glass with clean water. Submerge just the leaf nodes of your cuttings into the water, ensuring no leaves are in the water itself.
- Change Water Regularly: Refresh the water every 2-3 days to keep it clean and oxygenated.
- Wait for Roots: Patience is key here. You should start to see tiny roots emerging from the nodes within a few weeks.
- Transplant: Once the roots are about an inch long, you can carefully transplant them into your well-draining potting mix, following the planting instructions for stem cuttings.
The “Secret Sauce” (Pro Tips)
Here are a few little tricks I’ve learned over the years that can really make a difference:
- Bottom Heat is Your Friend: If you can, place your pots on a gentle heating mat. This warmth from below encourages root development much faster than ambient room temperature alone. It’s like a cozy little incubator for your cuttings.
- Don’t Let Leaves Touch the Water (Water Propagation): This is crucial if you’re water propagating. Any leaves that sit in the water will quickly start to rot, which can be detrimental to the cutting and even spread to the developing roots. Keep those leaves dry!
- Mist, Don’t Drown: For cuttings in soil, a light misting of the leaves every day or two can help keep them turgid while they’re trying to root. However, be careful not to over-water the soil; that’s the quickest way to invite rot.
Aftercare & Troubleshooting
Once you see signs of new growth – little leaves emerging from the top – it’s a good indication that roots have formed!
- Acclimatization: If you were using a plastic bag or dome, gradually remove it over a few days to let your new plant adjust to normal humidity.
- Watering: Continue to water when the top inch of soil feels dry. It’s better to water thoroughly and less often than to keep it constantly soggy.
- Light: Keep it in that bright, indirect light. As it grows stronger, you can slowly introduce it to slightly more direct morning sun.
Now, what if things aren’t going as planned? The most common issue you’ll encounter is rot. If your cutting turns black and mushy, or the leaves wilt dramatically and refuse to perk up even after watering, it’s likely root rot. This is usually too much moisture. If you catch it early, you might be able to salvage it by trimming away the rotten parts and repotting in fresh, dry soil, but often, it’s best to simply start again. Another sign of failure is a cutting that just seems to sit there, doing nothing, for weeks on end. This can sometimes be due to insufficient light, too cold temperatures, or taking the cutting at the wrong time.
A Little Patience Goes a Long Way
Remember, gardening is a journey, and propagation is a rewarding part of that. Don’t be discouraged if your first few attempts aren’t perfect. Each plant and each cutting is a little experiment. Enjoy the process, celebrate the little victories, and before you know it, you’ll have a whole collection of your own beautiful Hylodesmum glutinosum. Happy growing!
Resource: