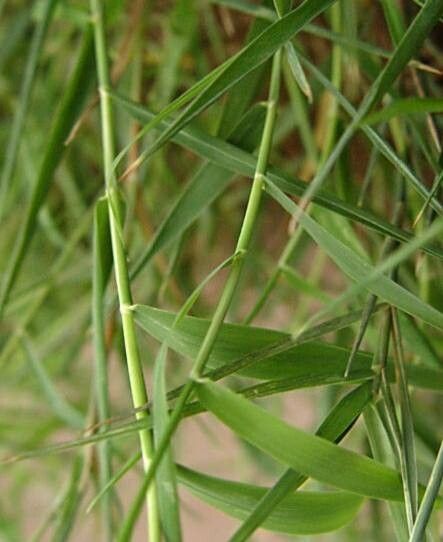
Hey there, fellow garden enthusiasts! I’m so excited to chat with you today about Holcus rigidus, also known as the Rigid Holcus. If you haven’t met this beauty yet, you’re in for a treat. It’s got these striking, architectural leaves that add such a wonderful texture to any garden. Plus, watching a tiny cutting unfurl into a whole new plant? Truly one of life’s simple pleasures.
Now, if you’re new to the wonderful world of propagation, you might be wondering if Holcus rigidus is a good place to start. I’d say it’s moderately easy. It’s not quite as forgiving as a pothos, but with a little attention, you’ll have plenty of success. The reward of seeing your new plants thrive is absolutely worth the effort!
The Best Time to Start
For Holcus rigidus, the sweet spot for propagation is generally during its active growing season. Think late spring through early summer. This is when the plant has plenty of energy to put into developing new roots. Trying to propagate when it’s stressed or dormant is like asking a sleepy cat to fetch – it’s just not going to happen!
Supplies You’ll Need
Before we dive into the methods, let’s gather our tools. Having everything ready makes the process so much smoother.
- Sharp, clean pruning shears or a sharp knife: You want a clean cut to prevent disease.
- A well-draining potting mix: I like a blend of peat moss, perlite, and a little bit of compost. For Holcus rigidus, I lean towards an even lighter mix.
- Plastic pots or seed trays with drainage holes: Whatever you choose, make sure water can escape!
- Rooting hormone (optional but recommended): This can give your cuttings a real boost.
- Plastic bags or a propagation dome: To create a humid environment.
- Watering can or spray bottle: For gentle watering.
Propagation Methods
Holcus rigidus can be delightfully propagated through both stem cuttings and division. Let’s break those down.
Stem Cuttings
This is my go-to method for increasing my Holcus rigidus collection.
- Select your cutting: Look for a healthy, non-flowering stem that is about 4-6 inches long. You want a section that has at least two sets of leaves.
- Make the cut: Using your clean shears, make a clean cut just below a leaf node. This is where roots are most likely to form.
- Prepare the cutting: Gently remove the lower leaves, leaving just the top two or three. This prevents them from rotting in the soil.
- Apply rooting hormone (optional): If you’re using it, dip the cut end into the rooting hormone, tapping off any excess.
- Plant your cutting: Fill your pot with your well-draining potting mix. Make a small hole with your finger or a pencil and gently insert the cutting, ensuring the leaf nodes are below the soil surface.
- Water gently: Water the soil until it’s evenly moist, but not soggy.
- Create humidity: Cover the pot with a plastic bag or place it under a propagation dome. This traps moisture, which is crucial for cuttings to root. Make sure the leaves aren’t touching the plastic if possible.
- Place in bright, indirect light: Find a spot that gets plenty of light but no direct sun, which can scorch your new babies.
Division
This method is perfect if your plant is already a bit crowded.
- Gently remove from pot: Carefully take your Holcus rigidus out of its container.
- Examine the root ball: You’ll often see distinct clumps or sections.
- Divide: Using your hands, or a clean knife if the roots are dense, gently pull or cut the root ball into smaller sections. Each section should have at least a few leaves and a good portion of roots.
- Pot up: Plant each division into its own pot with fresh, well-draining soil.
- Water and place: Water them in and place them in bright, indirect light.
The “Secret Sauce” (Pro Tips)
Here are a few things I’ve learned over the years that make a big difference.
- The power of bottom heat! If you’re doing stem cuttings, placing your pots on a seedling heat mat can speed up root development considerably. It mimics the warmth of spring soil, encouraging those roots to wake up.
- Don’t be afraid of a little misting. You can gently mist the leaves of your cuttings every other day or so, especially if you don’t have a super tight-fitting dome. It adds that extra bit of humidity without soaking the soil.
- Patience is key, but so is observation. Check your cuttings every few days. If you see condensation on the inside of the bag, that’s a good sign. If the soil looks like it’s drying out, give it a gentle watering.
Aftercare & Troubleshooting
Once you see signs of new growth – maybe a tiny leaf poking through or the cutting tugging back when you gently pull – congratulations! It’s rooted!
- Gradually acclimate: Once roots have formed, slowly remove the plastic bag or dome over a week or so. This helps your new plant adjust to normal humidity.
- Water as needed: Continue to water when the top inch of soil feels dry.
- Move to a slightly brighter spot: As your plant grows stronger, you can gradually introduce it to a bit more light.
Now, about troubleshooting. The most common issue you’ll face is rot. This usually happens if the soil stays too wet or the humidity is too high without enough air circulation. If you see the stem turning mushy or black, sadly, that cutting is likely lost. Prevention is the best cure, so ensure good drainage and don’t overwater! Another sign of failure is if the cuttings just shrivel and dry up; this often means they didn’t get enough humidity or the light was too intense.
A Encouraging Closing
Propagating Holcus rigidus is a journey, and like any good journey, it’s full of learning and growth. Don’t be discouraged if your first attempt isn’t perfect. Keep trying, observe your plants, and most importantly, enjoy the process of watching new life emerge. Happy gardening!
Resource:
https://identify.plantnet.org/k-world-flora/species/Holcus%20rigidus%20Hochst./data