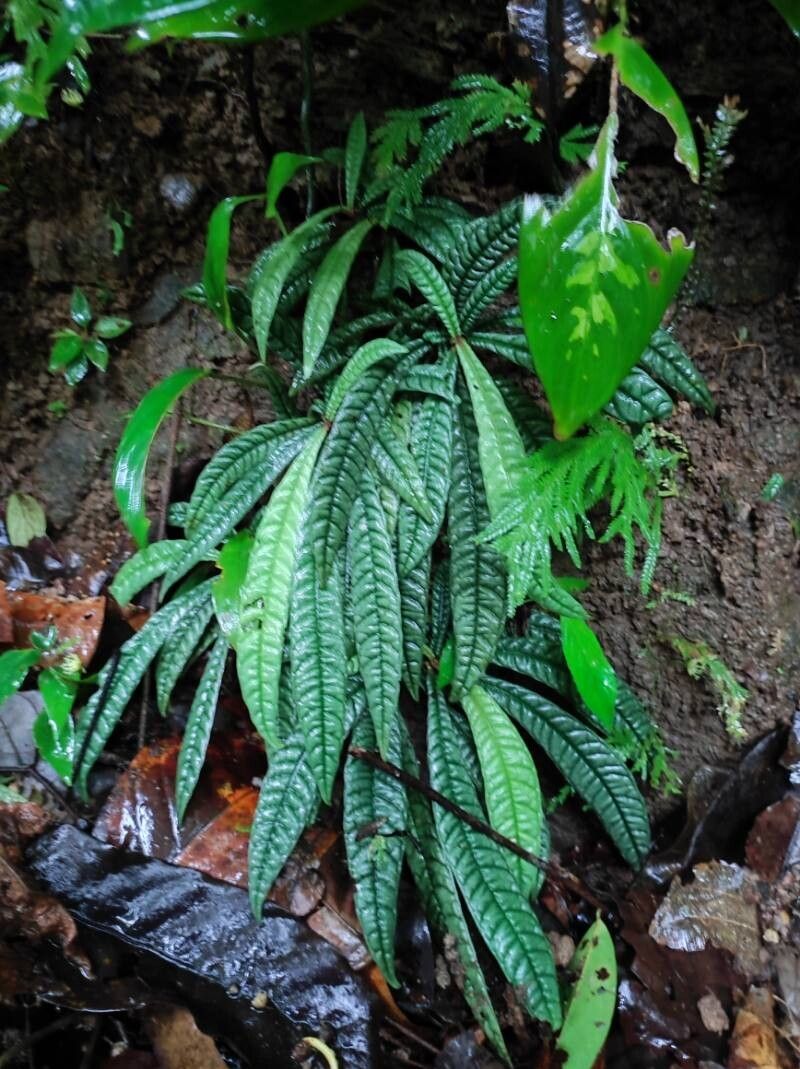
Oh, hello there! Pull up a chair and let’s chat about a plant that has absolutely stolen my heart: Hoffmannia pustulata. If you’re looking for a bit of lush, vibrant color and intriguing texture in your indoor jungle, this one is a winner. Its leaves are truly something special, often sporting a deep, almost velvety green with striking, reddish undersides and fascinating raised bumps. Propagating it is not only a fantastic way to expand your collection without breaking the bank, but it’s also incredibly satisfying. Now, I won’t lie, this plant can be a tad particular, but with a little patience and these steps, it’s definitely within reach for most home gardeners. We’ll get you growing new Hoffmannias in no time!
The Best Time to Start
My favorite time to get Hoffmannias going is in the late spring or early summer. This is when the plant is actively growing and has plenty of energy to dedicate to putting out new roots. You’ll want to take cuttings from healthy, vigorous growth. Avoid anything that looks old or leggy. Think of it as harvesting from a plant that’s feeling its best – that’s when it’s most willing to share its magic!
Supplies You’ll Need
Before we dive in, let’s gather our tools. Having everything ready beforehand makes the whole process much smoother.
- Sharp, clean pruning shears or a razor blade: For making clean cuts on your cuttings. Sterilize them with rubbing alcohol to prevent disease.
- Potting mix: A well-draining mix is crucial. I often use a blend of equal parts peat moss (or coco coir), perlite, and a bit of compost. Some growers swear by a mix specifically for aroids, which usually contains more bark and charcoal.
- Small pots or rooting trays: Clean pots are a must! Small 2-4 inch pots work wonderfully for cuttings.
- Rooting hormone (optional but recommended): A powdered or gel rooting hormone can give your cuttings a helpful boost.
- Clear plastic bags or a humidity dome: To maintain consistent humidity around your cuttings.
- Spray bottle: For misting.
- A soft brush (optional): For applying rooting hormone cleanly.
- Water: For water propagation.
Propagation Methods
Hoffmannia pustulata is pretty amenable to a couple of different methods. Here are my go-to techniques:
Stem Cuttings
This is my most successful method for this particular plant.
- Select your cutting: Look for a healthy stem that has at least two to three sets of leaves. Aim for stems that are semi-hardwood – not too soft and new, and not too woody.
- Make the cut: Using your clean shears or razor, make a clean cut just below a leaf node (where a leaf meets the stem). This node is where the magic happens, where roots are most likely to emerge.
- Prepare the cutting: Gently remove the lower leaves from the cutting, leaving only the top two or three leaves. If your leaves are very large, you can even cut them in half horizontally to reduce water loss. Dip the cut end into your rooting hormone, tapping off any excess.
- Plant the cutting: Fill your small pot with your prepared well-draining potting mix. Make a small hole in the center with your finger or a pencil. Insert the cut end of the stem into the hole, ensuring the leaf node is buried. Gently firm the soil around the cutting.
- Create humidity: Water the soil until it’s evenly moist, but not soggy. Then, cover the pot with a clear plastic bag or place it under a humidity dome. Make sure the leaves aren’t touching the plastic if possible! You can use small stakes to prop up the bag if needed.
- Place and wait: Position the pot in a spot with bright, indirect light. Avoid direct sun, which can scorch the delicate cuttings.
Water Propagation
This is a simpler method but can sometimes lead to weaker root systems that are prone to transplant shock.
- Take your cuttings: Follow steps 1 and 2 from the stem cutting method.
- Prepare for water: Remove all leaves from the lower portion of the cutting, ensuring no leaves will be submerged in the water. This is super important to prevent rot.
- Place in water: Fill a clean jar or glass with room-temperature water. Place your cutting in the water, making sure the leaf nodes are submerged but the leaves are above the water line.
- Find a good spot: Place the jar in a location with bright, indirect light.
- Change water regularly: Change the water every few days to keep it fresh and oxygenated. You should start seeing tiny white nubs – roots! – emerging from the leaf nodes within a few weeks.
The “Secret Sauce” (Pro Tips)
Now for a few little tricks I’ve picked up over the years that can really make a difference.
- Bottom Heat is Your Friend: Hoffmannia pustulata absolutely loves a little warmth from below, especially when you’re trying to encourage root development. A seedling heat mat placed under your pots can significantly speed up the rooting process. It mimics the warmth of spring soil and gives those roots a gentle nudge to grow.
- Don’t Overwater, But Keep it Humid: This is a delicate balance. Your cuttings need moisture, but they absolutely hate sitting in soggy soil. The goal is consistently moist, not wet. The humidity dome or plastic bag is key here, helping to trap that precious moisture. If you see condensation on the bag, that’s a good sign!
- Patience with the Roots: When you’re propagating, have a little faith. Don’t be tempted to constantly pull cuttings out to check for roots. You’ll just disturb the developing system. Once you see substantial root growth – enough to fill the pot or show good drainage from the bottom – then it’s time to transplant.
Aftercare & Troubleshooting
Once you see those roots, it’s time to celebrate (quietly, of course!).
- Transitioning to Soil: If you propagated in water, your roots should be about an inch or so long and looking healthy. Gently transplant your rooted cutting into a pot filled with your well-draining potting mix. Water it thoroughly. If you propagated in soil, and you’ve seen good root growth, you can simply continue caring for it in its nursery pot.
- Ongoing Care: Continue to keep the new plant in bright, indirect light. Water when the top inch or two of soil feels dry. Gradually reduce the humidity of the covering over a week or two as the plant adjusts to its new environment. You can slowly start to poke holes in the plastic bag, then remove it entirely.
- Troubleshooting: The most common issue you might encounter is rot. This is usually a result of overwatering or poor drainage. If your cutting looks mushy at the base or the leaves start to yellow and drop off quickly, it’s likely rot. Unfortunately, there’s not much you can do once it sets in. Prevention is key – use well-draining soil and be mindful of your watering. If you see a bit of wilting, it could mean it needs more humidity, or maybe it’s just stressed from the transition. Give it a gentle misting and ensure it’s not in a drafty spot.
A Little Encouragement
Propagating plants is a wonderful journey. There will be times when some cuttings don’t make it, and that’s perfectly okay. Think of it as learning. Every attempt teaches you something new about your plant and your own gardening style. Be patient, be observant, and enjoy the process of coaxing new life from your beloved Hoffmannia pustulata. Happy propagating!
Resource:
https://identify.plantnet.org/k-world-flora/species/Hoffmannia%20pustulata%20Dwyer/data